This document provides instructions for use of the De'Longhi Dragon 4 Oil Filled Radiator, models TRD41500ET and TRD42400ET. It covers important warnings, operational features, and maintenance guidelines to ensure safe and effective use of the appliance.
Function Description
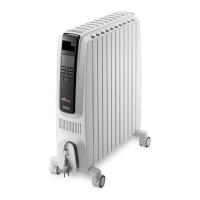
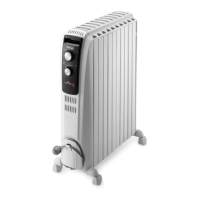
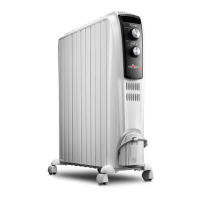
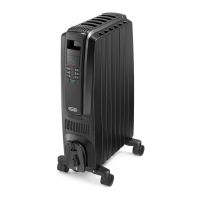
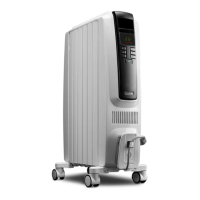
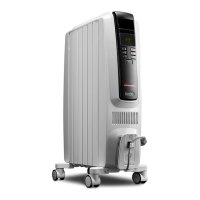
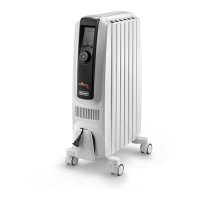
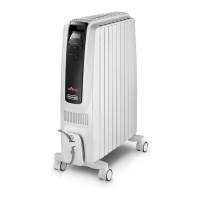
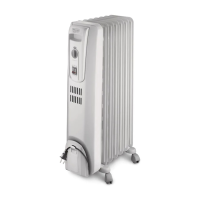
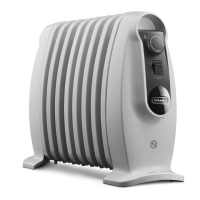
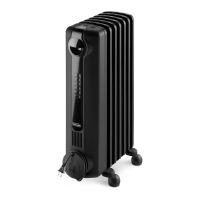
The De'Longhi Dragon 4 is an oil-filled radiator designed to provide heating for indoor spaces. It operates by heating a precise quantity of special oil contained within its body, which then radiates heat into the room. The appliance features a control panel with a display and various buttons for setting temperature, power levels, and activating special functions.
Key components include:
- Display (A): Shows current settings such as temperature, power level, and active functions.
- On-standby button (B): Used to turn the appliance on or put it into standby mode.
- Power button (C): Allows selection of different power levels (MIN, MED, MAX) to control heating intensity.
- Decrease button (D) and Increase button (E): Used to adjust the desired temperature setting.
- Timer button (F): Activates the timer function for delayed start or stop.
- Brightness button (G): Adjusts the brightness of the display.
- Eco button (H): Activates the Eco function for optimized energy consumption.
- Cord holder (I): For neat storage of the power cable.
- Easy wheels (L): Facilitate easy movement of the radiator.
The radiator is equipped with a diagnostic system that signals malfunctions through alarm messages on the display, such as "PF" for product failure or "HE" for high temperature. A safety device is also integrated to shut down the radiator in case of overheating.
Usage Features
Initial Setup:
Before first use, the radiator needs to be prepared. Turn the radiator upside down on a soft surface to avoid damaging the paint finish. Fully unfold the wheels by turning them outwards (as shown in Fig. 1), then turn the radiator back to its upright position.
Electrical Connection:
Ensure that the supply voltage matches the rating plate of the appliance. The socket must be adequately earthed. Avoid using extension leads, as they can overheat. The appliance should not be placed immediately below a fixed socket-outlet. Do not use the radiator in rooms smaller than 4 m² (43 square feet).
Turning On and Setting Power:
To turn on the appliance, press the On-standby button (B). The display will show the "↔" symbol in standby mode. To set the desired power level, press the Power button (C) to cycle through MIN (—), MED (——), or MAX (———).
Temperature Adjustment:
Use the Increase button (+) or Decrease button (-) (E or D) to select the desired temperature, which can be set from 5°C to 28°C. Each press adjusts the temperature by 1°C. Holding the button down will rapidly change the value.
Anti-freeze Function:
Setting the temperature to 5°C using the "-" button activates the Antifreeze function. The display will show a "*" symbol. In this mode, the appliance will automatically turn on at maximum power only if the room temperature drops below 5°C, preventing freezing. To return to normal heating, press the "+" button once.
Eco Function:
Press the "ECO" button (H) to activate the Eco function. The display will show the "ECO" symbol. This function automatically selects the most appropriate power level (MAX-MED-MIN-OFF) to maintain comfort while reducing energy consumption. If the selected temperature is much higher than the actual room temperature, the appliance will start heating rapidly. The appliance will cycle through power levels based on the initial power setting:
- If MAX power was selected, it cycles between MAX-MED-MIN-OFF.
- If MED power was selected, it cycles between MED-MIN-OFF.
- If MIN power was selected, it cycles between MIN-OFF.
Working Indicator:
The "sss" symbol indicates the heating status by changing colors:
- sss RED: Unit is heating at maximum power.
- sss YELLOW: Unit is heating at medium power.
- sss GREEN: Unit is heating at minimum power.
- sss absent: Unit is not heating.
Display Brightness:
The appliance has two brightness settings. The highest is active when any key is pressed. After a few seconds of inactivity, the brightness decreases to an operating level, which can be adjusted by repeatedly pressing the Brightness button (G) to cycle through three available levels.
Key Lock Function:
To prevent accidental operation, the keyboard can be locked. Press the "+" and "-" buttons together for at least 3 seconds. The display will show the " " symbol, and a double acoustic signal will be emitted. Repeat the process to deactivate the key lock.
Timer Function:
The timer can be set for delayed start or delayed stop.
- Delayed Start: With the appliance on-standby, press the Timer button (F). The " " symbol will flash with the hours remaining. Use the "+" and "-" buttons to set the desired hours (0.5 to 24 hours), then wait a few seconds for the program to be stored. The display will turn off, but the " " symbol will remain on. The appliance will turn on with previous settings once the programmed time elapses.
- Delayed Stop: With the appliance on, press the Timer button (F). The " " symbol will flash with the hours remaining until the appliance goes into standby. Use the "+" and "-" buttons to set the desired hours, then wait a few seconds for the program to be stored. The current settings and " " symbol will be displayed. The appliance will switch to standby automatically at the end of the set time. To cancel the timer, press the Timer button twice. The " " symbol will disappear from the display.
Changing Temperature Scale:
To switch between °F (Fahrenheit) and °C (Celsius), when the unit is in standby, press and hold the "+" and "ECO" keys for at least 10 seconds, then release. Two short beeps will confirm the change.
Important Safety Warnings:
- Do not use the heater near bathtubs, wash basins, showers, sinks, or swimming pools.
- Never use the heater to dry laundry.
- If the power cable is damaged, it must be replaced by the manufacturer, technical service center, or a qualified person.
- Children aged 8 and above, and persons with reduced physical, sensory, or mental capabilities, or lack of experience, can use the appliance if supervised and instructed on safe use. Children under 3 years should be continuously supervised. Children aged 3 to 8 years can only switch the appliance on/off if it has been placed in its normal operating position and they have been supervised and instructed on safe use.
- Do not obstruct the air intake and outlet areas to prevent overheating.
- Never cover the appliance during operation.
- The plug on the appliance may heat up during use, which is normal. Ensure your power socket is in good condition.
- The body of the radiator is filled with special oil; repairs requiring opening the oil body must only be done by a service agent. Report any oil leakage to Customer Experience.
- When scrapping the heater, follow regulations for oil disposal.
- The appliance must not be powered through an external timer to avoid accidental resetting of the safety system.
- For first-time use, set the radiator to maximum power for at least two hours in a ventilated room to eliminate the "new" smell. Some smoke may be emitted due to protective substances on the heating element.
- Position the appliance so that the plug and outlet are easily accessible.
Maintenance Features
Cleaning:
Before cleaning, always unplug the appliance from the mains socket and allow it to cool completely. Wipe the radiator with a soft, damp cloth. Do not use detergents or abrasive materials.
Storage:
If the radiator will not be used for an extended period, wrap the cable around the cord holder and store the appliance in a dry place. Ensure it is completely cooled and unplugged before storage. Do not store it in dusty atmospheres or hang it.
Troubleshooting:
The manual includes a troubleshooting section for common issues:
- Appliance doesn't work: Check if it's plugged in and the outlet is working. Ensure the temperature isn't set too low. Check if the Key lock is activated.
- Obstruction: If the appliance stops working due to an obstruction, remove the obstruction and let the appliance cool down. If the problem persists, contact Customer Experience.
Service:
In case of malfunction or doubt, do not attempt to repair the appliance yourself to avoid fire or electric shock. Refer to the enclosed guarantee leaflet for service and assistance details. A safety device will shut down the radiator in case of overheating; contact Customer Experience to restart it.