N:08:10
Heating and Air Conditioning
p''f?M
P7?7W|
10.
Remove bottom nuts securing condenser to
radiator.
11.
Withdraw condenser by drawing forwards to
disengage condenser bolts from radiator and
then downwards to remove.
12.
Secure radiator to ensure that the water hoses
are not strained.
INSTALLING CONDENSER
WARNING: Observe all safety precautions
regarding freon refrigerant gas while carrying out
this installation procedure (see refrigerant handling
procedures page N:04:01).
1.
Release temporary fixings of radiator and
support radiator while locating condenser
studs on radiator.
m
2. Fit nuts to the condenser studs and tighten.
3. Ensure that the foam sealing strip is fitted
between top of the radiator and body, and to
the sides of the air duct.
4.
Raise radiator into mounting position and
support while fitting air duct.
5. Fit radiator right hand lower support bracket
together with horn and bracket, and secure
with the three bolts into frame. Connect horn
leads.
6. Fit 17 mm nut to secure bracket to radiator,
ensuring that rubber buffers are fitted on each
side of bracket.
7. Repeat to fit left hand bracket. Do not
overtighten the 17 mm radiator nuts.
8. Fit left hand upper support bracket and secure
to radiator with nut.
9. Fit bolt to secure bracket to chassis.
10.
Repeat for right hand brackets.
11.
Fit securing screws to attach air duct to body
and spoiler.
12.
Re-connect hoses; ensure that connections are
scrupulously clean, fit new '0' rings and coat
mating surfaces and '0' rings with refrigerant
oil.
Use a spanner on the condenser
connection whilst tightening Torque tighten
upper connection.
Torque tighten lower connection.
13.
Re-charge system (refer to N:07:01).
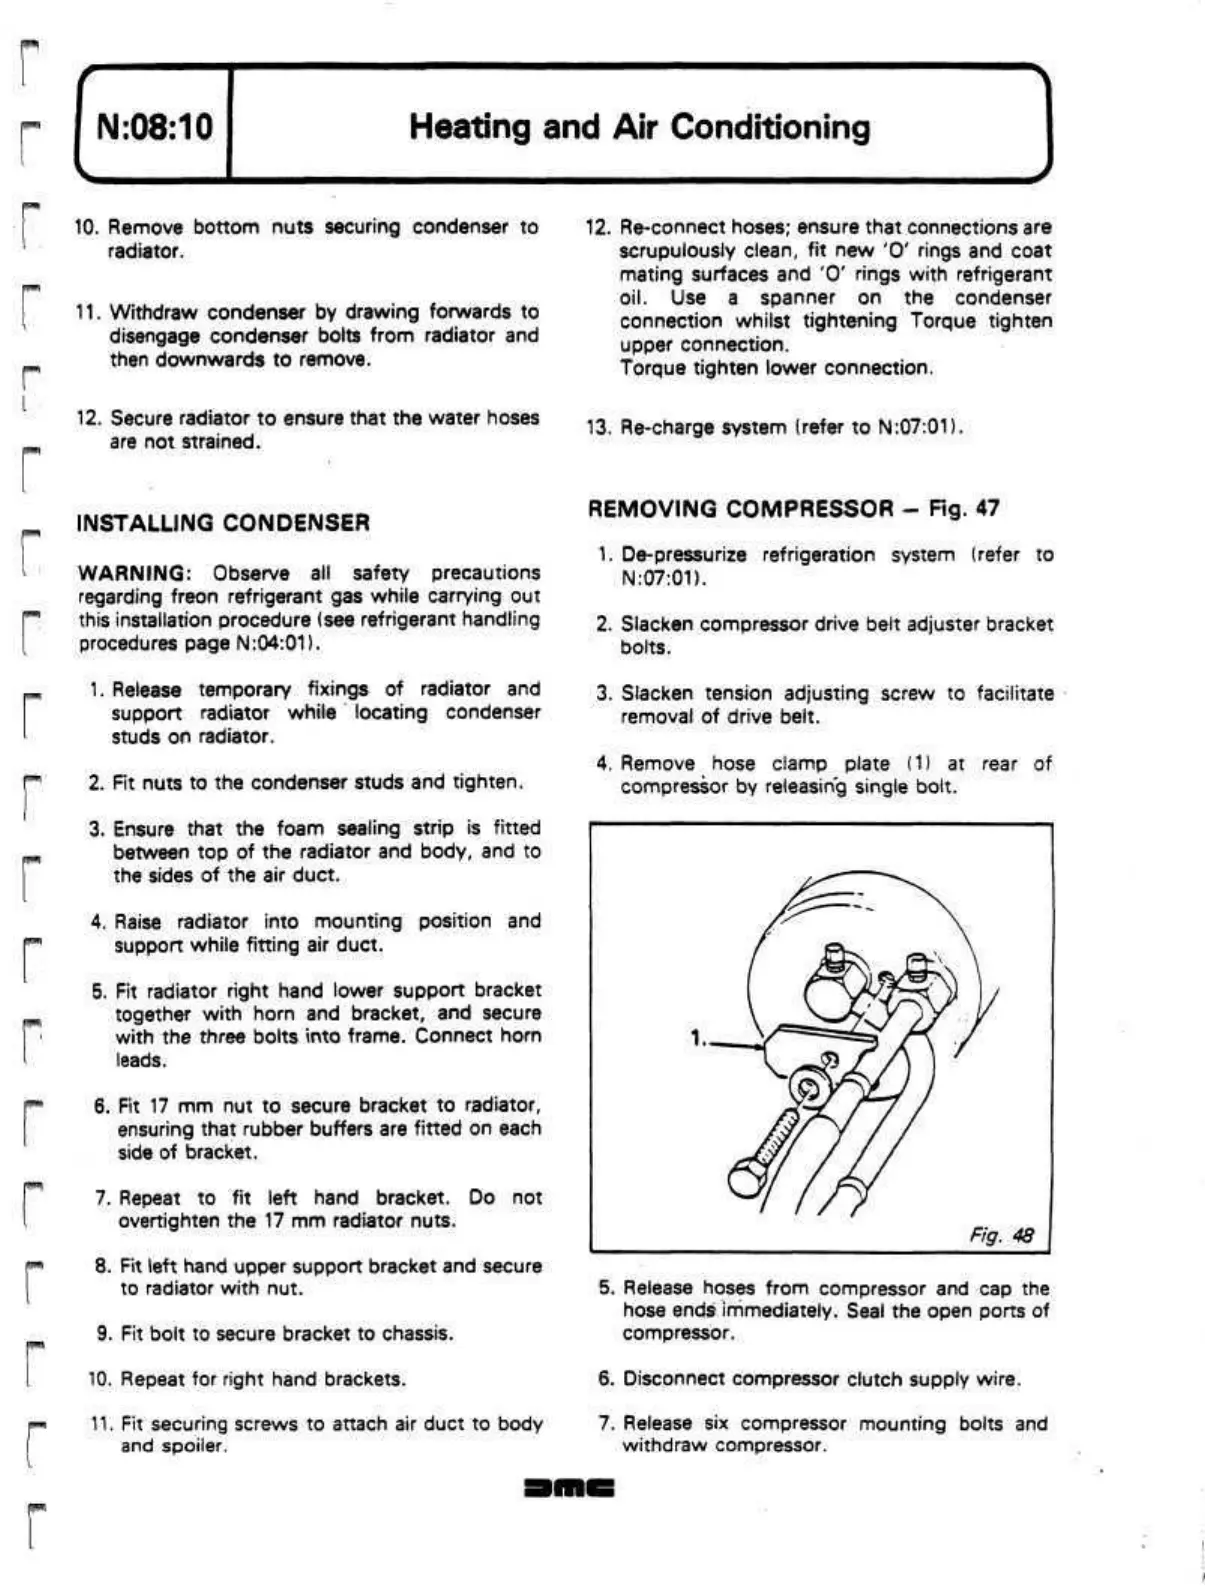
REMOVING COMPRESSOR
-
Fig. 47
1.
De-pressurize refrigeration system (refer to
N:07:01).
2.
Slacken compressor drive belt adjuster bracket
bolts.
3. Slacken tension adjusting screw to facilitate
removal of drive belt.
4.
Remove hose clamp plate (1) at rear of
compressor by releasing single bolt.
5. Release hoses from compressor and cap the
hose
ends
immediately.
Seal the open ports of
compressor.
6. Disconnect compressor clutch supply wire.
7. Release six compressor mounting bolts and
withdraw compressor.
 Loading...
