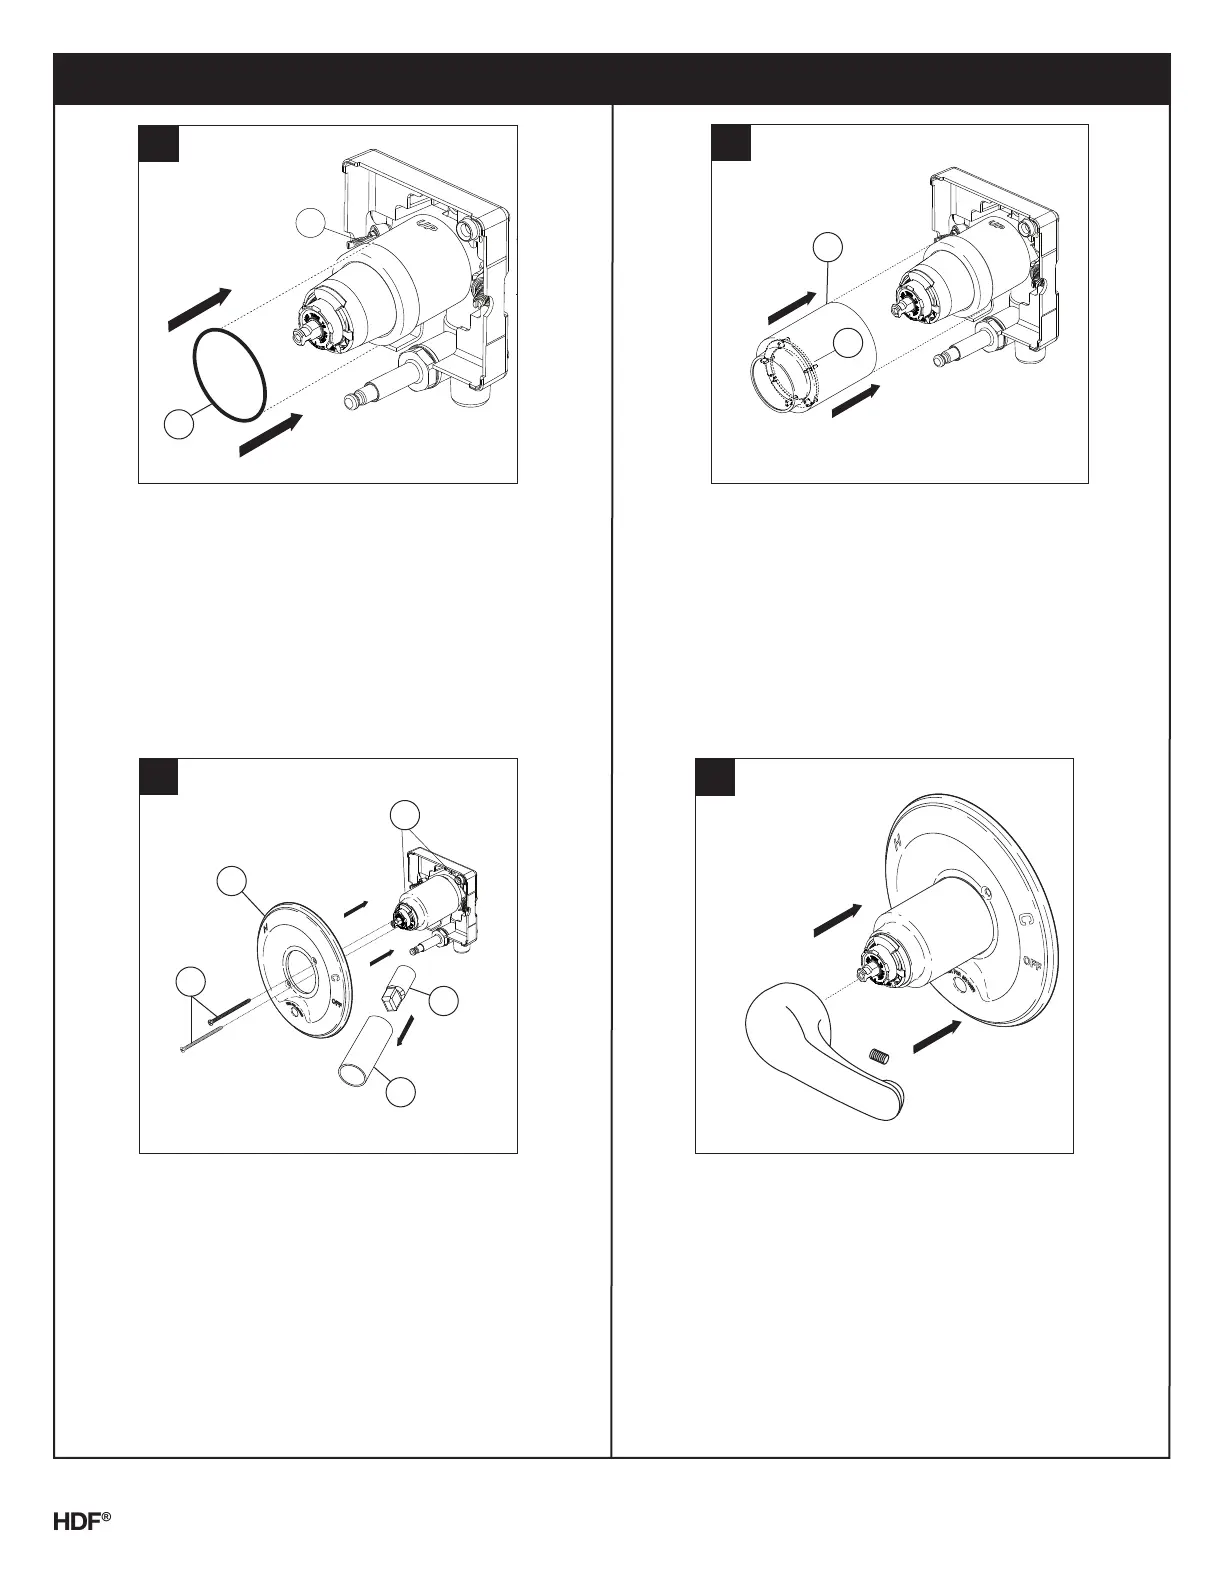
Trim Installation / Installation des pièces de finition / Instalación Final
Slide O-ring (1) over cartridge and the bonnet nut (2). The O-ring,
which acts as a spacer to steady the sleeve, should rest behind the
bonnet nut.
Faites glisser le joint torique (1) sur la cartouche et l’écrou à portée
sphérique (2). Le joint sert de pièce d’espacement et il stabilise le
manchon; il doit se trouver derrière l’écrou à portée sphérique.
Deslice el aro O (1) sobre el cartucho y la tuerca tapa (2). El aro O, el
cual fonciona como un separador para estabilizer la manga, debe
quedar apoyado en la tuerca tapa.
If your model requires a spacer (1), insert it into sleeve (2) and push it
to the front. Slide the sleeve over the cartridge, body and O-ring.
Si le modèle que vous installez nécessite une pièce d’espacement (1),
introduisez-la dans le manchon (2) et poussez-la vers l’avant. Faites
glisser le manchon sur la cartouche, le corps et le joint torique.
Si su modelo requiere un separador (1), insértelo en la manga (2) y
empújelo hacia el frente. Deslice la manga sobre el cartucho, el cuerpo
de la pieza y el aro O.
Remove cardboard protector tube (4) and thermoplastic cap (5) from push
button assembly. Secure the escutcheon (1) to the bracket (2) using the 2
screws provided (3). Do not overtighten escutcheon screws.
Enlevez le manchon protecteur en carton (4) et le capuchon en thermoplas-
tique (5) de la dérivation à poussoir. Fixez la rosace (1) sur le support (2) à
l’aide des 2 vis fournies (3). Prenez garde de serrer les vis de la rosace
excessivement.
Quite la tubo protector de cartón (4) y la tapa de termoplástico (5) de el
conjunto del botón pulsador. Fije la roseta con orificio (1) al soporte (2)
usando los 2 tornillos suministrados (3). No apriete demasiado los tornillos
de la roseta.
Install the handle onto the stem.
Montez la manette sur la tige.
Instale la manija en la espiga.
A
1
2
B
2
1
C
1
2
3
5
4
D
Page 8 - 11 210401, Rev. D
 Loading...