9
ENGLISH
Easy Setup and Operation Easy Setup and Operation
ENGLISH
Starting Auto Setup
2
Press the CURSOR
DD
or
HH
button to
select the “Auto Setup / Room EQ”,
then press the
ENTER button.
• Display the “Auto Setup / Room EQ” menu
screen.
3
Press the CURSOR
DD
or
HH
button to
select the “Auto Setup”, then press the
ENTER button.
• Display the “Auto Setup” screen.
1
Press the SETUP button.
• Display the “System Setup Menu”.
The message “Connect Microphone” is
displayed if no microphone is connected. If so,
connect the auto setup microphone.
1
2
Press the CURSOR
DD
or
HH
button to
select the “Extra Setup”, then press the
CURSOR
FF
button.
• Switch to the “Extra Setup” screen.
Extra Setup
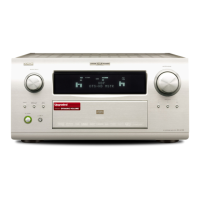
The AVC-A11XV has seven available amplifier
channels, some of which can be assigned for
powering speakers in ZONE2 and ZONE3, depending
on the speaker system complement in the main room.
If this functionality is not needed, skip this “Extra
Setup” procedure and proceed to “Preliminary
Measurements” ( page 9, 10).
Press the CURSOR
DD
or
HH
button to
choose the setting you want to change,
then press the
ENTER button.
• Switch to the setting screen.
For instructions on making the “Channel Setup”
settings ( page 49).
For instructions on making the “Setting the
Power Amplifier Assignment” settings (
page 49, 50).
The speakers measured with this Auto Setup
procedure are based on the setting of these
“Channel Setup” and “Power Amp Assign”
functions.
4
Press the ON/STANDBY switch on the
main unit or
ON button on the remote
control unit.
• When pressed, the power turns on and the
display lights.
• When pressed again, the power turns off,
the standby mode is set and the display
turns off.
5
Press the AMP button to select the
“AMP” (only when operating with the
remote control unit).
3
Press the POWER switch.
£ OFF:
The power turns off and indicator is off.
In this position, the power cannot be turned on and
off from the remote control unit.
¢ ON:
The power turns on and the power indicator lights.
Set the POWER switch to this position to turn the
power on and off from the included remote control
unit.
1
Turn on your subwoofer.
2
Turn on your monitor (TV).
Turning on the power
Set the volume to halfway and set the crossover
frequency to the maximum or Low pass filter off
if your subwoofer can adjust the output volume
and the crossover frequency.
Some subwoofers have a standby mode. Be sure
to turn this function off before performing the
Auto Setup procedure.
The sound is muted for several seconds, after
which the unit operates normally.
Whenever the ON/STANDBY button is in the
standby state, the apparatus is still connected to
the AC line voltage. Please be sure to turn off the
POWER switch or unplug the cord when you
leave home for, say, a vacation.
3
4
Once the settings are completed, press
the
ENTER button at the each setting
screen.
• The “Extra Setup” menu reappears.
Press the CURSOR
DD
or
HH
button to
select the “Exit”, then press the
ENTER
button.
• Return to the “Auto Setup” screen.
The screen shown at the below appears once the
preliminary measurements are completed.
Preliminary Measurements
• This procedure is used to automatically determine
the background noise, whether or not speakers are
connected, and the polarities of the connected
speakers.
•To avoid affecting the measurements, turn off the
air-conditioner or any other device that makes noise
and take the measurements with the room as quiet
as possible.
1
Press the CURSOR
DD
or
HH
button to
select the “Start”, then press the
CURSOR
FF
button.
• Start the preliminary measurements.
2
Press the ENTER button.
• Switch to the “Speaker Detect Check”
screen.
[ First screen ]
 Loading...