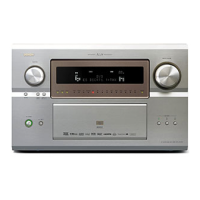
The Operating Manual for DENON AV Receiver/Amplifier firmware update. Page 15 / 18
D&M Holdings, INC.
3.4 IncaseofRouterconnection(withDHCPServer).
3.4.1 SetuptheIPaddressPCandtheAVReceiver/Amplifier
SetuptheIPAddressatAutoIPmode.
1)SetuptheautoIPaddressofPC.
2)SetuptheautoIPaddressoftheAVReceiver/Amplifier.
Referto3.4.2.
3.4.2 HowtosetuptheautoIPaddressoftheAVReceiver/Amplifier.
1)Keeptopushthe'STANDARD'buttonandthe'9CHSTEREO'buttonontheAV
Receiver/Amplifiersimultaneously.Andturnonthepowerswitchof
theAVReceiver/Amplifier.
2)Confirmthepowerindicatorisgreen.Ifthepowerindicatorisred,Makethepower
indicatorgreenpushingtheON/STANDBYbutton.
3)PushtheʻSYSTEMSETUPʼbutton.Youcanseethe“SystemSetup”menu.
4)Selectthe“OptionSetup”usingcursorUP/DOWNbutton.
5)Pushthe“CHSELENTER”button.Selectthe"NetworkSetup"usingcursorUP/DOWNbutton.
6)Pushthe“CHSELENTER”button.Youcanseethe"IPAddress".
7)Pushthe“CHSELENTER”button.Setupthe"DHCP:<OFF>"to<ON>usingcursorLEFT/RIGHT
button.
8)Finishthe“SystemSetup”usingthe“SYSTEMSETUP”button.
3.4.3 PowerontheAVReceiver/Amplifier.
Operatethefollowing.TheAVReceiver/Amplifiergoestothenetworksettingmode.
1)Keeptopushthe'STANDARD'buttonandthe'9CHSTEREO'buttonontheAV
Receiver/Amplifiersimultaneously.Andturnonthepowerswitchof
theAVReceiver/Amplifier.
2)Confirmthepowerindicatorisgreen.Ifthepowerindicatorisred,Makethepower
indicatorgreenpushingtheON/STANDBYbutton.
3.4.4 ConfirmIPAddressoftheAVReceiver/Amplifier.
Operatethefollowing.ConfirmIPAdressoftheAVReceiver/Amplifier.
1)PushtheʻSYSTEMSETUPʼbutton.Youcanseethe“SystemSetup”menu.
2)Selectthe“OptionSetup”usingcursorUP/DOWNbutton.
3)Pushthe“CHSELENTER”button.Selectthe"NetworkSetup"usingcursorUP/DOWNbutton.
4)Pushthe“CHSELENTER”button.Youcanseethe"IPAddress".
5)Pushthe“CHSELENTER”button.Youcanseethe"DHCP:<ON>".
6)PushthecursorDOWNbutton.YoucanconfirmtheIPAddress.
7)Finishthe“SystemSetup”usingthe“SYSTEMSETUP”button.

 Loading...