Connections Operation Troubleshooting
ENGLISH
Specications
For buttons not explained here, see the page indicated in parentheses ( ).
q Power indicator
Changes as shown below according to PMA-
710AE’s status.
• For several seconds after the power is turned
on ··············································· Red (blinking)
• Power “ON” ············································Green
• Muting ······································· Red (blinking)
• Standby ······················································ Red
• Power “OFF” ··············································· Off
w Power switch
(hON/STANDBY jOFF )
When set to “hON/STANDBY”, the power turns
on, and when set to “jOFF”, the power turns
off.
e Headphones jack (PHONES)
r BASS control knob
t TREBLE control knob
y BALANCE control knob
u VOLUME control knob
i REC OUT SELECTOR knob
o INPUT SELECTOR knob
Use this to select the source that you wish to
listen to.
Q0 Input indicator
The selected input is shown with an orange
indicator.
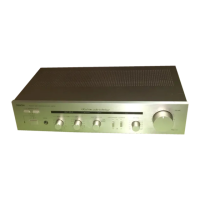
Front Panel
q w e r t y iu o
Q0Q1Q2Q4 Q3
Part Names and Functions
Q1 SOURCE DIRECT switch
When set to “hON”, the signals do not pass
through the tone adjustment circuitry (bass,
treble, balance and loudness), resulting in
playback with higher sound quality.
When set to “jOFF”, the sound can be
adjusted to your tastes.
Q2 LOUDNESS switch
When listening with the volume turned low, set
this to “hON” to amplify the bass and treble
sound that is hard to hear when the volume is
low and achieve a more natural sound.
Q3 SPEAKERS A/B switches
• When A (or B) is set to “hON”, sound is
produced from the speakers connected to the
A (or B) speaker output terminals.
• When both A and B are set to “hON”, sound is
produced from the speakers connected to both
the A and B speaker output terminals.
• When both A and B are set to “jOFF”, no
sound is produced from the speakers. Use this
when listening over headphones.
Q4 Remote control sensor
Rear Panel
q Input terminals (INPUTS)
Connect your source equipment here.
w Recording input/output terminals
(RECORDER-1 and RECORDER-2)
Connect your recording equipment here.
e PRE OUT terminals
Use this to add such equipment as a power
amplier or subwoofer.
r Speaker system terminals
(SPEAKER SYSTEMS)
Connect your speakers here.
t AC OUTLETS
Use this as the power outlets for other audio
devices. Check equipment power requirement
ratings before use (see the ratings as marked
on the rear panel). If in doubt consult with your
dealer or DENON distributor.
y
Power cord
u SIGNAL GND (ground) terminal
Connect the ground wire from your turntable
here.
NOTE
• This terminal is not a safety ground.
• NEVER insert the short-circuiting pin plug into
the recording output or PRE OUT terminals.
Doing so could result in damage.
NOTE
Functions r, t, y and Q2 are only available when
the SOURCE DIRECT switch is set to “jOFF”.
• When the VOLUME control knob is set just
beyond the “12 o’clock” position (over halfway),
the adjustments that can be made with the BASS
and TREBLE controls is decreased.
• When the VOLUME control knob is set to
maximum or turned fully clockwise, the base and
treble can no longer be adjusted.
Getting Started
 Loading...