This document serves as the user's manual for the DENVER TAD-10082MK2 tablet PC, providing essential information for its operation, maintenance, and safety.
Before using the tablet, it is crucial to read and understand all safety information. For electrostatic discharge (ESD) tests, manual operation (switching the power ON/OFF) may be required to resume normal function. The tablet contains a lithium battery, so it should not be opened, exposed to heat, water, moisture, or direct sunlight. Only the original adapter should be used for charging. Attempting to replace the battery yourself can damage it, potentially causing overheating and injury. Lithium-ion batteries should only be replaced by skilled engineers and must be recycled or disposed of separately from household waste; never incinerate the battery.
To prevent fire or electric shock, do not expose the tablet to rain or moisture. It should not be subjected to dripping or splashing, and no objects filled with liquids, such as vases, should be placed on it. The direct plug-in adapter acts as a disconnect device and must remain easily operable. This equipment is a Class II, double-insulated electrical appliance, meaning it does not require a safety connection to electrical earth. The lightning flash symbol within an equilateral triangle warns of non-insulated "dangerous voltage" inside the product, indicating a risk of electric shock. Do not remove the cover or back as there are no user-serviceable parts inside; refer servicing to qualified personnel. The exclamation point within an equilateral triangle indicates important operating and maintenance instructions in the accompanying literature.
Proper disposal of this product is essential. The crossed-out trash can symbol indicates that it should not be disposed of with other household waste within the EU. To prevent environmental harm and promote sustainable reuse of materials, recycle the device responsibly. Return used devices through designated collection systems or contact the retailer where the product was purchased.
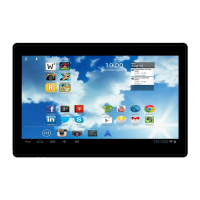
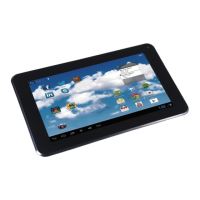
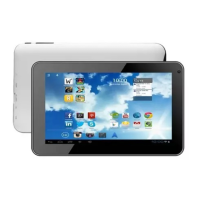
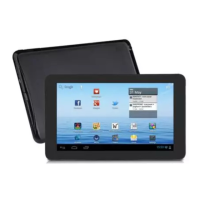
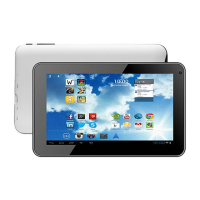
Unit at a Glance
The tablet features several key components:
- Power Button: Press to turn the unit on or off, or to turn the screen on or off. Press and hold to access the Power Off menu.
- Headphone Jack: Audio output connection for headphones.
- USB Port: Connect to a USB device or computer for data transfer (music, videos, photos, files).
- Reset Button: Use a needle or paper clip to reset the unit.
- DC IN 5V: Port for charging and powering the tablet with the included power adapter.
- SD CARD Slot: Load external SD CARD memory cards here.
- MIC: Built-in microphone.
- Return Button: Navigational control.
- V+/V- Buttons: Adjust the volume.
Getting Started
Turning the Tablet On or Off:
To turn on, press and hold the Power key until the LCD screen illuminates and the Home screen appears. To turn off, press and hold the Power key until the power off menu appears, then touch "OK" to shut down.
Turning the Screen On or Off (Standby):
When the tablet is on, press the Power key once to turn the screen off and conserve battery power. Press it again to turn the screen back on. To save battery, the screen can be set to turn off automatically after a period of inactivity (15 seconds to 30 minutes), configurable in the Display menu.
Unlocking the Screen:
After the screen turns off, you'll need to unlock it. Drag the lock icon across the screen towards the slide lock icon on the right side where an unlock icon is shown.
About Applications
To open an application, touch its icon on the home screen or within the Launcher, which can be accessed by tapping the icon on the home screen. The manual provides an illustrative Launcher screen showing various preinstalled applications like Browser, Calculator, Calendar, Camera, Clock, Downloads, Email, File Manager, Gmail, Google, Google Settings, Hi-Q MP3 Recorder, Maps, Play Music, Play Store, Settings, UHD Player, and Voice Search. The actual list of applications may vary and is subject to modification.
Preinstalled Applications:
The tablet comes with several preinstalled applications for convenience:
- Browser: For web browsing.
- Calculator: For mathematical operations.
- Camera: To take pictures or videos using the front-facing camera.
- Email: To check your email.
- Music: To play music.
- Settings: To adjust tablet options.
Installing Applications:
Additional applications can be downloaded and installed from the device's application marketplace, the web browser, or other sources. To install applications from non-Market sources, the "Unknown sources" option must be enabled in the Application settings menu.
Connecting to the Internet
Connecting to Wireless Internet:
- Press the Settings icon.
- Locate the Wi-Fi setting and slide it to the "On" position.
- Select a network from the list of available networks. To refresh the list, press the Scan button. To manually add a network, select the Add Network button.
- Select "Connect" from the pop-up menu.
- If the network is secured, enter the password to continue.
- Once connected, the display will show "Connected" under the network name.
To conserve battery life, turn off Wi-Fi when not in use.
Email
Setting Up an Email Account:
- Press the Email icon under the App menu.
- Enter your email address and password, then press "Next." If this fails, you may need to manually configure the account. Re-enter your email and password to ensure correctness before attempting manual configuration.
Manually Configuring an Email Account:
It is recommended to consult an IT professional for manual email configuration.
- Detailed information about your email provider's website or phone support is required.
- Determine the server type (POP3, IMAP, or Exchange are supported).
- Enter your email address and password, then press "Next."
- Fill in all information for the Incoming server portion of the manual setup.
- Press "Next" to test settings (Wi-Fi must be active).
- Fill in all information for the Outgoing server settings.
- Press "Next" to test settings (Wi-Fi must be active).
Transferring Files
Transferring Files with a Computer:
- Connect one end of the included Mini-USB to USB cord to the tablet and the other end to a computer's USB port.
- Press the USB icon in the lower right-hand corner of the tablet screen.
- Select "USB Connected."
- Press the "Turn On USB Storage" button.
- Accept any prompts on the connected computer using its native controls.
- You can now transfer files to and from your computer.
- To end the session, press the "Turn Off USB Storage" button.
Troubleshooting
This section provides solutions for common issues:
Device cannot connect to Wi-Fi:
- Verify the wireless network is functional using another device.
- Ensure the tablet and router are within range; walls or obstructions can reduce range.
- Confirm the security password is correct.
Device doesn't turn on:
- Charge the battery if its charge is critically low.
- Use a needle or paper clip to reset the unit and check if it restarts normally.
- Verify the charger is connected correctly.
Heat Issues:
- The device may become warm when running multiple applications, using the screen at brightest settings, or while charging. This is normal and should not cause inconvenience.
System has anomalies and doesn't work correctly:
- Third-party applications can sometimes cause system malfunctions. Press the RESET button and perform a system reset to resolve this.
Cannot set E-mail Account or registration application:
- Ensure the tablet is connected to a Wi-Fi network and has internet access.
- Verify that email settings are entered correctly for the account.
- Ensure system time and local time are correct.
Cannot record:
- Use a needle or paper clip to reset the unit, then check if the record function works.
The stand-by time of the device is too short:
- Battery duration varies with environmental temperature and service conditions. Extreme temperatures (too low or too high) affect battery life. Use the device at normal temperatures.
- Battery life depends on usage; high volume, Wi-Fi, and frequent use drain the battery faster.
No sound via earphone:
- Check if the volume setting is at 0.
- Check if the audio file is corrupted by trying another audio file. Corrupted files can cause noise or static.
The color distortion of video or picture display:
- Use a needle or paper clip to reset the unit to resolve this.
Cannot copy files:
- Check if the device is connected correctly to the computer.
- Check if memory space is full.
- Check if the USB cable is damaged.
Other troubles:
- Step 1: Use a needle or paper clip to reset the unit, then check if the function works.
- Step 2: Upgrade the firmware from the PC, restart the device, and then check if the function works.
For the latest product information, visit www.denver-electronics.com. Design, specifications, and the manual are subject to change without notice.
Inter Sales A/S declares that the DENVER TAD-10082MK2 tablet complies with the essential requirements and other relevant provisions of Directive 1999/5/EC. A copy of the Declaration of Conformity can be obtained from Inter Sales A/S, Stavneagervej 22, DK-8250 Egaa, Denmark.