Network connection and Http access
IP Addresses & DHCP Servers
The easiest way to use the ETH8020 is to connect it to a network with a DHCP server. In this case the ETH8020 will
have its IP address assigned automatically by the DHCP server.
If there is no DHCP server on the network, then a fixed IP address of 192.168.0.200 is used. To control the ETH8020
using this fixed IP address your computer MUST be on the same subnet.
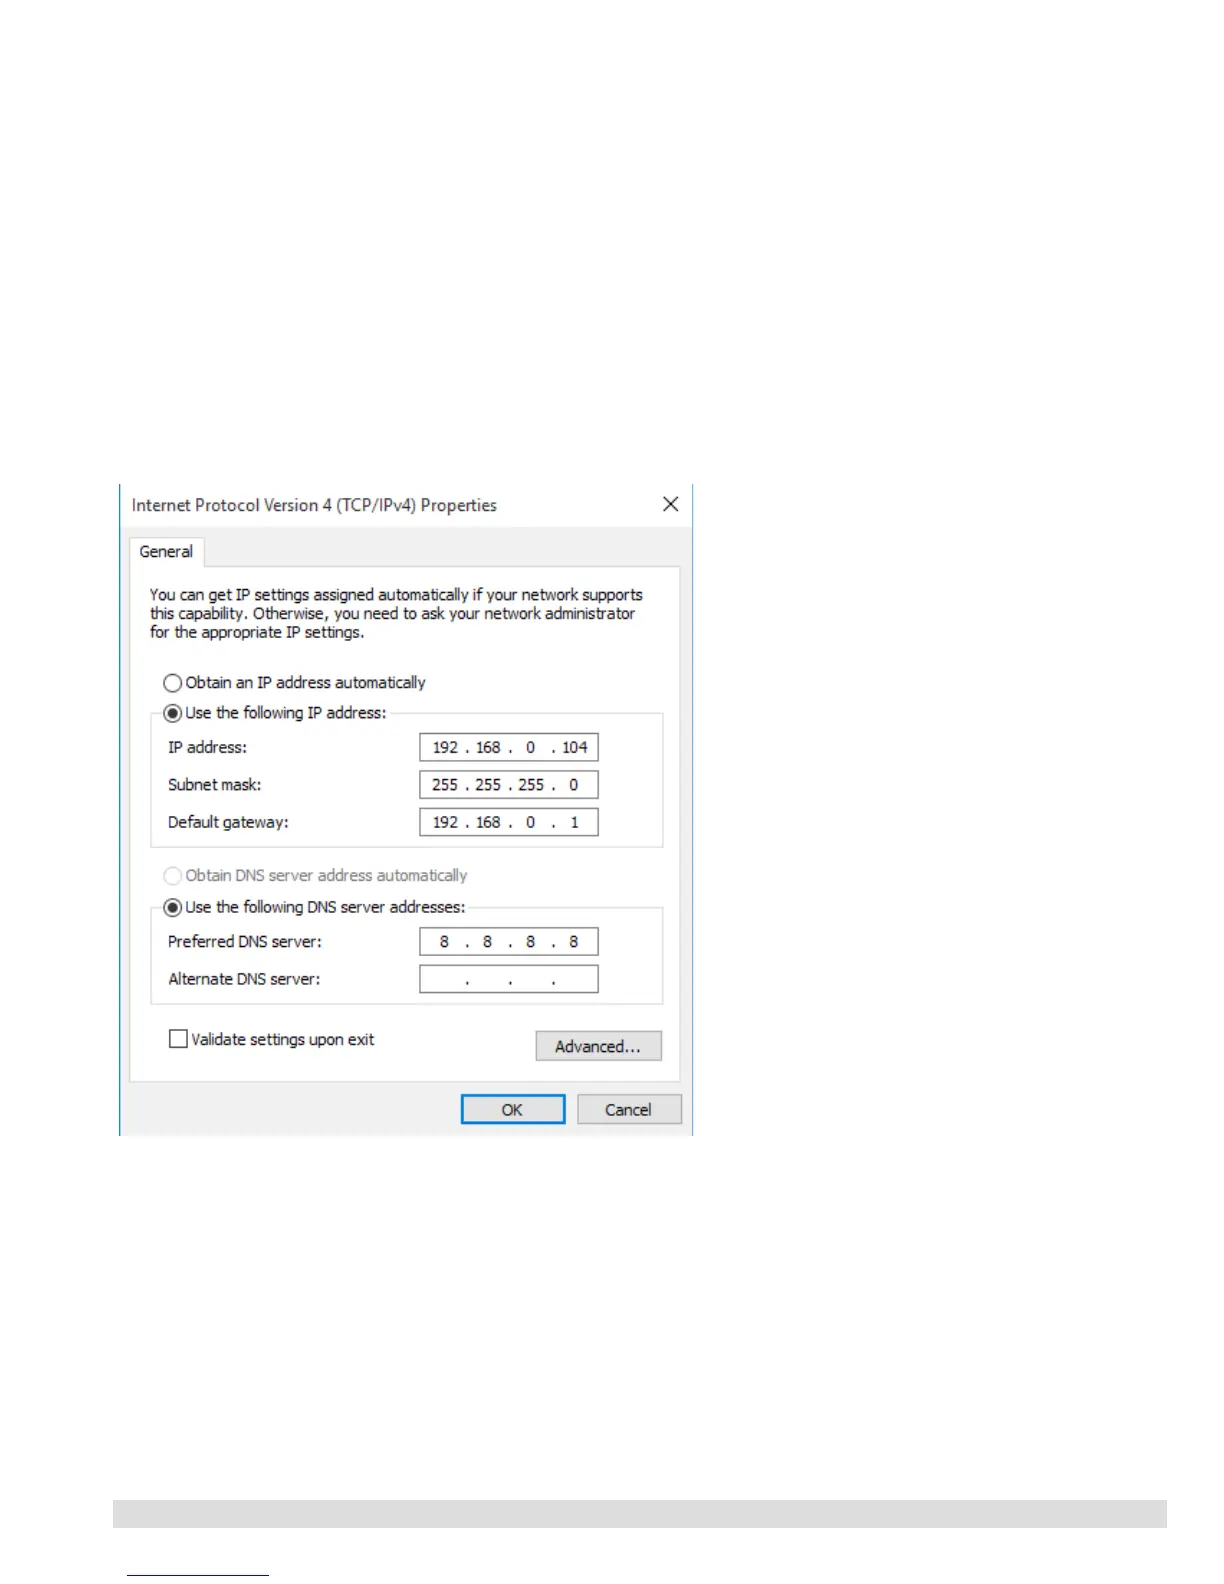
The next step is to set your computers IP address to 192.168.0.x where x is in the range of 1 to 255 but not 200 (the
ETH8020 is there!) or any other used IP addresses on the network.
The subnet mask dictates what IP addresses the PC can communicate with, we set this to 255.255.255.0 so the PC can
talk to any module with an IP address of 192.168.0.x
The default gateway is likely to be the IP address that the internet connection is located at and the DNS server can be
either your router address or Google provide a DNS service at 8.8.8.8..
This image is for a PC running Windows 10.
To get to the TCP/IP properties screen, go to:
Control Panel->Network and Sharing Center-
>Local Area Connection->Properties.
Select Internet Protocol Version 4(TCP/IPv4) from
the scroll box and click Properties.
That gets you to the dialog box shown left.
© Devantech Ltd 02/07/19 ETH8020 Documentation 4/17
 Loading...