ENGLISH
8
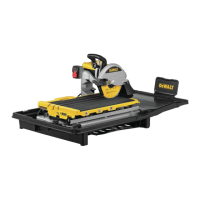
Transportation and Storage (Fig. DD)
WARNING: For your own safety, it is recommended that two people carry this machine or
serious injury couldresult.
CAUTION: Always lock cutting cart before moving or transportingsaw.
The rear water attachments
8
,
9
cutting cart water attachments
12
,
13
and water pan
15
may be nested together to make carrying easier (Fig.DD).
MAINTENANCE
WARNING: To reduce the risk of serious personal injury, turn unit off and
disconnect it from power source before making any adjustments or removing/
installing attachments or accessories. An accidental start-up can causeinjury.
Fig. CC
52
Stand
D24001 Heavy Duty Tile Saw Stand
Cutting wheels
7" (178 mm) DW4760 – Wet Ceramic Tile Cutting Cutting Wheel
7" (178 mm) DW4766 – Wet Porcelain Tile Cutting Cutting Wheel
7" (178 mm) DWA4768 – Wet Glass Tile Cutting Cutting Wheel-
10" (254 mm) DW4761 – Wet Ceramic Tile Cutting Cutting Wheel
10" (254 mm) DW4764 – Wet Porcelain Tile Cutting Cutting Wheel
10" (254 mm) DWA4769 – Wet Glass Tile Cutting Cutting Wheel
Accessories
WARNING: Since accessories, other than those offered by
, have not been tested
with this product, use of such accessories with this tool could be hazardous. To reduce the
risk of injury, only
recommended accessories should be used with thisproduct.
Recommended accessories for use with your tool are available at extra cost from your local
dealer or authorized service center. If you need assistance in locating any accessory, please
contact
call 1-800-4-
(1-800-433-9258) or visit our website: www.dewalt.com.
Lubrication
WARNING: NEVER spray or in any other way apply lubricants or cleaning solvents inside
the tool. This can seriously affect the life and performance of the tool and may result in
personalinjury.
tools are properly lubricated at the factory and are ready for use. However, it is
recommended that, once a year, you take or send the tool to a certified service center for a
thorough cleaning andinspection.
1. Turn off the saw and disconnect it from the powersource.
2. Place a 5 gallon (19 liters) bucket under the drain plug. Remove the drain plug by
loosening the attached wing nut and allow the water to empty into thebucket.
3. Slide the cutting cart off the rail system. Spray the cutting cart with a hose or wipe with a
grout sponge orrag.
4. Wipe the rails with a grout sponge or a rag. Spray lubricants are not required on the guide
rail orwheels.
5. Clean the water reservoir by wiping with a groutsponge.
WARNING: Do not spray with water. Some water may reach the motorarea.
Use only mild soap and a damp cloth to clean the tool. Many household cleaners contain
chemicals which could seriously damage plastic. Also, do not use gasoline, turpentine, lacquer
or paint thinner, dry cleaning fluids or similar products. Try not to let any liquid get inside the
tool; never immerse any part of the tool into aliquid.
Cleaning
WARNING: Blow dirt and dust out of all air vents with clean, dry air at least once a week.
To minimize the risk of eye injury, always wear ANSI Z87.1 approved eye protection when
performingthisprocedure.
WARNING: Never use solvents or other harsh chemicals for cleaning the non-metallic
parts of the tool. These chemicals may weaken the plastic materials used in these parts.
Use a cloth dampened only with water and mild soap. Never let any liquid get inside the
tool; never immerse any part of the tool into aliquid.
Moving the Saw (Fig. CC)
CAUTION: Do not attempt to move the saw while filled with water or personal injury
mayresult.
CAUTION: Always lock cutting cart before moving or transportingsaw.
Before moving the saw, be sure the to drain the water pan by placing a 5 gallon (19 liters)
bucket under the drain plug
52
of the saw. Remove the drain plug and allow the water to
empty into thebucket.
Fig. BB
25
54
Fig. AA
1. Loosen the bevel lock knob
41
in the rear of the saw and adjust the head of the saw to
the correct miter degree. The bevel pointer
42
on the front of the saw will show the angle
ofadjustment.
2. Always do a dry run and push the cart past the cutting wheel before turning on the saw.
Ensure the cutting wheel is adjusted to the center of thegroove.
3. Mark the tile and line the tile against the fence of the cutting cart and the edge guide.
Proceed to make thecut.
4. Turn off thesaw.
Fig. DD
9
8
13
12
15
The attachments are numbered 1-4. The attachments must fit in the order shown in Fig. DD
starting with the small cutting cart water attachement
12
in order to seatcorrectly.
NOTE: The large cutting cart water attachment
13
and the small rear water attachment
8
are
stored upsidedown.

 Loading...