ENGLISH
12
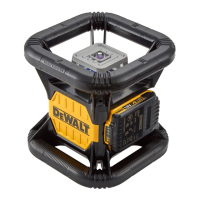
Inserting and Removing the Battery Pack
from the Tool (Fig. B)
NOTE: Make sure your battery pack
1
is fullycharged.
To Install the Battery Pack into the Tool
Handle
1. Align the battery pack
1
with the rails inside the tool’s
handle (Fig. B).
2. Slide it into the handle until the battery pack is firmly
seated in the tool and ensure that you hear the lock snap
intoplace.
To Remove the Battery Pack from the Tool
1. Press the battery release button
7
and firmly pull the
battery pack out of the toolhandle.
2. Insert battery pack into the charger as described in the
charger section of thismanual.
Fuel Gauge Battery Packs (Fig.B)
Some DEWALT battery packs include a fuel gauge which
consists of three green LED lights that indicate the level of
charge remaining in the batterypack.
To actuate the fuel gauge, press and hold the fuel gauge
button
8
. A combination of the three green LED lights will
illuminate designating the level of charge left. When the
level of charge in the battery is below the usable limit, the
fuel gauge will not illuminate and the battery will need to
berecharged.
NOTE: The fuel gauge is only an indication of the charge left
on the battery pack. It does not indicate tool functionality
and is subject to variation based on product components,
temperature and end-userapplication.
POWERING THE LASER
OPERATING TIPS
• To extend battery life per charge, turn the laser off when
it is not inuse.
• To ensure the accuracy of your work, check the laser
calibration often. Refer to Checking LaserAccuracy.
• Before attempting to use the laser, make sure it is
positioned securely, on a smooth, flat stable surface that
is level in bothdirections.
• To increase beam visibility, use a Laser Target Card
(FigureT).
CAUTION: To reduce the risk of serious injury,
never stare directly into the laser beam with or
without these glasses. Refer to Accessories for
importantinformation.
• Always mark the centre of the beam created by thelaser.
• Extreme temperature changes can cause movement or
shifting of building structures, metal tripods, equipment,
etc., which can effect accuracy. Check your accuracy
often whileworking.
• If the laser has been dropped, check to make sure your
laser is still calibrated. Refer to Checking LaserAccuracy.
TURNING THE LASER ON (FIG. A)
Place the laser on a flat level surface. Slide the Power/
Transport Lock switch
2
to the right to unlock/turn ON
thelaser.
Each laser line is powered on by pressing its buttonon the
keypad
3
. Pressing the button again turns the laser line off.
The laser lines can be powered one at a time or all at the
sametime.
Button Displays
Horizontal laser line
4
Side vertical laser line
5
Front vertical laser line
6
When the laser is not in use, slide the Power/Transport Lock
switch to the left in the OFF/Lockedposition.
CHECKING LASER ACCURACY
The laser tools are sealed and calibrated at the factory.
It is recommended that you perform an accuracy check
prior to using the laser for the first time (in case the laser
was exposed to extreme temperatures) and then regularly
to ensure the accuracy of your work. When performing
any of the accuracy checks listed in this manual, follow
theseguidelines:
• Use the largest area/distance possible, closest to the
operating distance. The greater the area/distance, the
easier to measure the accuracy of thelaser.
• Place the laser on asmooth, flat, stable surface that is
level in bothdirections.
• Mark the centre of the laserbeam.
FIELD CALIBRATION CHECK
Horizontal Beam - Scan Direction
(Fig. A, F, G, H)
Checking the horizontal pitch calibration of the laser requires
a single wall at least 30’ (9 m) long. It is important to conduct
a calibration check using a distance no shorter than the
distance of the applications for which the tool will beused.
1. Place the laser against the end of the wall on a smooth,
flat, stable surface that is level in both directions
(FigureF).
2. Move the Power/Transport Lock switch
2
to the right to
turn the laser ON (FigureA).
3. Press the button to turn on the horizontal beam
4
.
4. At least 30' (9m) apart along the laser beam, mark
a
and
b
.
5. Turn the laser180º.
6. Adjust the height of the laser so the centre of the beam is
aligned with
a
(FigureG).
7. Directly above or below
b
, mark
c
along the laser beam
(FigureH).
8. Measure the vertical distance between
b
and
c
.

 Loading...