Cable length (m)
7.5 15 25 30 45 60
Voltage Amperes Cable rating (Amperes)
115 0 - 2.0 6 6 6 6 6 10
2.1 - 3.4 6 6 6 6 15 15
3.5 - 5.0 6 6 10 15 20 20
5.1 - 7.0 10 10 15 20 20 25
7.1 - 12.0 15 15 20 25 25 -
12.1 - 20.0 20 20 25 - - -
230 0 - 2.0 6 6 6 6 6 6
2.1 - 3.4 6 6 6 6 6 6
3.5 - 5.0 6 6 6 6 10 15
5.1 - 7.0 10 10 10 10 15 15
7.1 - 12.0 15 15 15 15 20 20
12.1 - 20.0 20 20 20 20 25 -
Assembly and adjustment
@
Prior to assembly and adjustment
always unplug the tool.
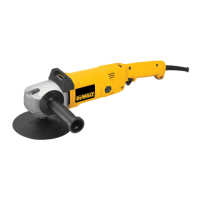
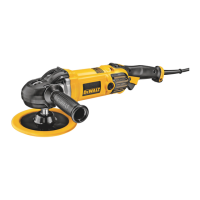
Mounting the side handle (fig. B)
● Screw the side handle (5) tightly into one of the
holes on either side of the tool.
Fitting and removing the backing pad (fig. C)
● Place the tool on a table, spindle up.
● Press the spindle lock (4) and turn the spindle
until the lock engages.
● Place the backing pad (6) onto the spindle.
● Screw the threaded flange (7) onto the spindle.
● Tighten the threaded flange.
● Release the spindle lock.
● To remove the backing pad, loosen the threaded
flange while the spindle lock is engaged.
Fitting the polishing bonnet (fig. D)
● Place the tool on a table, spindle up.
● Pull the polishing bonnet (8) over the backing
pad (6).
Instructions for use
@
● Always observe the safety instructions
and applicable regulations.
● Apply only a gentle pressure to the tool.
Do not exert side pressure on the
backing pad.
● Avoid overloading. Should the tool
become hot, let it run a few minutes
under no load condition.
Prior to operation:
● Be sure the threaded flange is mounted correctly.
● Make sure the pad rotates in the direction of the
arrows on the accessory and the tool.
● Make sure any dirt is washed off the workpiece
surface.
Polishing (fig. A)
● Always use clean polishing bonnets.
● Evenly apply a required amount of polishing
paste over the polishing bonnet.
● Hold the polishing bonnet to the surface to be
polished and switch on the tool.
● Move the tool evenly over the surface, without
applying pressure.
● Switch off the machine before taking the tool
from the surface.
● Check your work at short intervals.
@
High-speed rubbing action of the
polishing bonnet upon the workpiece
surface can build a static charge on the
metal portions of this tool resulting in
a static shock when touched.
Switching on and off (fig. E)
● To run the tool, press the variable speed switch
(1). The pressure exerted on the variable speed
switch determines the tool speed.
● For continuous operation, also press the lock-
on button (2). The lock-on button works only in
full speed.
● Switching off: press the on/off switch again.
@
Do not switch the tool on or off when
under load.
Speed control (fig. F)
The speed control dial (3) can be used for advance
setting of the required maximum tool speed.
● Turn the speed control dial (3) to the desired
position. The higher the number, the higher the
maximum tool speed.
 Loading...