8
ENGLISH
Cleaning
WARNING: Never use solvents or other harsh chemicals
for cleaning the non-metallic parts of the appliance. These
chemicals may weaken the materials used in these parts.
Never let any liquid get inside the machine; never immerse
any part of the appliance into a liquid.
1. Vacuum the outside of the dust extractor. For further
cleaning use a cloth dampened only with water and mild
soap if necessary.
2. After use dispose of cloth in an appropriate container.
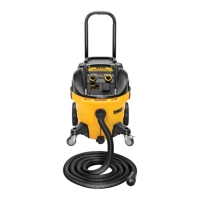
Storage (Fig. A)
1. Empty the canister, refer to To Empty Canister
under Operation.
2. Clean the vacuum inside and outside. Refer to Cleaning.
3. Clean or replace filters, refer to Filters.
4. Store the suction hose and the power cord as shown in the
illustration. Place the unit in a dry room and secure it from
unauthorized use.
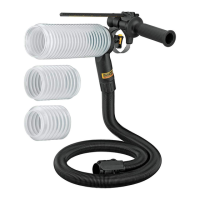
Optional Accessories
WARNING: Since accessories, other than those offered by
, have not been tested with this product, use of
such accessories with this appliance could be hazardous.
To reduce the risk of injury, only
recommended
accessories should be used with this product.
ACCESSORIES
DWV9340-XJ Filter
DWV9315-XJ Crush-proof hose
DWV9316-XJ Anti-static hose
DWV9401-XJ Paper bag
DWV9400-XJ Plastic liner
DWV9402-XJ Fleece bag
DWV9500-XJ Vac Rack
AirLock System
DWV9000 Twist-Lock connection
DWV9110 29–35mm tapered
rubber adapter
DWV9120 35–38mm stepped
rubber adapter
DWV9130 35mm OD adapter
DWV9150 35mm OD angle
adapter
Vac Rack DWV9500 Installation (Fig. J)
NOTE: The DWV901L comes with DWV9500 vac rack
attachment already installed.
1. Remove the 4 carry handle screws using a T-25 star bit and
remove the carry handle.
2. Install the vac rack reusing the carry handle screws. Put
them back in their original holes and tighten.
3. Use the 2 screws
22
provided by placing them in the rear
holes of the vac rack. Push down and turn each screw to
break through the material and into the hidden screw boss
below. Tighten.
CAUTION: Do not exceed 9 kg in each 14liter storage
unit, maximum 2 storage units per dust extractor. Do not
exceed 18 kg in a 28 liter storage unit, 1 storage unit per
dust extractor. Exceeding the recommended height and/
or weight could result in an unstable dust extractor would
could cause injury or damage.
NOTICE: Do not remove dust extractor head from tank
with T-stack storage units attached. Doing so could result
in damage to the dust extractor filter.
Securing the Power Cord to the
Hose (Fig. A)
The power cord
2
can be secured to the suction hose
7
using the D279058CL hose clip(available from your local
D
WALTsupplier).
Consult your dealer for further information on the
appropriateaccessories.
Troubleshooting
Problem Solution
Motor does
not run
Check power cord, plugs and outlet.
Ensure the on/off switch is in the ONposition
(
).
Ensure the tool control switch is in the OFF
position.
Suction
capacity
decreases
Remove blockages in the suction nozzle,
suction tube, suction hose or filters.
Replace the paper or fleece bag.
Check for proper installation of the filters.
Clean or replace the filters.
Empty canister, refer to Empty Canister under
Operation.
Vacuum
stops
running
Thermal overload has been tripped:
1. Turn the vacuum off and disconnect
vacuum cleaner from power source.
2. Empty the canister, if needed.
3. Allow the unit to cool.
4. Plug the power cord into an appropriate
outlet and turn on/off switch to the ON
position (
) to test. If vacuum will not
restart contact your seller or check the
location of your nearest authorised
repair agent in the
catalogue or
contact your
office at the address
indicated in this manual.

 Loading...