9
ENGLISH
Inserting and Removing the Battery Pack
from the Radio (Fig.F)
NOTE: Make sure your battery pack
16
is fullycharged.
To Install the Battery Pack into the Radio
1. Align the battery pack
16
with the rails inside the battery
receptacle
17
.
2. Slide it into the receptacle until the battery pack is firmly
seated in the tool and ensure that you hear the lock snap
intoplace.
To Remove the Battery Pack from the Radio
1. Press the release button
22
and firmly pull the battery pack
out of the batteryreceptacle.
2. Insert battery pack into the Radio as described in the
charger section of thismanual.
Fuel Gauge Battery Packs (Fig.F)
Some
battery packs include a fuel gauge which consists
of three green LED lights that indicate the level of charge
remaining in the batterypack.
To actuate the fuel gauge, press and hold the fuel gauge
button
23
. A combination of the three green LED lights will
illuminate designating the level of charge left. When the level of
charge in the battery is below the usable limit, the fuel gauge
will not illuminate and the battery will need to berecharged.
NOTE: The fuel gauge is only an indication of the charge left on
the battery pack. It does not indicate tool functionality and is
subject to variation based on product components, temperature
and end-userapplication.
ASSEMBLY AND ADJUSTMENTS
WARNING: To reduce the risk of serious personal
injury, turn tool off and disconnect battery pack
before making any adjustments or removing/
installing attachments or accessories. An accidental
start‑up can causeinjury.
WARNING: Use only
T battery packs andchargers.
LCD Indicators (Fig.G)
When the appliance is turned OFF
When charging a battery pack while the appliance is turned
off, a large battery image is displayed in the center of the LCD
screen
18
showing the battery pack chargingstatus.
Battery pack is empty
Battery pack level is low
Battery pack is partially charged
Battery pack is fully charged
Hot/Cold Delay
This charger has a hot/cold delay feature: when the charger
detects a battery that is hot, it automatically starts a delay,
suspending charging until the battery has cooled. After the
battery has cooled, the charger automatically switches to
the pack charging mode. This feature ensures maximum
battery life.
Charging a Battery Pack in the Radio
(Fig.A, D–F)
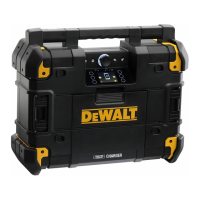
The ToughSystem® Music + Charge includes a large storage
compartment. This compartment also stores and protects the
AC/DC power adaptor when not in-use.
1. Open the top compartment cover
5
to take out the AC/DC
poweradaptor.
2. Plug the charger AC/DC power adaptor into an appropriate
outlet and connect it to the power-in port
8
before
inserting the battery pack
16
.
3. Open the battery pack cover
5
by releasing its
lockinglatches
6
.
4. Insert the battery pack (not included) into the battery
receptacle, making sure the pack is securely held in the
receptacle. The battery indicator will blink continuously,
indicating that battery charging is inprocess.
NOTE: Close the cover and check it is tightlyclosed.
5. The charging completion will be indicated by a steady
battery indicator. The pack is fully charged and may be used
at this time or left in thecharger.
• Volume control and sound tone adjustment
• Heavy-duty design
• Mounts and locks to the
DWST08210 ToughSystem®
L-Cart Carrier
• Stackable onto any ToughSystem® unit
• Water and dust resistant – IP54 tested
• DAB+ advanced digital audio broadcasting with information
display as broadcast by the station
• DRC dynamic range compression allows quiet sounds
to be comparatively louder, and loud sounds to be
comparativelyquieter
• Favorites – preset digital stations
OPERATIONS
Instructions for Use
WARNING: Always observe the safety instructions and
applicableregulations.
WARNING: Do not place the radio in locations where it
may be exposed to dripping orsplashing.
 Loading...