7
BUY ONLINE OR CLICK AND COLLECT IN STORE @ WWW.DIAMONDBACK.CO.UK
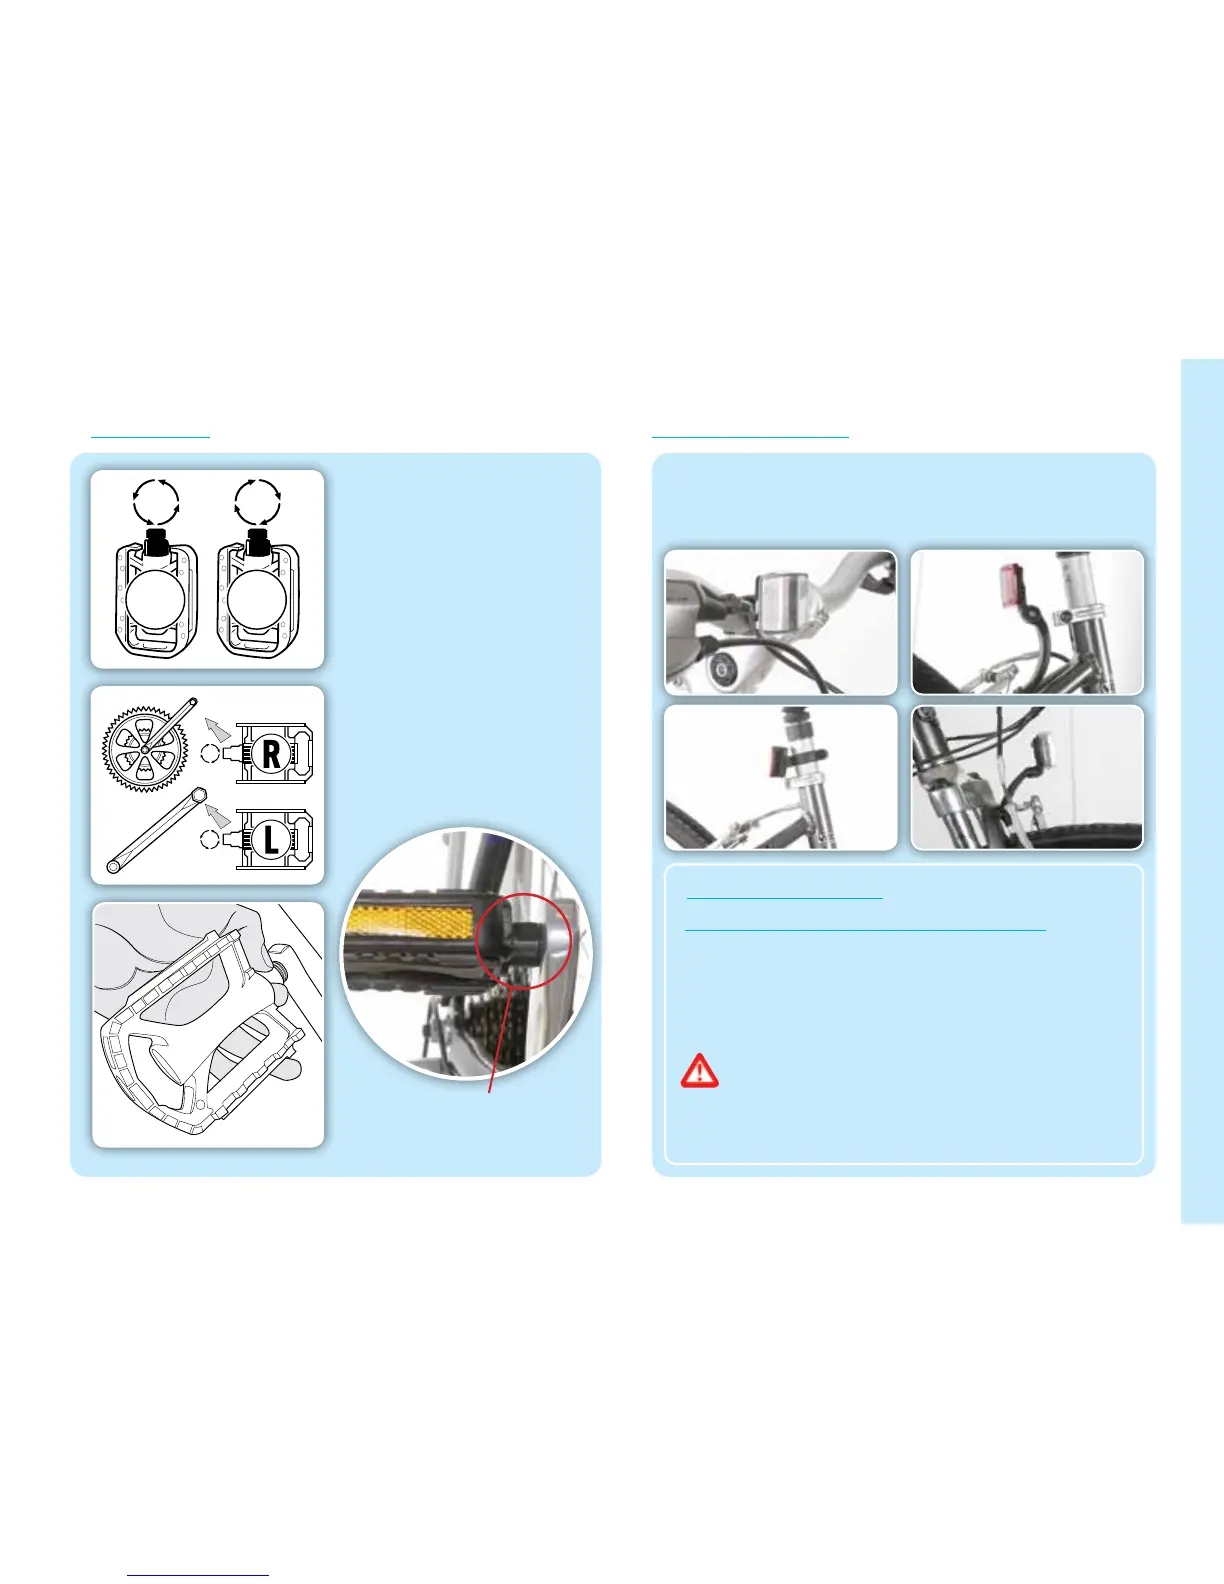
1 Identify left and right pedals by
the letter R & L stamped on the
end of the thread.
2 Identify left and right cranks.
Tighten pedal by hand into the
correct crank. Note the correct
rotation.
3 Tighten the pedals by hand, then
using a spanner fully tighten in
the correct rotation.
Remember
• Correct pedal and crank
• Correct tightening rotation
• Do not cross-thread
• Always keep pedals tight
• Check and retighten regularly
Remember
• Correct pedal and crank
• Correct tightening rotation
• Do not cross-thread
• Always keep pedals tight
• Check and retighten regularly
PEDALS REFLECTORS
For safety reasons it is very important that these are fitted correctly
as the photograph below. Depending on the type supplied, the front
reflector may be fitted to the handlebar or fork and the rear fitted to
the seat post or rear bridge (see photos below).
1 Tyres are inflated to the recommended pressure.
2 Brakes are functioning properly.
3 Axle nuts or quick release levers are tightened.
4 Handlebar bolt(s) is tightened.
5 Seat bolt is tightened.
KEEP YOUR REFLECTORS CLEAN -
CYCLISTS MUST BE SEEN .
THE REFLECTORS FITTED TO YOUR NEW BIKE ARE A LEGAL
REQUIREMENT, SUPPLIED FOR YOUR SAFETY. DON’T BE
TEMPTED TO REMOVE THEM.
Ensure pedal is tight up against
the crank when fully tightened
 Loading...