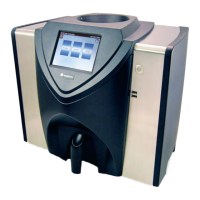
OPERATOR’S MANUAL
GAC® 2500 Model (INTL)
11001-1655B-201611
/I
Safety Notices ..................................................................................................... 1
Disclaimer ......................................................................................................................... 1
Introduction ......................................................................................................... 3
Accessories ....................................................................................................................... 3
Unit Overview .................................................................................................................... 3
Features ............................................................................................................................ 4
Specifications .................................................................................................................... 4
Declaration of Conformity ................................................................................................. 4
External Communication Connections .............................................................................. 5
Printer ............................................................................................................................... 6
Quick Start Guide ................................................................................................ 7
Step 1: Unlock Shipping Brackets .................................................................................................... 7
Step 2: Instrument Placement .......................................................................................................... 8
Step 3: Leveling Instrument ............................................................................................................. 8
Step 4: Initial Setup .......................................................................................................................... 8
Step 5: Begin Grain Analysis ........................................................................................................... 9
Step 6: Select a Product .................................................................................................................. 9
Step 7: Perform a Grain Analysis ................................................................................................... 10
Physical Instrument Setup ............................................................................... 11
Unlock Shipping Brackets ............................................................................................... 11
Instrument Placement ..................................................................................................... 14
Leveling Instrument ........................................................................................................................ 14
Security .............................................................................................................. 15
OEM Password ............................................................................................................... 16
Installation ......................................................................................................... 17
Connecting AC Power ..................................................................................................... 17
Grain Drawer ................................................................................................................... 18
Optional Bottomless Grain Drawer ................................................................................................. 18
Initial Setup ........................................................................................................ 19
Navigation .......................................................................................................... 21
Using External Devices ................................................................................................... 21
Touch Screen Button Functions ...................................................................................... 21
Home .............................................................................................................................................. 21
Power Off ....................................................................................................................................... 22
Initiate ............................................................................................................................................. 22
Print ................................................................................................................................................ 22
Back ............................................................................................................................................... 22
Abort ............................................................................................................................................... 22
Enter ............................................................................................................................................... 22
USB ................................................................................................................................................ 22
User ................................................................................................................................................ 22
Instrument Information ................................................................................................................... 22
LCD Display Touch Screen Calibration .......................................................................................... 22
Keypad ........................................................................................................................................... 23
Clean .............................................................................................................................................. 23
Region ............................................................................................................................................ 23
Import Region ................................................................................................................................. 23
Delete Region ................................................................................................................................ 23


