Scan the QR code for the
Full Manual & Assembly Video
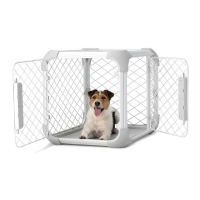
Choose which direction you would like the doors to open: Option A (left handles) or Option B (right
handles).
Position door panels so that the handles are on the OPPOSITE SIDE of your selected direction (In the first
few assembly steps the crate will be upside-down. When you flip the crate over the door handles will be in
the orientation you’ve selected)
01
03
06 07 08
09 10
04 05
02
The doors and side panels slide together with post
and hole connectors.
Starting with the front and side door, slide the post
and hole connectors together, and repeat the
process to connect the remaining side panels.
Bottom Corner Connectors: Rotate the outer knob to
the open position, hold the panels together and place the
corner connector over frame intersection, press firmly and
rotate clockwise to lock.
Check inside to ensure frames are captured. Repeat
for the remaining 3 corners, checking connections.
Insert tray through the opening where the ceiling will
be installed; it nests within the notch in the bottom
frame.
Puppy Divider Installation (If needed): Insert divider
feet into base holes based on dog size. Align the top
pins with corresponding frame holes, and slide the
pins into the hole until they snap into place.
Top Corner Connectors: Locate the top corner connectors,
rotate the outer knob to the open position. Hold the
panels together and place the corner connector over frame
intersection, press firmly, and rotate clockwise to lock.
Check inside to ensure frames are captured.
Repeat for the remaining 3 corners, checking
connections.
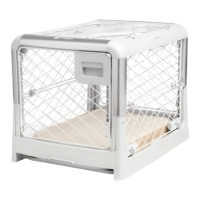
Place the ceiling panel on top of the
side panels with the DIGGS logo
facing UP.
Flip crate so bottom feet are on the
floor, preferably with two people.
Please note that assembly should take 20 minutes max. If you're struggling or
it's taking longer than expected, please reach out to help@diggs.pet or text us at
1-833-802-0537 with your questions and any visuals that will allow us to
troubleshoot your concern.
!
Assembly Guide
Place the base frame on top of side
panels with the notched side facing
DOWN. Locate the bottom corner
connectors.
11
Option A
Direction of Door Swing
Option B
Direction of Door Swing
8
9
10
6
1 2
43
5
7
1 212
Follow the assembly steps below:
8
9
1
2