9
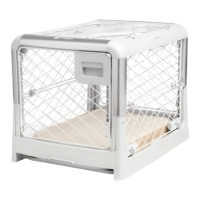
Puppy Divider (continued)
» Divider Removal/Relocation
» Open the front door or ceiling hatch, whichever is easier for you
to access the divider locks
» Starting with the right or the left side of the divider, pull the divider lock
towards the center of the Crate until it is freed of the ceiling
» Repeat with the other side, so that both divider locks are free of the ceiling.
They will fall to either side of the divider when not in place in the ceiling
» Lift the divider towards the ceiling of the Crate, so that the bottom of the
divider is free of the holes on the base
» Slide the top of the divider down, so that the top of the divider
is free of the ceiling tabs
» Move the puppy divider to the new position, making sure to allow
only enough room for your puppy to stand, turn around and lie down
comfortably. Install it using the process outlined in the “Installation” section.
Or, remove the divider entirely if your pup is all grown up!
» Be sure to remove the puppy divider before collapsing the Crate,
or using the side door!
10
Cleaning Tray
Lowering & Moving the Crate
To clean tray:
» Remove dog from Crate
» Pull tray out from tray slot
» Clean tray with gentle cleaner
To lower Crate:
» Remove puppy divider
» Lift ceiling handle slightly and turn 90 degrees
» Lower ceiling to the base of the Crate
» Lower front and rear doors to their collapsed positions
To move Crate by rolling:
» Start from a collapsed position
» Lift the front of the Crate by the rolling hand grip so the
wheels engage with the floor at the back of the Crate
» Roll Crate over short distances and when in place, lower front of Crate
until the front touches the ground and the wheels disengage from the floor
 Loading...