ƉƉĞŶĚŝdž
Starting ƚŚĞIP Đamera
After forwarding correctly the Web Port,
through your router (if applicable), install the
IP Camera in a proper location.
1
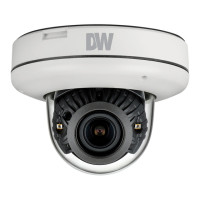
Locate the serial number located on the label attached to
the bottom of the IP Camera, you will need this for DDNS
registration.
2
Connect the IP Camera to your router or cable/DSL modem
(per your network scenario) via a Cat5/5e UTP Ethernet
network cable.
3
Supply power to the IP Camera.
4
After 1 minute, verify the IP Camera indicators:
· LINK : Flickering/Solid
5
ĨƚĞƌĐŽŶĮŐƵƌŝŶŐWŽƌƚ&ŽƌǁĂƌĚŝŶŐŽŶLJŽƵƌĐŽŵƉƵƚĞƌ
(if necessary), access your IP Camera on your local network
by opening Internet Explorer and specifying the IP address
and Web Port assigned to the IP Camera.
6
Access your IP Camera via the Internet :
If you use Case B, C
1) Open Internet Explorer.
2) Type the IP of the IP Camera.
If you use Case A, D
1) Open Internet Explorer.
2) Visit the DDNS website.
3) Register the IP Camera.
4) Give the DDNS server 10 minutes (MAX) to locate your
IP Camera’s IP information. You may reboot the server
to send an immediate request to our DDNS server.
5) After your camera is connected, select your camera.
i
Examples: http://192.168.0.200:8888 or
http://24.106.88.123
i
If you left your Web Port set to 80, do not need to
specify the port in the Address Bar to access the
IP Camera.
i
dŚĞĚŝīĞƌĞŶĐĞďĞƚǁĞĞŶĂŶĚŝƐƚŚĂƚŶĞĞĚƐƚŽ
set the port forwarding.
i
^ŝŶĐĞƚŚĞƚLJƉĞŽĨE^ĚŝīĞƌƐĨƌŽŵƚŚĞƐĞƌǀŝĐĞƚLJƉĞ
refer to the related service site.
ϴϯ
 Loading...