2. Installation and operation
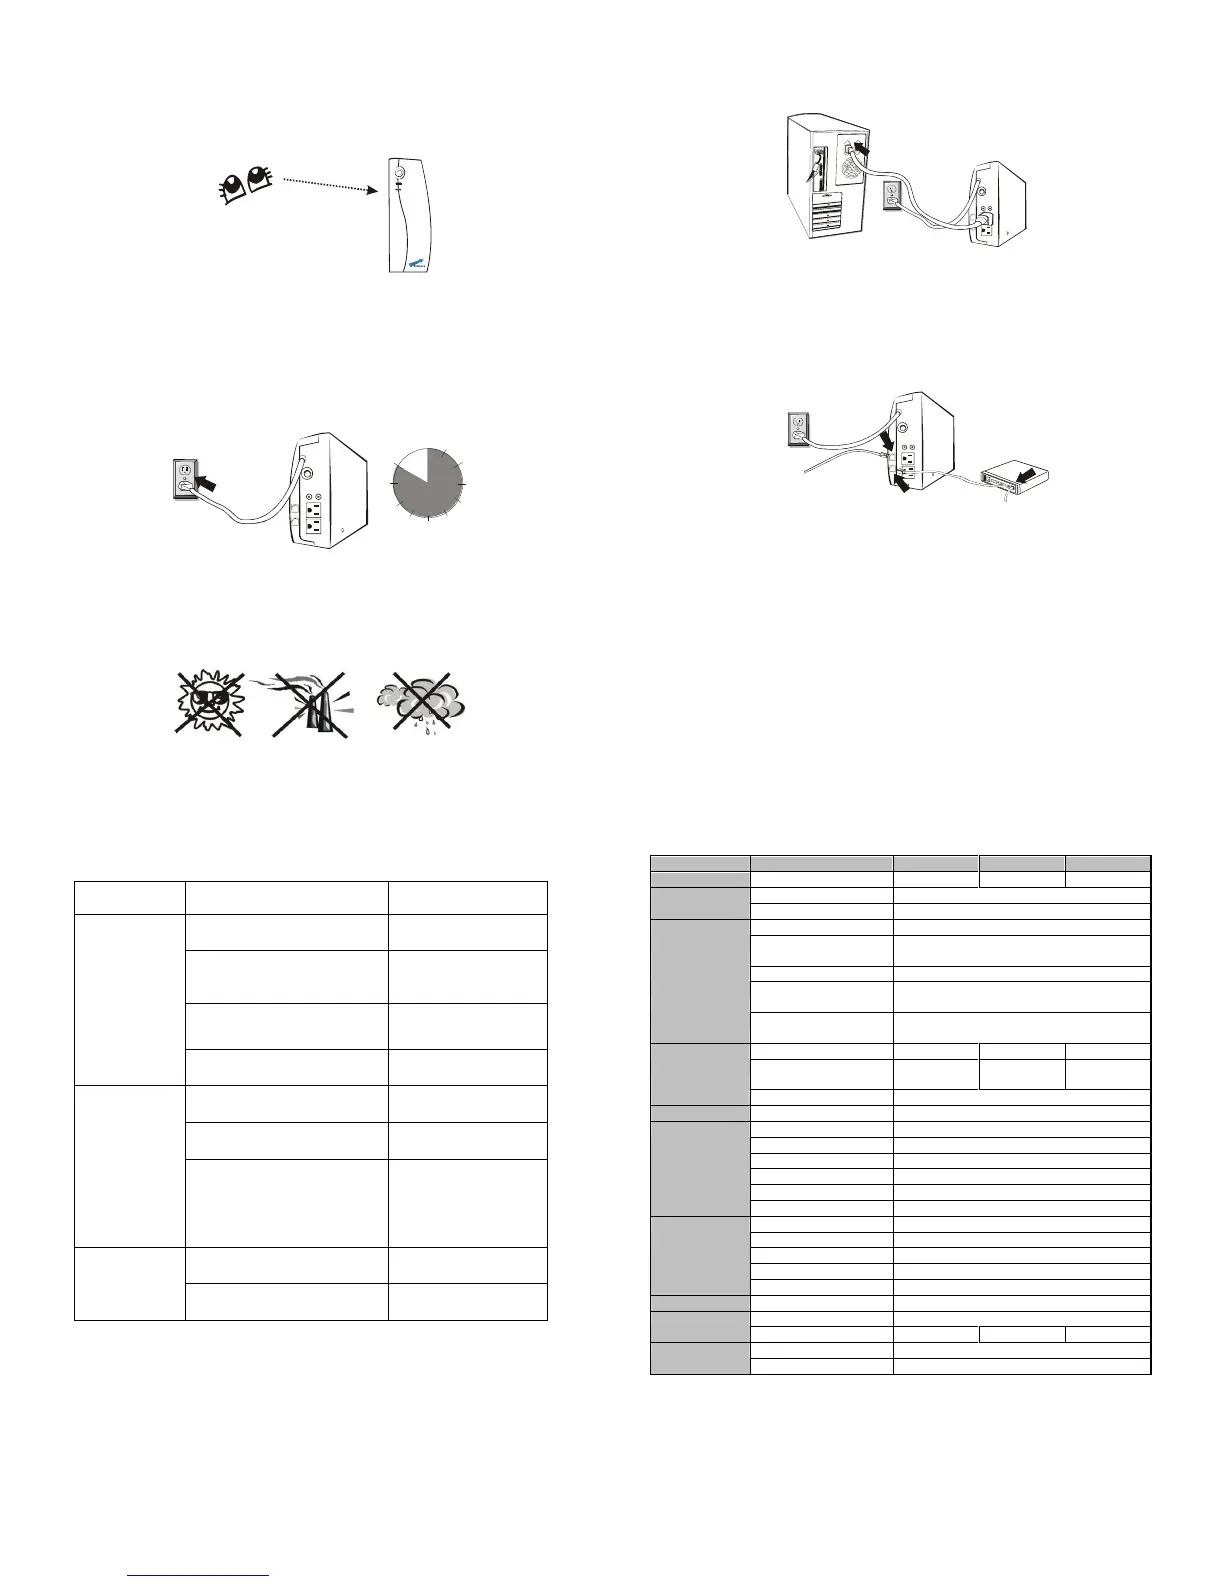
1. Inspection
Remove the UPS from its packaging and inspect it for damage
that may have occurred during shipping. If any damage is
discovered, repack the unit and return it to the place of
purchase.
2. Charging
This unit is shipped from the factory with its internal battery fully
charged, however, some charge may be lost during shipping
and the battery should be recharged prior to use. Plug the unit
into an appropriate power supply and allow the UPS to charge
fully by leaving it plugged in for at least 10 hours with no load
(no electrical devices such as computers, monitors, etc.)
connected.
3. Placement
Install the UPS unit in any protected environment that provides
adequate airflow around the unit, and is free from excessive
dust, corrosive fumes and conductive contaminants. Do not
operate your UPS in an environment where the ambient
temperature or humidity is high.
4. Computer Connection
Plug the UPS into a 2-pole, 3-wire grounded receptacle. Then
connect one computer-related device into each of the power
receptacles supplied on the back of the UPS.
5. phone system, computer, monitor against surges and
spikes Connection (Option)
Plug incoming Internet line into the “In” socket at the back of the
UPS. Use one more Internet line cable and plug one end of the
Internet line cable to the “Out” socket at the back of the UPS. Plug
the other end to the modem input socket as shown.
6. Turn On/Off
Press the switch of the UPS continuously for 1 second and the
UPS turns into its normal state (the green light is on and the
beeper is off) after it performs a self-diagnosis (the beeper and the
red and green indicator lights are on) for several seconds. At this
time, user may turn on the PC and other loads. Press the switch of
the UPS continuously for 1 second to turn off the UPS.
Note: 1. For the convenience of maintenance, please turn on the UPS first
before turning on the PC and the other loads, and turn off the UPS
after the loads are turned off.
2. At ordinary times, we recommend to remain the UPS on with the
battery charging (even if the loads are turned off), which is benefit to
the maintenance of the battery.
No LED display
on the front
panel.
1. Re-charge battery
up to 8 hours.
2. Replace with the
same type of
battery.
3. Power switch is not
pressed.
3. Press power switch
again.
4. Battery connector loosed
4. Check the internal
battery connection
When power
failure, backup
time is short.
1. Remove some
non-critical load.
2. Battery voltage is too low.
2. Charge battery 8
hours or more.
3. Battery defect due to high
temperature operation
environment, or improper
operation to battery.
3. Replace with the
same type of battery.
Mains normal
but LED is
flashing.
1. Replace the same
type of fuse.
2. Reconnect the
power cord properly.
If any abnormal situations occur that are not listed above, please
call service people immediately.
110/120VAC or 220/230/240VAC
110/120VAC or 220/230/240VAC
Voltage Regulation
(Batt. Mode)
Frequency Regulation (Batt.
Mode)
Output Waveform
(Batt. Mode)
Back up Time (at a PC load
with 15" monitor)
10 hours to 90% after complete discharge
Green LED flashing every 4 seconds
Low Battery at Battery Mode
Green LED flashing every second
Red LED flashing every 2 seconds for 30 seconds
Red LED flashing three times every 2 seconds
Low Battery at Battery Mode
Battery Charging at AC Mode
Sounding every 2 seconds for 30 seconds
Sounding three times every 2 seconds
0- 40°C, 0-90 % relative humidity (non-condensing)
 Loading...