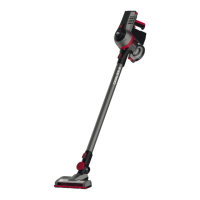
Maintaining the appliance
Emptying the dust collector
1
Press the wand release button (Fig
7
/
1
) and
remove the reach wand or the accessory from the
handheld.
2
Hold the handheld over a bin and press
the dirt release button (Fig.
11
/
1
). The dust col-
lector cover opens and the dust falls out.
Cleaning the lters
CAUTION!
Use the appliance only with both lters in place.
NOTE:
For best cleaning results, tap the lters over a bin
every 4 – 6 uses and wash them every 3 months.
1
Empty the dust collector, > “Emptying the dust
collector” on page 19.
2
Twist the lter cover anti-
clockwise to unlock (Fig.
12
) and remove the lter
cover from the handheld.
3
Pull the tab on the l-
ter (Fig.
13
/
1
) to remove it from the cover.
4
Pull
the round foam lter to remove it from the handheld.
5
Tap both lters over a bin to remove dirt.
6
Rinse
out the lters under running water (max. 40 °C).
7
Leave the lters dry for at least 24 hours before
putting them back in the appliance.
Cleaning the separator
1
Empty the dust collector, > “Emptying the dust
collector” on page 19.
2
Twist the lter cover anti-
clockwise to unlock (Fig.
12
) and remove lter cover
from the handheld.
3
Press dust collector release
button to open the dust collector.
4
To release the
separator, push from inside the dust collector and
pull out the separator to remove (Fig.
14
).
5
Pull l-
ter out of the separator (Fig.
15
).
6
Tap lter and
sepa- rator over a bin to remove dirt.
7
Rinse out the
lter under running water (max. 40 °C).
8
Let the l-
ter dry for at least 24 hours before putting it back in
the appliance.
Removing blockages
Carefully remove any hair from the turbo head
with a pair of scissors in order to remove any
blockages.
Use a broomstick or similar blunt object to remove
blockages from the reach wand.
Removing and replacing the brushbar
1
Press accessory release button and remove the
turbo head from the reach wand or the handheld
(Fig.
16
/
1
).
2
Find the letter “A” on the base of the
turbo head to indicate the cover you need to remove
(Fig.
17
/
A
).
3
Use a screwdriver to unscrew the
three screws and remove the cover.
4
Slide the brushbar out of the housing (Fig.
18
).
5
Clear any blockages or replace the brushbar if it
is defective.
6
Push brushbar onto the cover, slide
both parts in the housing (Fig.
19
) and tighten the
cover with the screws.
Removing and replacing the belt
1
Press the accessory release button and remove
the turbo head from the reach wand or the hand-
held (Fig.
16
/
1
).
2
Find the letter “B” on the base of
the turbo head to indicate the cover you need to re-
move (Fig.
17
/
B
).
3
Use a screwdriver to unscrew
the three screws and remove the cover.
4
If the belt
is broken, remove it and slide a new one onto the
cogs (Fig.
20
).
5
Ret the cover and tighten it with
the screws.
Accessories
• Crevice tool – 0777007 (Fig.
21
/A)
• Brushbar – 0777017 (Fig.
21
/B)
• Pre-motor lter – 0777001 (Fig.
21
/C)
• Wall mount – 0777006 (Fig.
21
/D)
• Filter set (separator + lter) – 0777002 (Fig.
21
/E)
• 24 V mains adapter – 0767004 (Fig.
21
/F)
• 32 V mains adapter – 0777004 (Fig.
21
/F)
• Pet tool – 0777009 (Fig.
21
/G)
• Dusting brush – 0777008 (Fig.
21
/H)
• Parquet tool – 0777011 (Fig.
21
/I)
Troubleshooting
Before you contact our Dirt Devil customer service
department or send the appliance to the Dirt Devil
customer service department, you will nd a lot of
additional information in the service area of our web-
site which will help you solve problems.
www.dirtdevil.de/service
WARNING!
Switch o the appliance before you start trouble-
shooting. Never use a faulty appliance, mains
adapter or rechargeable battery.
!
EN
19
 Loading...