6
STEP 5
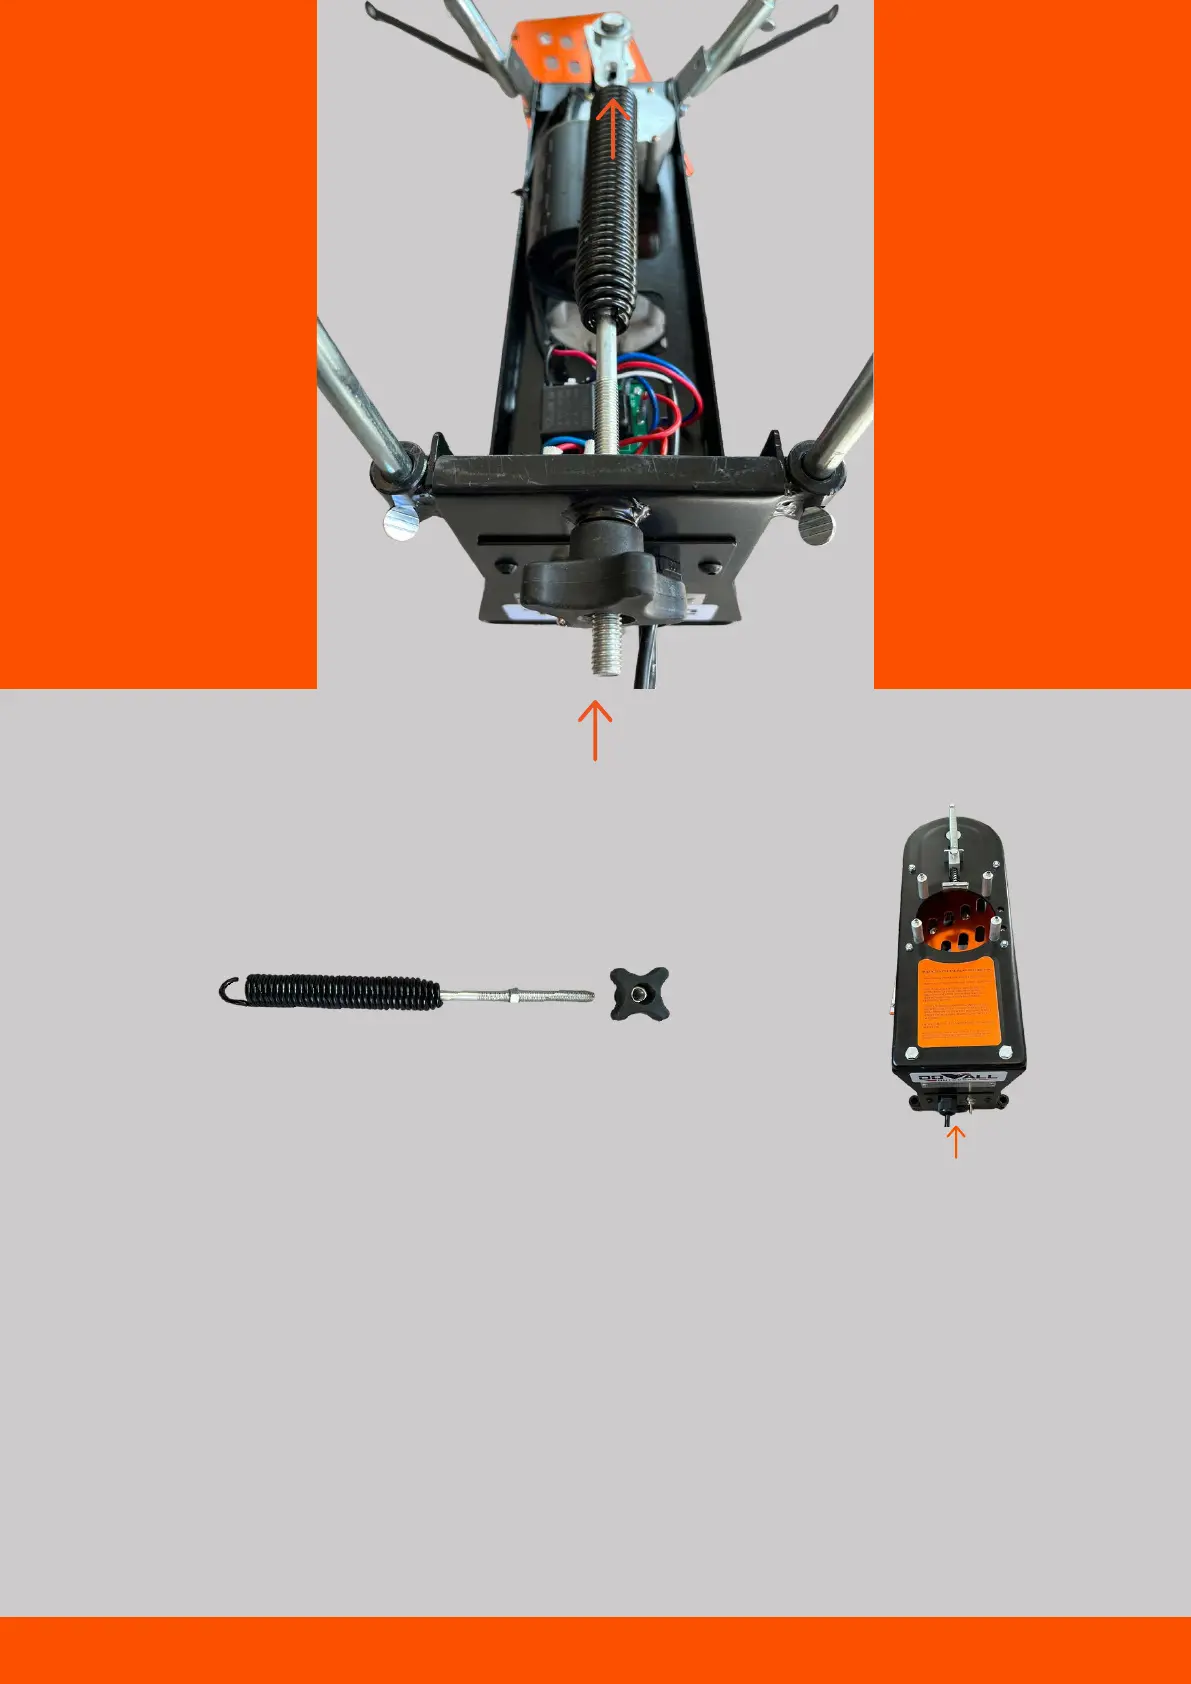
Now, rotate the throwing arm out to the 12 o’clock
position as depicted above. Hook Main Spring onto the
eyelet towards the front of the Trap Head. Remove the
Hand Crank and slide the Spade Bolt through the hole in
the rear of the trap. Then, secure the hand crank back
onto the Spade Bolt. Once tension on the spring can be
felt while securing, stop tightening. Use this as a starting
point for your trap, tighten or loosen to desired tension
after testing the trap’s throw once the remaining assembly
is complete.


 To Next Page