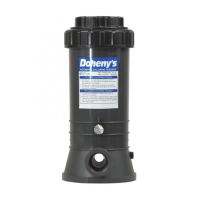
Automatic
Chlorine Feeders
Item #s 2457, 2458 & 2459
10411 80th Avenue Pleasant Prairie, WI 53158|Orders and Customer Care: 1-800-574-7665|Fax: 1-800-323-5932|Doheny.com
I INSTALLATION 2457 / 2458
1. Your automatic chlorine feeder is designed for
permanent installation in the pool water return line.
2. Always install the chlorine feeder after the heater. If
thereisnoheater,installafterthelter.Damageto
theheaterorltermayresultifconcentratedchlorine
isallowedtoowthroughthem.
3. 2457 & 2458 are furnished with 1-1/2 in. female
threads. 2457 is also equipped with male threads.
Only use pipe sealants formulated and approved for
usewithABSplasticconnections.Donotovertighten
pipetting.Properttingmakeupishandtightplus
1 to 1-1/2 turns maximum.
Notice: After starting up system, re-check all
connectionsforleaks.Re-tightenasrequired.
4.RefertoSection II DIRECTIONS FOR USE.
Note: Never install the chlorine feeder directly into
copper plumbing as pipe damage may occur.If
you have brass or bronze backwash valves, or
othersensitivemetalliccomponents,callDoheny’s
for precautions or recommendations for your
particular system.
A Planning Installation 2459
1. The inlet connection should be made in the piping after
thepumpandbeforethelter.Marklocationonpipe.
2. The outlet connection should be made in the piping
after the heater. If no heater is being used, connection
shouldbemadeafterthelter.Marklocationonpipe.
3. Based on the locations from Steps 1 and 2, cut
tubing to required lengths. Be sure ends are cut
evenly and cleanly.
Note: Never install the chlorine feeder directly into
copper plumbing as pipe damage may occur. If
you have brass or bronze backwash valves, or
othersensitivemetalliccomponents,callDoheny’s
for precautions or recommendations for your
particular system.
B Connection to Chlorine feeder 2459
1.Wrap Teon tape on larger male thread of Check
Valve and thread it securely into outlet port
of chlorine feeder.
Notice:TheCheckValveismarkedwitha‘dot’.It
alsohasaballthat‘clicks’whenyoushakeit.
2.WrapTeontapeonlargemalethreadofthe Inlet
Fitting Adapter and thread it securely into the inlet
port of chlorine feeder.
3. To connect inlet tubing to chlorine feeder, place
compression nut over inlet tubing and move the nut
up about 2 in. Insert the tubing all the way into the
inletttingadaptersocketandwhileholdingtubingin
place,tightennutrmlybyhand.Donotovertighten.
4.ConnectoutlettubingtotheCheckValveinthesame
manner as in Step 3 above.
C Connection to Plumbing Lines 2459
Notice: The Saddle Fittings and clamps are
designedtottheO.D.of1-1/2in.or2in.pipe.
5.Drilla3/8in.holeatlocationidentiedinStep1of
planning installation section. Clean all burrs and
shavings. Fit Saddle Fitting, with gasket, into
oval shaped hole in clamp and insert tting into
the 3/8 in. hole. Secure clamp around Saddle Fitting,
gasketand pipe and tighten securely toachieve a
goodseal.Donotovertightenclamp.
®