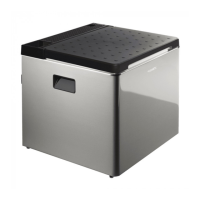
Replacing the gas cylinder (ACX3 30 and ACX3 40)
WARNING!
Replace the gas cylinder in a well-ventilated location.
Ensure that there are no open flames in the vicinity.
Only replace the gas cylinder when the device is switched off.
1. Completely close the valve on the gas cylinder.
2. Unscrew the pressure regulator from the cylinder.
3. Check the condition of the hose.
4. Replace the hose if the material is brittle or porous.
5. Connect the hose to the gas cylinder (fig.10).
Connecting a gas cartridge to the cooler (ACX3 40G)
WARNING!
Observe the handling and storage instructions for the gas cartridge.
Make sure that the ports on the cartridge and the cooler are free of dirt.
NOTE
The cooler is suitable for operation with self-sealing gas cartridges of the type CAMPINGAZ CP250.
1. Push the gas cartridge up into the port on the cooler (fig. 11).
WARNING!
Never check for leaks with an open flame or near sources of ignition.
2. Check all connections with leak spray.
There are no leaks at the connections if no bubbles form.
Before moving the cooler:
Take out the gas cartridge.
6.7 Using the cooler in gas mode
Proceed as follows (fig.12):
1. Turn the cooling level controller (fig. 4 2 and fig.5 2) to the maximum position.
2. Press and hold the cooling level controller.
3. After 10 seconds, press the ignition button (fig. 4 3 and fig.5 3) several times quickly in succession until the
flame is lit.
 Loading...