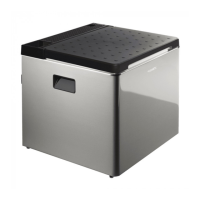
Operation ACX3
24
6.8 Connecting a gas cartridge to the cooler (ACX3 40G)
!
I
➤ Push the gas cartridge up into the port on the cooler (fig. a, page 9).
!
➤ Check all connections with leak spray.
There are no leaks at the connections if no bubbles form.
Any time you move the cooler:
➤ Take out the gas cartridge first.
6.9 Using the cooler in gas mode
Proceed as follows (fig. b, page 10):
➤ Turn the cooling level controller (fig. 4 2, page 4 and fig. 5 2, page 5) to the
maximum position.
➤ Press and hold the cooling level controller.
➤ After 10 seconds, press the ignition button (fig. 4 3, page 4 and fig. 5 3,
page 5) several times quickly in succession until the flame is lit.
✔ After ignition, you can see the flame in the sight glass (fig. 2 5, page 3 and
fig. 3 5, page 4).
➤ Hold down the cooling level controller for another 20 seconds.
To switch off the cooler:
➤ Close off the gas valve on the device and on the gas cylinder.
WARNING!
• Observe the handling and storage instructions for the gas cartridge.
• Make sure that the ports on the cartridge and the cooler are free of
dirt.
NOTE
The cooler is suitable for operation with self-sealing gas cartridges of the
type CAMPINGAZ CP250.
WARNING!
Never check for leaks with an open flame or near sources of ignition.
DometicACX3_30-ACX3_40-ACX3_40G_OPM_4445103211 _EMEA16_202x-xx-xx.book Seite 24 Montag, 16. November 2020 9:58 09
 Loading...