3736
11.3 Service Mode
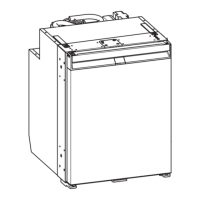
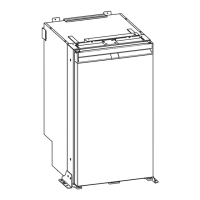
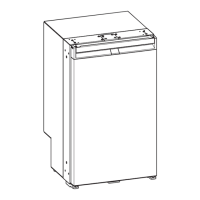
NEA1402
NDA1402
Before entering the “Service mode”, switch “OFF” the refrigerator with the ON/OFF button. To enter the service mode, press
and hold the “SET” button then press the ON/OFF button to the “ON” position. In this mode the refrigerator is not operat-
ing normally. Instead, a number of tests can be performed and the “SET” button is used to step through the tests. The test
number and the result of the test are displayed alternating (ashed). Stepping beyond the last test will result in a restart
from test number 1 again. The refrigerator will automatically exit the “Service mode” if no action is detected for 3 minutes.
To manually exit, switch the refrigerator “OFF” and then back “ON” again.
The service mode is intended as a tool to perform diagnostic troubleshooting.
Test 01:
Display Test
All segments and dots in the displays shall now be
lit.
Test 02:
DC Voltage Test
The display shows either “Lo”, “12” or “hi” depend-
ing on the actual battery supply voltage. If the display
does not show “12”, there is a severe problem with
the 12 volt DC battery supply.
Note: The “Lo dc” message will remain for approx 10
minutes after correct DC voltage is restored. Switching
the refrigerator “OFF” and then back “ON” will clear the
message immediately if DC voltage is normal.
Test 03:
Air Temperature Sensor Test
The display shows the actual air temperatures in degrees
Fahrenheit of the two compartments, freezer to the left
and fresh food to the right. The display range is from -9°
F to 41° F in the freezer and from -9° F to 59° F in the
fresh food side. For temperatures below and above these
ranges, the display will show “Lo” and “hi” respectively. An
open circuit to a sensor will be displayed as “--”.
The out of range indications in the temperature display
(“hi” and “Lo”) indicates that temperature is out of mea-
surement circuit range. However, these indications may
remain for some time after temperature is within range
again. This depends on that the temperature display is
ltered with long time constants. To reset the temperature
lter memory, switch “OFF” and “ON” again. Now the tem-
perature indications will start from the actual value.
Note: There is an offset between measured temperature
and shown temperature, as the indications are intended
to show food temperature rather than the temperature at
the sensor.
No. Test Function Test Results
00 ----- -----
01 LED Display panel. All LED Segments on.
02 DC Voltage check. “12” = within the proper operational range, 8.5 to 18 volts DC.
“Lo” or “hi” = outside of operational range.
03 Air temperature sensors, freezer & fresh
food.
Degrees °F = in range, “hi” or “Lo’ = out of range, “-- --” = fault
detected.
04 Surface temperature sensors, freezer & fresh
food.
Degrees °F = in range, “hi” or “Lo’ = out of range, “-- --” = fault
detected.
05 Door switches. “OP” = door is opened, “CL” = door is closed.
06 AC Detection. “On” = circuit is turned on, “no AC” = fault detected.
07 Turn on fresh food defrost heater. “On” = turned on, “-- --” = fault detected.
08 Turn on freezer plate defrost heater. “On” = turned on, “-- --” = fault detected.
09 Turn on drain tube/tray defrost heater. “On” = turned on, “-- --” = fault detected.
10 Turn on door frame heater. “On” = turned on.
11 Turn on fan in fresh food section. “On” = turned on, “-- --” = fault detected.
12 Turn on fan in freezer section. “On” = turned on, “-- --” = fault detected or “bl” = fan is blocked.
13 Turn on gas ignition system (NDA1402) only. “i9” = sparking, “FL” = ame is present, “-- --” = fault detected.
 Loading...