Saneo B, Saneo C Installing the toilet
25
Note that the cassette protrudes 112 mm out of the cassette housing (fig. a ,
page 11).
➤ Place the housing base (fig. a 1, page 11) flush with the installation frame of the
service door (fig. a 2, page 11) so that there is a clean transition and no gap.
Anchoring the Saneo B, Saneo C toilets
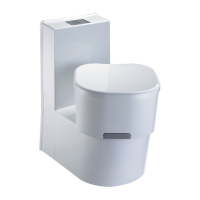
➤ Place the toilet in the desired position.
➤ Tightly fasten the base plate with four screws (fig. b 2, page 12).
➤ Insert the caps (fig. b 1, page 12).
➤ Then bolt the toilet housing to the wall (using a maximum of 4 bolts, not included)
(fig. c, page 12).
I
➤ Slide in the mobile tank cassette (fig. i, page 15).
Installation of the control and operating panel of the Saneo B, Saneo C
toilets
Install the control and operating panel in the wall in the immediate vicinity of the toilet
at an easily accessible location.
➤ For the control and operating panel, create an opening in the wall using the true-
to-scale template (fig. d, page 13).
➤ Connect the electrical cables to the couplings for installation of the operating and
control panel (chapter “Electrical connection” on page 28).
!
➤ Press the retaining springs of the control and operating panel in and push it into
the wall cutout (fig. e, page 14).
NOTE
1:1 template available from the manufacturer.
CAUTION!
There is a risk of injury due to the springs springing back!
Saneo-B-Saneo-C--I-EN-DE-FR-IT-NL.book Seite 25 Montag, 20. Februar 2017 10:08 10
 Loading...