EasyManua.ls Logo

DOREL Living TWIN/FULL BUNK BED DA7499W User Manual

DOREL Living TWIN/FULL BUNK BED DA7499W
60 pages
To Next Page IconTo Next Page
Page #1 background imageLoading...
Page #1 background image
Model Number: UPC Code: Color:
DA7499E 0-65857-17298-0 Espresso
DA7499W 0-65857-17299-7 White
DA7499G 0-65857-17755-8 Gray
Date of Purchase: _____ / _____ / _____ Lot Number:
(taken from carton)
NOTE: THIS INSTRUCTION BOOKLET CONTAINS IMPORTANT SAFETY INFORMATION.
PLEASE READ AND KEEP FOR FUTURE REFERENCE.
Congratulations on your latest furniture purchase! Dorel Living furniture has been developed with quality,
convenience and style in mind. We trust it will provide you with many years of exceptional comfort and
service.
Before beginning assembly, we encourage you to familiarize yourself with your new furniture piece by taking
a few minutes to go through this booklet. It contains important information on our warranty and care tips to
keep your furniture looking as good as new.
Customer satisfaction is important to us at Dorel Asia. Our agents are available Monday to Friday 8am to
5pm (EST) to answer any question you may have. For faster service, always have the model number ready
when calling our toll free number 1-800-295-1980 or emailing us at das@dorel.com .
DO NOT RETURN PRODUCT TO THE STORE. If a part is missing or damaged, contact our
customer service department. We will replace the part FREE of charge.
TWIN/FULL BUNK BED
For more great furniture ideas, check out our website at www.dorelliving.com.
You can also keep up to date on all the latest trends by liking our Facebook page.
Question and Answer IconNeed help?

Do you have a question about the DOREL Living TWIN/FULL BUNK BED DA7499W and is the answer not in the manual?

DOREL Living TWIN/FULL BUNK BED DA7499W Specifications

General IconGeneral
BrandDOREL Living
ModelTWIN/FULL BUNK BED DA7499W
CategoryIndoor Furnishing
LanguageEnglish

Summary

Important Safety Warnings

Strangulation Hazard Warning

Do not attach items to the bunk bed that are not designed for it, to prevent strangulation.

Adhere to Warning Labels

Follow warnings on the bunk bed structure and carton; do not remove warning labels.

Recommended Mattress Size

Use recommended mattress size/support to prevent entrapment or falls.

Coil Spring Mattress Requirement

Only use coil spring mattresses on both bunks to prevent injury.

Specific Mattress Dimensions

Use specified mattress lengths and widths, with a maximum thickness of 6 inches.

Age Restriction for Upper Bunk

Children under 6 years old are prohibited from using the upper bunk.

Guardrail Placement

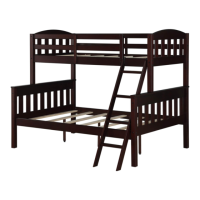
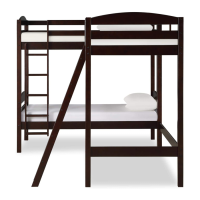
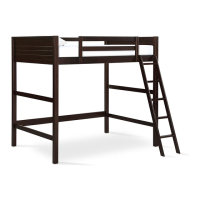
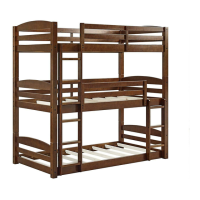
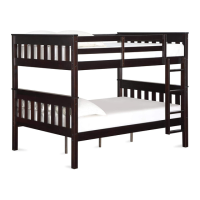
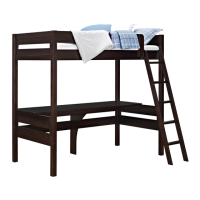
Always use guardrails on both long sides of the upper bunk, especially near walls.

Prohibited Activities

Do not allow horseplay or jumping on or under the bed.

Prohibited Mattress Types

Water or sleep flotation mattresses are not permitted for use with this bunk bed.

Ladder Usage for Access

Always use the ladder for entering and leaving the upper bunk.

Upper Bunk Occupancy Limit

Only one person is permitted on the upper bunk at a time.

Immediate Action for Damaged Products

Do Not Use Damaged Product

Do not use the product if it is damaged, has broken or missing components.

Assembly Step 1: Headboard Assembly

Attach Headboard Components

Assemble headboard bottom cross (G) with stoppers (10) and slats (R), then attach top cross (F) and posts (A, B).

Assembly Step 2: Remaining Headboards

Assemble Remaining Headboards

Assemble the other three headboard sets using specified posts (A, C, D, E) and top cross (F).

Assembly Step 3: Lower Bunk Frame

Connect Bottom Posts to Side Rails

Insert barrel nuts (11) into bottom side rails (J) and attach to bottom posts (D, E) with connectors (1).

Assembly Step 4: Lower Bunk Slats

Attach Lower Bunk Slats and Supports

Attach support posts (W) to slats (Y) with bolts (8), and slats (X, Y) to side rails (J) with screws (4).

Assembly Step 5: Upper Bunk Frame

Assemble Upper Bunk Frame

Insert dowels (9) into guardrails (L), insert nuts (11) into side rails (H, I), and connect to posts (A, B, C).

Assembly Step 6: Guardrail Assembly

Attach Short Guardrails and Legs

Insert dowels (9) into short guardrails (M), attach post (S) and leg (Q) with connectors (3) and screws (6).

Assembly Step 7: Upper Bunk Slats

Attach Upper Bunk Slats and Guardrail

Attach short guardrail to post (A) and rail (H). Attach top slats (K, Z) to side rails (H, I) with screws (4).

Assembly Step 8: Stacking Bunks

Secure Guardrails and Stack Bunks

Attach guardrail legs (Q) to guardrails (L) and rail (I). Place dowels (5) in headboard crosses (T) and stack.

Assembly Step 9: Ladder Construction

Assemble Ladder Steps and Ends

Insert dowels (9) into ladder steps (P) and attach ladder ends (N, O) with connectors (2).

Assembly Step 10: Attach Ladder

Secure Ladder to Top Side Rail

Attach the assembled ladder to the top side rail (H) using flat head screws (12).

General Usage Cautions

Weight and Usage Limitations

Unit intended for specified products/weights; exceeding may cause instability or injury.

Prohibited Activities on Bed

Do not allow horseplay or jumping on or under the bunk bed.

Age Suitability for Upper Bunk

Upper bunk for children 6 years and older; designed for ages 6 to young teenagers.

Mattress Type and Safety

Use only coil spring mattresses; failure to do so can result in injury.

Mattress Size and Thickness

Specify mattress dimensions for upper/lower beds; thickness must not exceed 6 inches.

Related product manuals