3
Contents
1. Assembly Instrucons
2. Food Preparaon Instrucons
3. Pre-Cooking Precauons
4. Lighng and Cooking Instrucons
5. Storage Instrucons
6. Important Facts
7. Frequently Asked Quesons
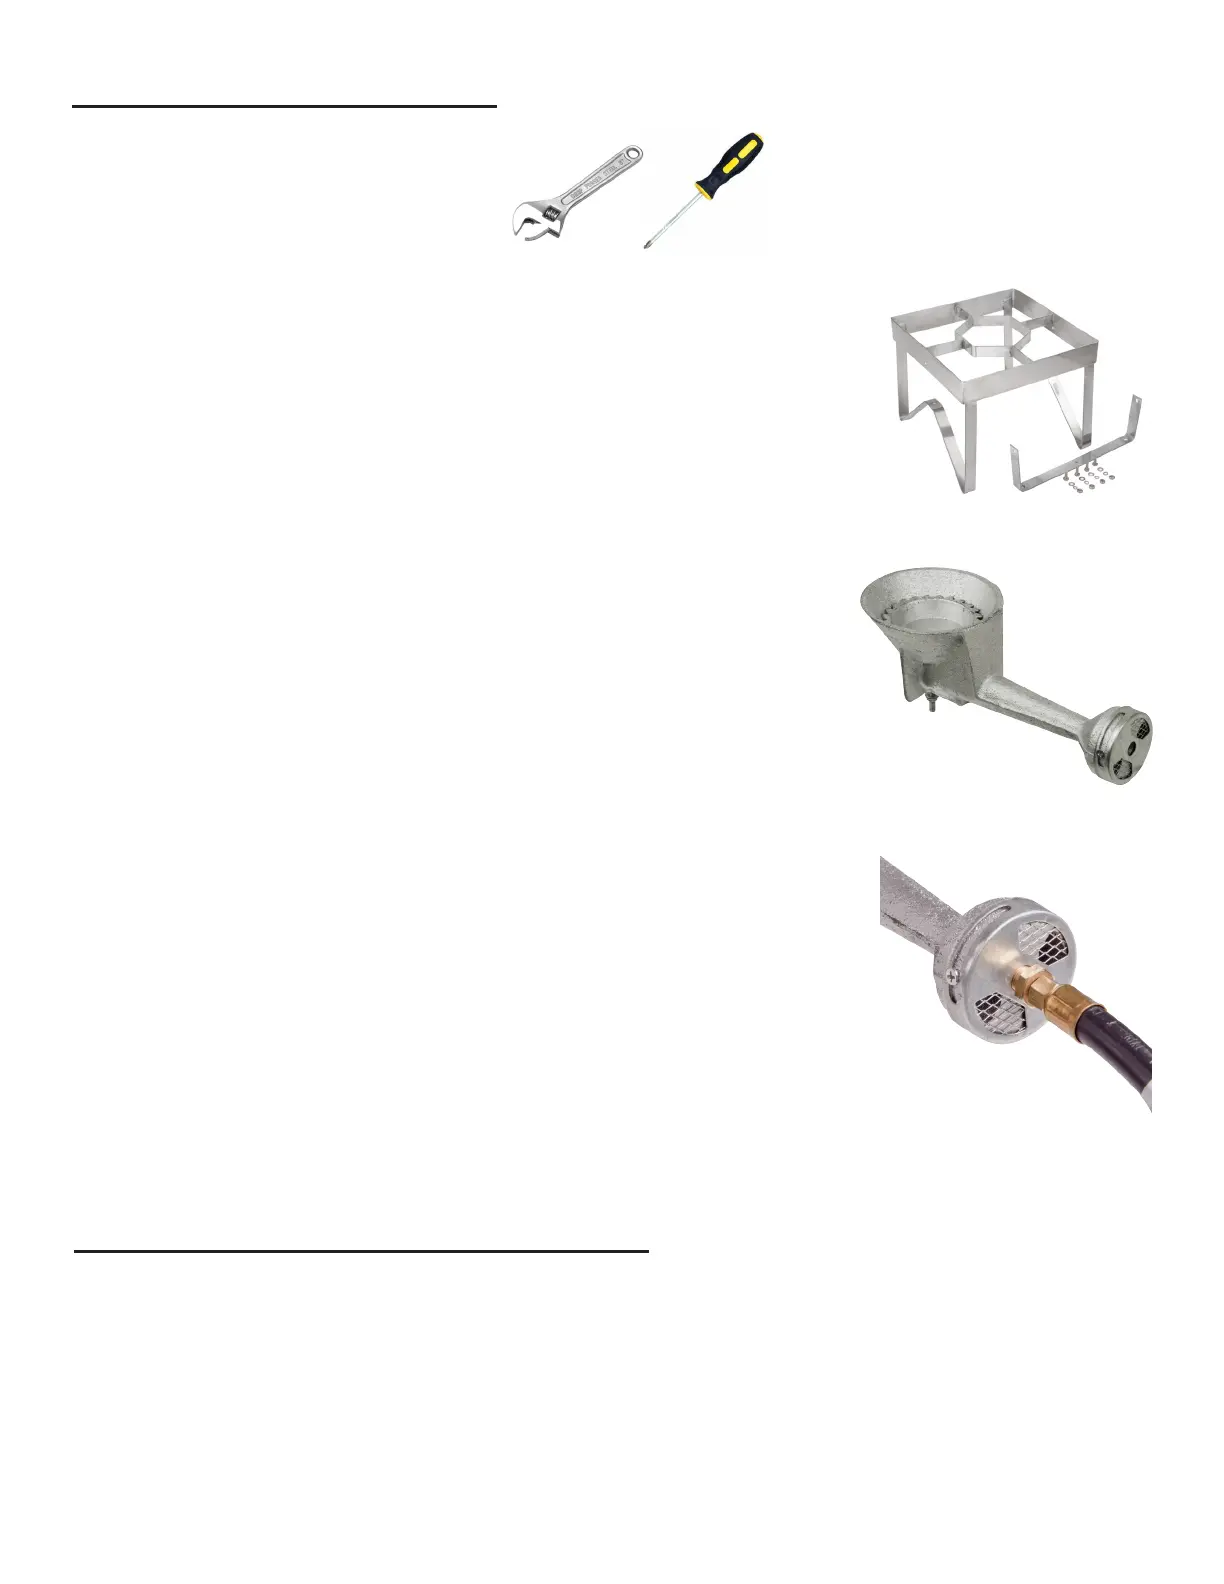
You will need:
1. An adjustable wrench
2. A Phillips head screwdriver
1. Remove all components from the box and individual packaging.
2. Turn fryer base frame upside down.
3. Burner crossbar mounng:
a. Align the crossbar holes with the corresponding frame holes.
b. Aach bolts, washers and nuts.
c. Tighten with wrench.
4. Burner and Heat Shield aachment
a. Remove bolts and washers from burner’s boom
b. Align burner’s long end above the U-shape in the frame if
applicable to your unit.
c. Align the burner’s bolt to the center hole in the crossbar.
d. Insert the burner’s bolt into the crossbar.
e. Place the heat shield over the bolt if applicable.
f. Aach washer and nut.
g. Tighten with wrench.
5. Hose to Burner aachment
a. If the air shuer is not already aached to the burner with
screws, align the air control disc over the end of the burner.
b. Burner’s screws may need ghtening; be careful not to
over ghten.
c. Insert brass hose connector into burner.
d. Turn connector clockwise with wrench unl snug; be careful
not to over ghten.
6. Return fryer base frame upright.
1. ASSEMBLY INSTRUCTIONS
2. FOOD PREPARATION INSTRUCTIONS
1. Allow poultry to thaw completely. Towel dry if necessary.
a. Never insert frozen, parally frozen or wet food into hot oil.
2. Remove giblets, neck, excess skin and extra fat from poultry.
3. Cut a 1” slit in the skin at the leg-thigh joints to allow oil drainage aer cooking.
4. Apply seasonings. Marinade should be injected into breast, thighs and drumscks.
5. Place turkey upside down on rack.
4.
5.
2.
3.
 Loading...