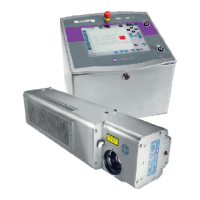
Software
A70622-D1
189/192
First start procedure
The following procedure describes the different steps to perform when starting the LO5.x
firmware version for the first time.
1
Insert the compact Flash
Switch the controller OFF and insert the Compact Flash to its dedicated location into the
controller
2
Start the controller
Switch On the controller and wait 3-4 minutes until the
screen displays the Markem-Imaje logo and icons.
Double-Click on Switch Touch icon.
3
Make a Touch screen Calibration :
► Click on the icon “TBCALIB”
► Follow the instructions displayed by the screen
(touch the screen as requested)
► When the following screen appears, click “Ok” to
validate the calibration
4
Make a network communication initialization.
► Click on the icon First start to initialize the network
communication (Ethernet and Serial). Before, you
have to take care that Ethernet and Serial cables
are disconnected.
► A First Start window will appear. Wait until the
closing of this window and close all the opened
windows then shut down the controller by using the
shutdown button in the Start menu.
► Switch Off the controller when the windows
message appears “It is now safe to turn off your
computer.
5
Resart the controller
► Switch the controller on and wait 2 minutes until the main windows appears
► Launch the laser software application through LaserME icon.
 Loading...