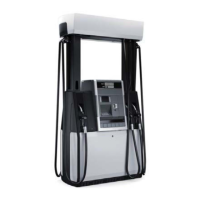
Calibration Procedure
Note: The Startup report, located at the end of this manual, can be used to perform calibration
on any meter. For NA Xflo warranty, the completed report must be sent to Wayne along with the
dispenser startup forms.
Follow the steps below to perform the calibration and complete the startup report.
For iMeters, or meters not requiring the startup report, perform the steps 11-20 for the calibration.
1
UST Temperature: Enter the tank temperature reported from the tank monitor for each fuel
type.
2
Dispenser Serial Number: Enter the dispenser serial number located on the serial plate.
3
Dispenser Model: Enter the complete dispenser model description located on the serial plate.
4
Station Fueling Point: Enter the station fueling point (FP) for the dispenser side under test.
5
Ambient Air Temperature: Enter the air temperature at the time of test.
6
Weather conditions at the dispenser: Circle or enter the conditions that apply when the test
is being conducted.
7
Meter Serial Number: Enter the serial number located on the serial label on the A side of the
meter.
8
Dispenser Side A or B: Circle the dispenser side (A or B) under test.
9
Fuel Type: Enter the fuel type and grade under test.
10
Meter totals: Enter the meter total.
11
Initial Meter Purge Reading (cu in): Enter the can value (in line 6 of SU Report) after filling as
close as possible to 5.000 gallons on the pump display.
12
Verification Value Fast Flow: (cu in): Enter the can value (in line 7 of SU Report) after filling
as close as possible to 5.000 gallons on the pump display. If calibration is within +/- 0.1% (+/-
1 cubic inch in 5-gallons), skip steps 13-18.
13
Lift nozzle.
14
Open calibration door of meter to be calibrated. (Only one door can be opened at a time
during the calibration process.)
15
Display Volume Value at Calibration: Dispense 5 gallons (20 Liters) into the prover can exactly
to the ‘0’ mark on the sight glass and then enter (in line 8 of SU Report) the amount shown
on the volume display. (Note: Write down the entire number).
16
Close the calibration door. (This now redefines the calibration factor in the pulser.)
17
Hang up nozzle.
18
Verification Value Fast Flow: (cu in): Ensure calibration took successfully within +/- 0.1% (+/-
1 cubic inch in 5-gallons). (Enter in line 9 of SU Report). (Repeat steps 13 - 18 if outside ex-
pected limit.)
19
Verification Value Slow Flow: Ensure the meter remains in calibration at a slow flow rate
(enter in line 10 of SU Report).
202 WM048523 Rev 08 01/2019
13 Meter Calibration Procedure

 Loading...