CONTACT US AT www.DRpower.com 21
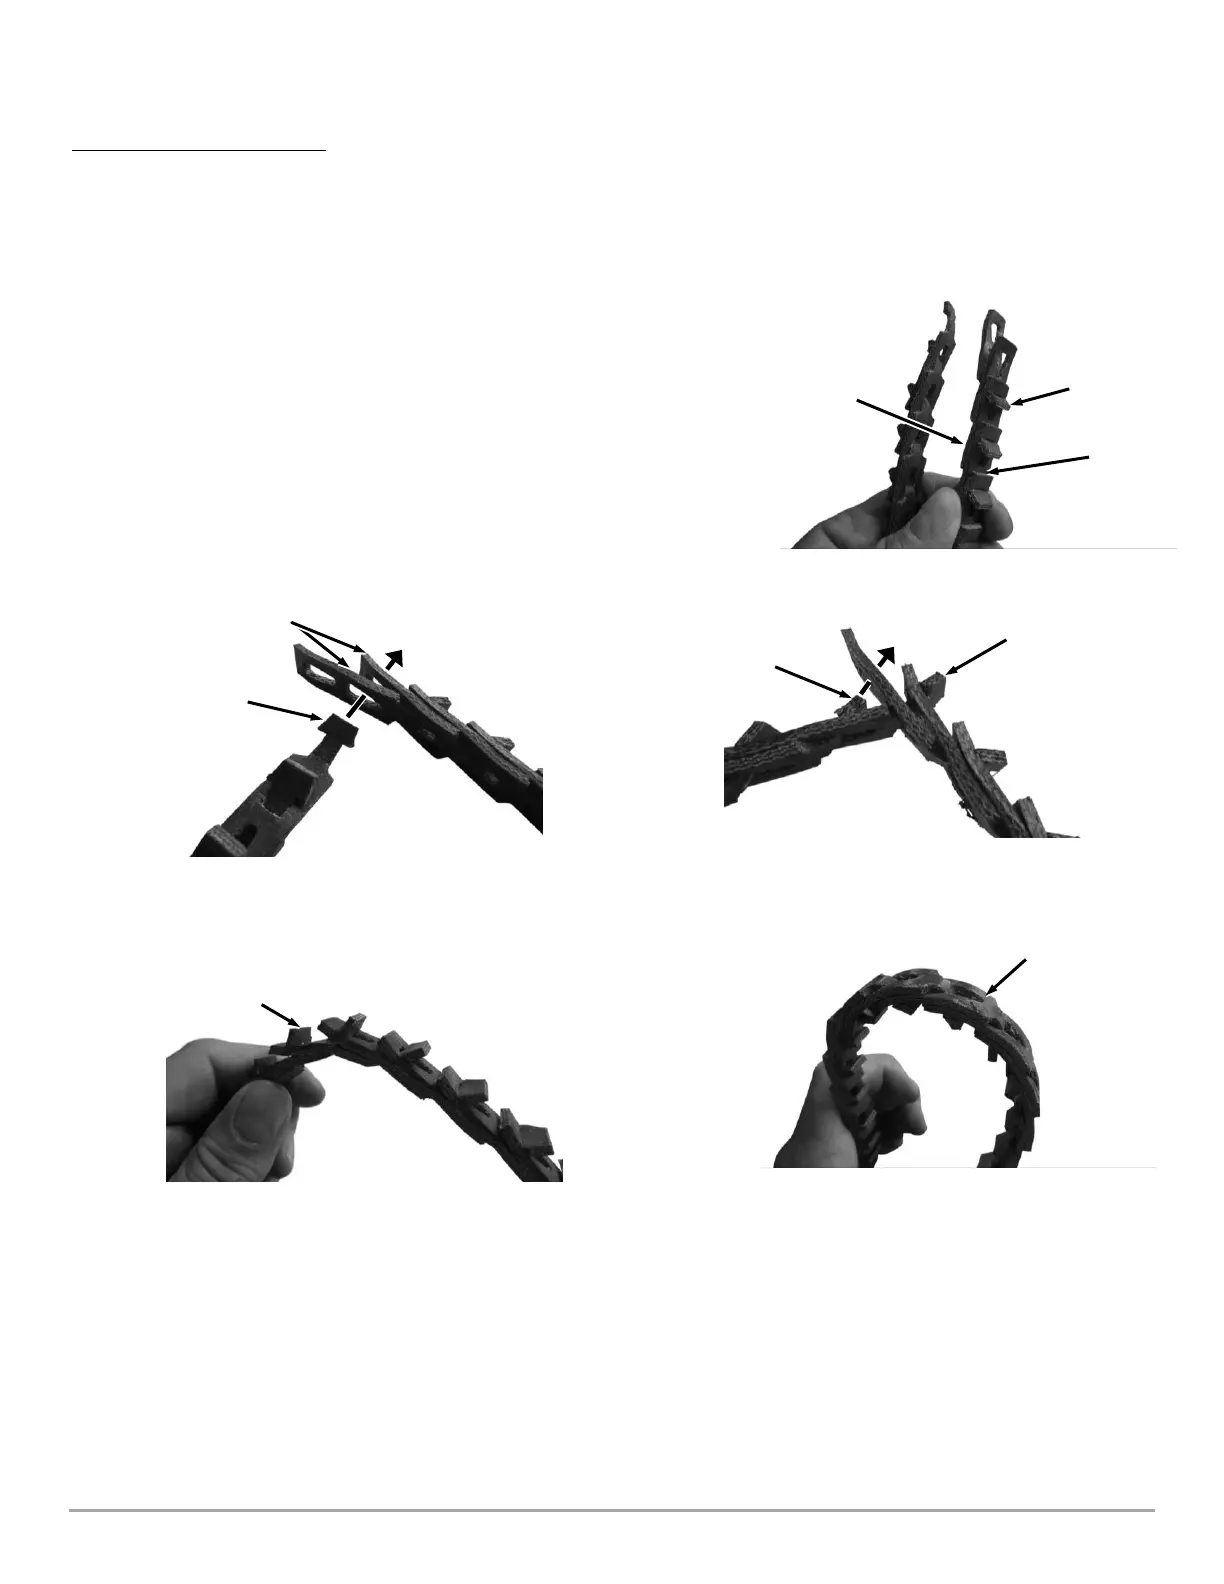
Assembling the Belt Links
This section explains the assembly of the Belt Links and is for reference when installing the Belt onto the machine.
The Belt can be assembled by hand but if you are having difficulty twisting the Tabs, Needle Nose Pliers can be used. Be
careful not to damage the Tabs when using the Pliers.
1. Turn the Belt inside out so the inside Tabs are facing out (Figure 42).
2. Twist the Tab end sideways and insert it through the two Slots until it comes
out the other side (Figure 43).
3. Twist the end of the Tab to lock it into position (Figure 44).
4. Twist the second Tab sideways and insert it into the slot of the single Link at
the end.
5. Twist the Tab back to the locking position (Figure 45).
6. Flip the Belt back to be right side out (Figure 46).
Note: The Belt must be disassembled before it can be installed around the Engine
Pulley.
 Loading...