3719543 (A3-D-P) 6 / 8
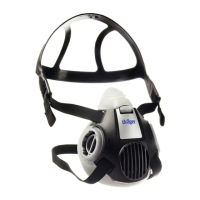
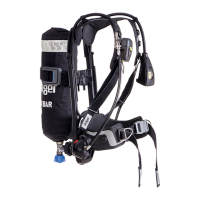
PSS
®
AirBoss Connect
Self-contained breathing apparatus
Instructions for use
2. Remove the 8 screws (Fig 29) using a 2.5 mm hexagon key.
3. Remove the battery cover.
4. Remove the batteries.
5. Install a new set of batteries observing the polarity marked inside the
pack.
6. Inspect the sealing ring inside the battery cover. Contact Dräger or
service personnel if sealing ring replacement is necessary.
7. Refit the battery cover and tighten the screws. Do not over tighten
(Dräger recommend tightening to 1 Nm (0.7 lbf ft)).
4.5.7 Fitting and removing compressed air cylinders
WARNING
High-pressure air release can cause injury to the user or other personnel
near the breathing apparatus.
► Close the cylinder valve and fully vent the system before attempting to
disconnect a cylinder.
WARNING
Impact damage to the cylinder valve or pressure reducer connector can
prevent valve connection or cause an air leak.
► Handle the cylinder and breathing apparatus with care.
For cylinder connector types not described in this document, refer to the
instructions for use supplied with the connector.
4.5.7.1 Fitting a compressed air cylinder with a threaded connector
1. Ensure that the cylinder is fully charged (see section 6.3.5).
2. Check the threads of the cylinder valve port and the pressure reducer.
Ensure that the O-ring (Fig 30, Item 1) and the sintered filter (2) in the
pressure reducer are clean and undamaged.
3. Lay the backplate horizontal, with the pressure reducer uppermost.
4. Ensure that the cam lever is fully open (Fig 31, Item 1).
5. Insert the cylinder through the cylinder strap.
6. Lift the cylinder and backplate into the vertical position (supported on
the end of the cylinder opposite the valve).
7. Align the cylinder valve with the pressure reducer (Fig 32). Tighten the
hand wheel using only the thumb and index finger until a definite stop
is felt. Do not use tools or over tighten.
8. Place the backplate into the horizontal position.
9. Fully close the cam lever (Fig 33).
10. Check that the cylinder is secure. If it is not, adjust the cylinder strap
(see section 4.5.7.7).
4.5.7.2 Fitting two compressed air cylinders with threaded
connectors
1. Ensure that the cylinders are fully charged (see section 6.3.5).
29
5427
30
5286
1
2
31
5306
1
32
5300
33
5301
2. Check the threads of the cylinder valve port and the pressure reducer.
Ensure that the O-ring (Fig 34, Item 1) and the sintered filter (2) in the
pressure reducer are clean and undamaged.
3. If not fitted, fit the connector piece on to the pressure reducer (Fig 35).
Tighten the hand wheel using only the thumb and index finger until a
definite stop is felt. Do not use tools or over tighten.
4. Lay the backplate horizontal, with the pressure reducer uppermost,
and fully extend the cylinder strap.
5. Ensure that the cam lever is fully open (Fig 36, Item 1).
6. Form two loops in the cylinder strap with the centre strap (Fig 37).
7. Insert the cylinders through the loops of the cylinder strap.
8. Align the cylinder valves with the connector piece then tighten the hand
wheels using only the thumb and index finger until a definite stop is felt.
Do not use tools of over tighten.
9. Fully close the cam lever (Fig 38).
10. Check that the cylinder is secure. If it is not, adjust the cylinder strap
(see section 4.5.7.8).
4.5.7.3 Removing a compressed air cylinder with a threaded
connector
1. Close the cylinder valve and fully vent the system.
2. Lay the backplate horizontal, with the cylinder uppermost.
3. Fully open the cam lever (Fig 39, Item 1).
4. Disconnect the cylinder valve from the pressure reducer.
5. Lift the cylinder away from the pressure reducer and remove the
cylinder.
4.5.7.4 Removing two compressed air cylinders with a threaded
connector
1. Close the cylinder valve and fully vent the system.
2. Lay the backplate horizontal, with the cylinders uppermost.
34
5286
1
2
35
5297
36
5333
1
37
5296
38
5332
39
5306
1
3. Fully open the cam lever (Fig 40, Item 1).
4. Disconnect the cylinder valves from the connector piece.
5. Lift the cylinders away from the connector piece and remove the
cylinders.
4.5.7.5 Configuring a twin cylinder strap for use with a single
cylinder
1. Pull the cylinder strap pin upwards (Fig 41).
2. Move the centre strap over to the side opposite the cam lever (Fig 42).
3. Make a loop of the cylinder strap as shown and fit it to the cylinder strap
pin (Fig 43).
4. Push the cylinder strap pin all the way through the cylinder cradle and
backplate (Fig 44).
5. Fit a cylinder to the breathing apparatus (see section 4.5.7.1).
6. Adjust the cylinder strap (see section 4.5.7.7).
4.5.7.6 Configuring a twin cylinder strap for use with two cylinders
1. Pull the cylinder strap pin upwards and remove the cylinder strap from
the pin (Fig 45).
2. Push the cylinder strap pin all the way through the cylinder cradle and
backplate.
3. Fit two cylinders to the breathing apparatus (see section 4.5.7.2).
4. Adjust the cylinder strap (see section 4.5.7.8).
4.5.7.7 Adjusting the single cylinder strap
1. Fit the cylinder but do not close the cam lever (see section 4.5.7.1).
2. Move the adjuster buckle (Fig 46, Item 1) so that the stitching is:
– Below the centre bar of the adjuster buckle (A, single cylinder
strap).
40
5333
1
41
5462
42
5412
43
5465/5466
44
5467
45
5363
 Loading...