3719543 (A3-D-P) 8 / 8
PSS
®
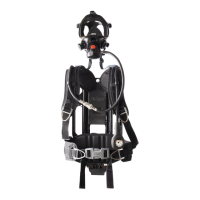
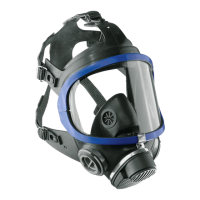
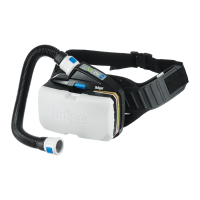
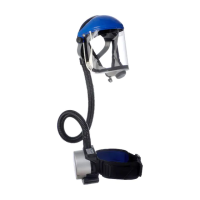
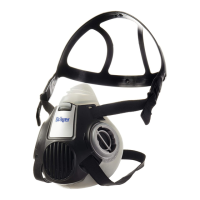
AirBoss Connect
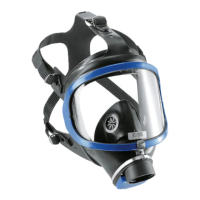
Self-contained breathing apparatus
Instructions for use
4. Remove the protective cover from the LED panel.
5. Fully remove the rubber cover from the Connect ECU UI module.
6. Remove the protective cover from the LCD screen (Fig 51).
7. Clean (see section 6.2), inspect (see section 6.3.1) and replace the
protective covers as necessary.
8. Ensure that the Connect ECU UI module is clean and undamaged.
9. Partly fit the rubber cover to the Connect ECU user interface (Fig 52).
10. Fit the protective cover over the LCD screen, using the partly fitted
rubber cover to hold the protective screen in place (Fig 53).
Ensure that the cover is orientated as shown, with the notch towards
the bottom of the screen and the part number facing upwards (Fig 53).
11. Fit the protective cover over the LED panel then fold the rubber cover
fully over the Connect ECU user interface while holding the LED panel
in place (Fig 54).
Ensure that the cover is orientated as shown, with the notch towards
the bottom of the screen and the part number facing upwards (Fig 54).
12. Fit the rubber band to the bottom of the rubber cover.
6.3.4 Functional testing
WARNING
Failure of the product to meet any of the standards or parameters during
functional testing, or any visible signs of damage, indicates a possible
system fault.
► Do not use the product and report the fault to trained maintenance
personnel or contact Dräger.
6.3.4.1 Electronic monitoring system testing
If the system fails to operate as described in this section or if any fault
indication appears, stop testing. Investigate and repair the fault before
proceeding (see section 5 for remedy information).
The functional test is carried during preparation for use and periodic or
post-repair testing of the product. To test only the electronic monitoring
system, start the test at step 1. To carry out a full functional test, prepare
the breathing apparatus as detailed in preparation for use (see section 4.1)
and start the test at step 2.
1. Press the left-hand button.
– The self-test and start-up sequences run and the system adopts
the active mode.
2. Allow the screen to deactivate.
3. Press the left-hand or right-hand button.
– The screen activates.
4. Press the manual alarm button.
– The full alarm activates (see section 4.2.1.2) with the manual
distress alarm symbol on screen.
5. Cancel the alarm.
– Key configuration. Remove and refit the key.
– Button configuration. Simultaneously hold the left-hand and right-
hand buttons until the alarm stops.
6. Remove the key.
7. Immobilize the Connect ECU UI module.
– After 27 to 30 seconds, the pre-alarm activates (see
section 4.2.1.2).
8. Move the Connect ECU UI module to cancel the alarm.
9. Immobilize the Connect ECU UI module again and ignore the pre-
alarm.
– After 12 to 15 seconds of pre-alarm, the full alarm activates with
the automatic distress alarm symbol on screen.
51
5434
52
5525
53
5435
54
5436
sos
10. Refit the key to cancel the alarm.
6.3.4.2 High-pressure leak test
1. Press the reset button of the lung demand valve.
2. Start the leak test.
3. Follow the on-screen instructions, and observe the following:
– Leak test pass . The system automatically progresses to the next
stage.
– Leak test fail . Close the cylinder valve, fully vent the system, and
investigate and repair the leak (see section 5).
– Timed out . On-screen instructions not carried out within the
permitted time. Recommence the test.
– Cylinder pressure too low . Recommence the test using a
cylinder that has a pressure above the minimum leak test start
pressure.
The breathing apparatus cylinder pressure must be above the
minimum leak test start pressure of 165 bar.
– Leak test error . The error is due to system pressure failing to
stabilize sufficiently within the permitted time. Re-attempt the test.
If the error re-occurs, do not use the breathing apparatus and
contact service personnel or Dräger.
6.3.5 Charging a compressed air cylinder
WARNING
Air quality for compressed air cylinders must meet the requirements for
breathable air according to EN 12021.
► Ensure that the air supply meets the EN 12021 requirements.
Refer to the instructions for use supplied with the cylinder and the charging
apparatus for details of charging a compressed air cylinder.
7 Transport
Transport the product in its original packaging.
8 Storage
8.1 Storage preparation
– Extend the shoulder straps, waist belt, and the straps of the mask (see
section 4.5).
– Place the mask in a protective bag (contact Dräger for supply of a
suitable bag).
– Route rubber hoses in such a way that the bend radius is not too acute
and the hose is not stretched, compressed, or twisted.
– Remove the power pack (see section 4.5.6.2).
– If the power pack has replaceable 1.5 V batteries, remove the
batteries from the power pack (see section 4.5.6.3).
8.2 Storage conditions
– Store the product between -15 °C and +25 °C.
– Ensure that the environment is dry, free from dust and dirt, and does
not subject the equipment to wear or damage due to abrasion.
– Do not store the equipment in direct sunlight.
– Fix the product securely to any raised mounting point to prevent it from
falling.
– If storing the equipment in a vehicle, ensure that the breathing
apparatus is securely retained and does not interfere with the
operation of the vehicle.
9 Disposal
9.1 General
Dispose of the product in accordance with applicable rules and regulations
in the country of use.
9.2 Disposal of electrical and electronic equipment
Electrical and electronic equipment must not be disposed of as
household waste. This is indicated by the adjacent symbol.
The product can be returned to Dräger free of charge. For information
please contact the national marketing organizations or Dräger.
10 Technical data
10.1 Electronic monitoring system
The following table shows the default settings for the electronic monitoring
system.
Low pressure alarms
Low-pressure alarm 1 55 bar
Low-pressure alarm 2 10 bar
Display accuracy
At 200 bar ± 10 bar
At 40 bar + 0 bar / -5 bar
DSU
Pre-alarm activation 27 to 30 seconds
Full alarm activation 12 to 15 seconds
Telemetry radio
Transmit power 0.5 W
Operating frequency 869.5 MHz; 469.9 MHz (UK only)
Restrictions in AZE, BLR, GEO, RUS, SMR, and UKR
RFID
Transmit power 42 dBµA/m at 10 m
Operating frequency 13.56 MHz
Restrictions in GEO and UKR
Bluetooth Low Energy
Transmit power 2.5 mW
Operating frequency 2400 to 2483.5 MHz
11 Manufacturer and document information
Manufacturer
Dräger Safety UK Limited
Ullswater Close
Blyth, NE24 4RG
United Kingdom
Tel: +44 1670 352 891
Fax: +44 1670 356 266
www.draeger.com
3719543_en
© Dräger Safety UK Limited
Edition: 4 – March 2022 (1 – May 2021)
Subject to alteration
 Loading...