EasyManua.ls Logo

Dream On Me 653 User Manual

Dream On Me 653
9 pages
To Next Page IconTo Next Page
Page #1 background imageLoading...
Page #1 background image
1
Adult assembly required.
Small parts may present choking hazard prior to assembly.
Enclosed please find simple step-by-step instructions to help you
quickly assemble your products. Before you begin we recommend
that you following the steps below:
1. Please read the instructions thoroughly.
2. Identify all parts and hardware.
3. You will need the following tools:
Philips head screw driver
Flat head screw driver
Hammer
Do Not Use Power Drills or Drivers
To protect your parts during assembly please place them on a soft
surface.
To clean surface use only water on a damp cloth. Do not use
window cleaners or cleaning abrasives as it will scratch the surface
and could damage the protective coating.
ASSEMBLY INSTRUCTIONS
ITEM NO: 653
s
Dream On Me Inc.
1532 S Washington Ave
Piscataway Township
NJ 08854
TEL: 732-752-7220
Customer Care: +1 (732) 366-1788
Question and Answer IconNeed help?

Do you have a question about the Dream On Me 653 and is the answer not in the manual?

Dream On Me 653 Specifications

General IconGeneral
BrandDream On Me
Model653
CategoryIndoor Furnishing
LanguageEnglish

Summary

Safety Warnings

Critical Safety Information and Precautions

Provides essential safety warnings and precautions to prevent injury or death during product assembly and use.

Product Components

Identification of All Parts

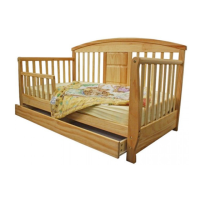
Lists and illustrates all individual parts required for the assembly of the toddler bed.

Hardware and Tools

Hardware and Tool Diagram

Illustrates the different types of hardware and tools needed for assembly.

Step 1: Connecting Side Bar to Legs

Instructions for connecting the side bar (G) to the left and right legs (D, E) using hardware.

Assembly Steps

Step 2: Connecting Headboard and Footboard

Instructions for connecting the headboard (A) and footboard (B) to the back rail (C).

Step 3: Attaching Cross Bars to Back Rail

Instructions for connecting the cross middle bar (H) and cross bars (J) to the back rail (C).

Step 4: Connecting Cross Bars to Side Rails

Instructions for connecting the cross middle bar (H) and cross bars (J) to the side rails (G).

Step 5: Attaching the Bed Rail

Instructions for attaching the bed rail (F) to the left leg (D) and side bar (G).

Step 6: Assembling Drawer Sides

Instructions for attaching the drawer right and left sides (L2, L1) to the drawer back panel (M).

Step 7: Attaching Drawer Panels

Instructions for attaching the middle panel (N) and bottom support (O) to the drawer back panel (M).

Step 8: Sliding Drawer Bottom Panels

Instructions for sliding the drawer bottom panels (I) into the grooves of the drawer frame.

Step 9: Attaching Drawer Front Panel

Instructions for attaching the drawer front panel (K) and securing the drawer assembly.

Step 10: Inserting Drawer into Bed

Instructions for aligning and sliding the completed drawer into the toddler bed frame.

Step 11: Final Check

Confirmation that the toddler bed with drawer is ready for use.

Related product manuals