Page 8 ;&(%$*4.8"4,7%<'*#$"&8#=%/7*,#*%4,77%>?@@@?@AA?BCDC1 Item 56544
EF;6GH IJ6KFGLIM NFLMG6MFMO6E6GPJ
I/*(,$"83%L8#$('4$"&8#
%K*,9%$.*%6MGLK6%LNJIKGFMG%EF;6GH%LM;IKNFGLIM%#*4$"&8%,$%$.*%+*3"88"83%&2%$."#%
5,8',7%"847'9"83%,77%$*Z$%'89*(%#'+.*,9"83#%$.*(*"8%+*2&(*%#*$%'/%&(%'#*%&2%$."#%/(&9'4$1
E*$$"83%,89%G*#$"83
GI%JK6!6MG%E6KLIPE%LMbPKH%;KIN%FOOLU6MGFT%IJ6KFGLIM-%
N,X*%#'(*%$.,$%$.*%G("33*(%"#%"8%$.*%&22?/&#"$"&8%+*2&(*%/*(2&(5"83%,8V%/(&4*9'(*%"8%$."#%#*4$"&81
O.,(3"83%S,$$*(V
1. Insert the Adapter cord plug into the
back of the Screwdriver’s housing.
2. Plug the Adapter module into an electrical
outlet. The red Charging Indicator
will light. Charge 5-7 hours.
3. Remove the Adapter from the electrical outlet.
The red Charging indicator will turn off.
OFPGLIMc%Do not overcharge the Battery.
Do not charge for more than 7 hours continuously.
The Adapter should not be left connected after
charging is complete or during operation.
Q&(X/"*4*%,89%Q&(X%F(*,%E*$%P/
1. Designate a work area that is clean and well lit.
The work area must not allow access by children
or pets to prevent distraction and injury.
2. Secure loose workpieces using a vise or clamps
(not included) to prevent movement while working.
3. There must not be objects, such as utility lines,
nearby that will present a hazard while working.
R*8*(,7%L8#$('4$"&8#%2&(%P#*
1. Make sure that the Trigger is in the off-position.
2. Disconnect the Power Adapter before operation.
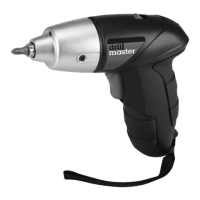
The Screwdriver is designed to accept a 1/4″
standard hex driver. Do not use larger drivers as
damage to the gears and/or motor may result.
3. Snap the desired hex driver into
the Magnetic Chuck.
4. If light is needed while driving screws, turn on
the Work Light using the Work Light Switch.
MIG6- The Work Light will activate once the
Forward or Reverse Trigger is pressed.
5. Engage the Screwdriver bit over the
item being turned. The bit size must
match the size of the screw.
6. Squeeze and hold down the top Forward
Trigger to start clockwise rotation. For
reverse (counterclockwise) rotation,
squeeze the bottom Reverse Trigger.
7. When finished using the Screwdriver, release the
Forward / Reverse Trigger to turn off the tool.
8. To prevent accidents, turn off the tool
after use. Clean, then store the tool
indoors out of children’s reach.
M&$*- The amount of actual torque will vary depending
on the cleanness and condition of the threads and
other factors. If tightening critical components,
chase threads before assembling components and
check the actual torque applied to the fastener
with a mechanical torque wrench (not supplied).
 Loading...