EasyManua.ls Logo

DUCATI Performance 96680503A - Page 47

DUCATI Performance 96680503A
83 pages
Print Icon
To Next Page IconTo Next Page
To Previous Page IconTo Previous Page
Loading...


Verifique, antes da montagem, se todos os componentes estão
-
rias para evitar danificar qualquer peça com a qual deve trabalhar.


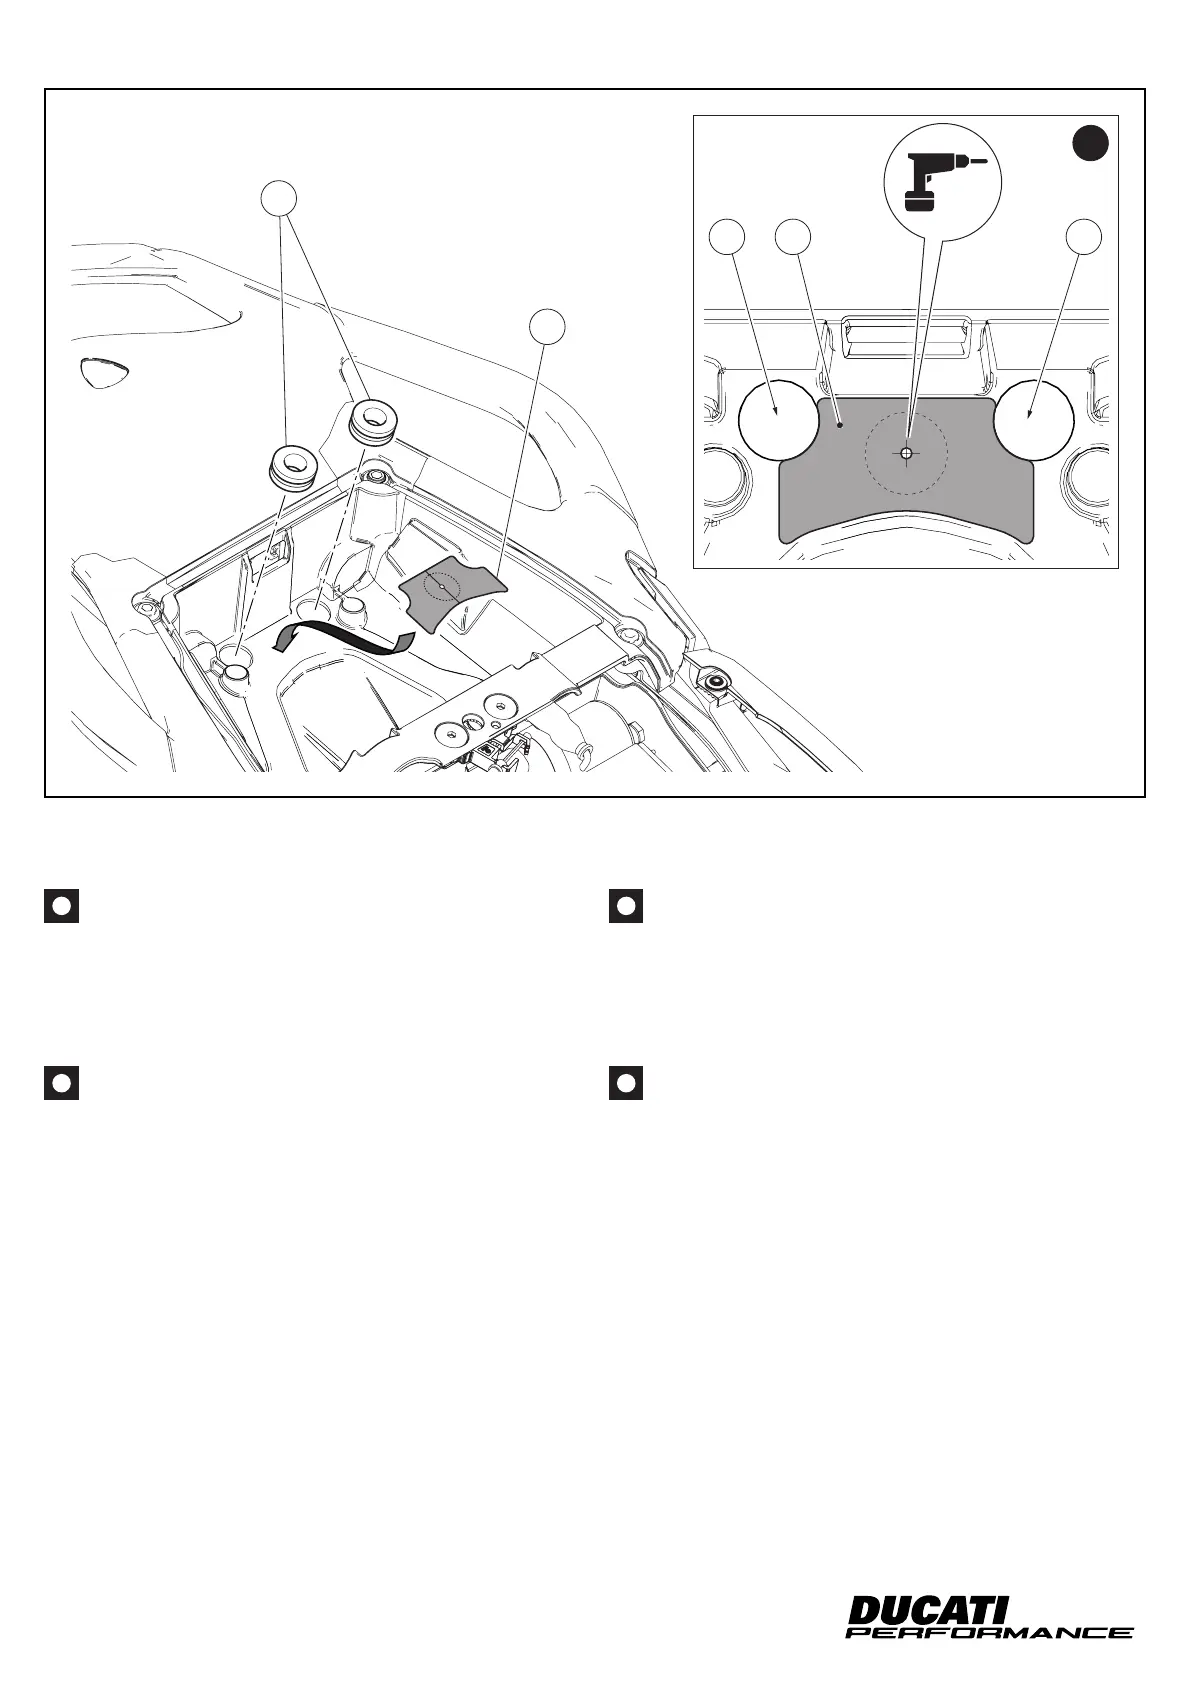
A operação a seguir deve ser feita caso exista o furo central para a
passagem da cablagem do dispositivo antirroubo, dentro do com-

Desmonte os 2 anéis de borracha antivibrações (T3) do compar-
        -


de modo que esteja centrado nos furos (T4), como o indicado no
quadro (Y). Posicionando a broca da furadeira no centro traçado

-

elimine eventuais rebarbas presentes no furo. Volte a montar os 2
anéis de borracha antivibrações (T3).


-
fore installation. Adopt any precaution necessary to avoid dam-



         


Remove no. 2 vibration damping pads (T3) from the glove com-

protection of the adhesive side of template (7). Position template

as shown in box (Y). Position the drill bit on the centre marked on
template (7), drill a first hole with a diameter of 3 mm on the glove

Remove template (7) and any burrs on the hole. Refit no. 2 vibra-
tion damping pads (T3).
ISTR 687 / 03
7
T4 7 T4
T3
7
Y