19
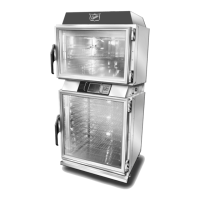
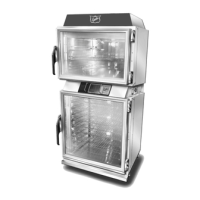
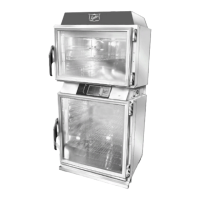
Installation and Operation of: DUKE TSC3 Proofer Oven with Touch Screen Controls
BAKING TIPS
• Always select the oven recipe and allow preheat
time prior to loading product. Only load when
the Oven Recipe Ready to Start Timers screen
is displayed. Load the oven with six pans of
dough and touch the start button.
• If the bread color is uneven, reduce
temperature and extend bake time in recipe
(see Programming Controls).
• If the bread is too dark, reduce the bake time in
the recipe (see Programming Controls). If the
bake time is reduced and the bread is still too
dark, reduce the temperature by 15° F (10° C)
and bake longer.
• When baking partial loads, center the pans in
the oven and start loading at the bottom shelf
and work up to the top.
• Opening oven door allows heat to escape.
Under normal conditions, quick loading and
unloading will not be a problem. If door is
left open too long, oven performance will be
aected.
NOTE: The Proofer Oven has a "Default" run
mode. This mode is only active when there is a
Touchscreen control communication error and
with power to the balance of the controls. This
mode allows for your Proofer Oven to maintain
approximately 370° F (188° C) in the baking oven
and approximately 105° F (41° C) and 80%RH in
the proofer. When the Proofer Oven is operating
in this mode, you will witness the Proofer and
Oven lights blinking o for approximately 2
seconds every minute. This mode allows you to
continue using your Proofer Oven for baking and
proong until the unit is properly serviced.
The "Default" run mode is disabled with an open
oven door.
5. When the bake is complete, an alarm will beep
to alert the operator. Touch the Timer or
open the oven door to cancel the alarm.
6. You can add 1 minute to baking time by
touching the button adjacent to the count
down timer. This can be done at any time
during the bake or at the end of a baking cycle.
You must add time in 1 minute increments.
7. Adjust the time, if necessary, depending on
type of dough and desired results.
Figure: Oven Bake Complete Alarm
OPERATING INSTRUCTIONS continued
 Loading...