Do you have a question about the Duratuf KIWI MK3A and is the answer not in the manual?
Important preliminary steps before beginning the assembly process.
Essential safety precautions to observe during shed construction.
Guidelines for choosing an appropriate and level location for the shed.
Assembling the back wall frame using base plates, top plates, and studs.
Constructing the front wall frame with base plates, top plates, studs, and nogs.
Connecting the side base and top plates to the front wall frame.
Positioning and securing the back wall frame onto the base plates.
Rolling the frame and fitting end wall nogs, including floor joists if applicable.
Attaching jack studs to the ridge beam and then to the top plates.
Positioning and tacking the first wall sheets on the front of the shed.
Attaching back wall sheets, ensuring correct overlap and alignment.
Fitting gable wall sheets to form the shed's end shapes.
Securing all wall sheets with nails and clouts to plates, studs, and nogs.
Laying out and assembling window studs and nogs for the frame.
Positioning and securing the window frame studs and nog within the opening.
Nailing wall sheets to the window framing and fitting the window frame.
Cutting and fitting an over panel for windows installed in gable ends.
Securing the over panel to the window frame using rivets.
Sliding and securing the louvre glass into the window units.
Laying out and assembling window studs and nog for the fixed window.
Fitting door jamb flashings between top/bottom plates and against studs.
Measuring, cutting, and fitting doorstep and overdoor flashings.
Fitting corner flashings over corner ribs, ensuring alignment with door jambs.
Centrally positioning the first roof sheet over the ridge beam and aligning ribs.
Nailing roof sheets to the ridge beam and back/front top plates.
Securing the ridge beam and top plates with roofing screws and clouts.
Leaving a gap for the clear panel and positioning adjacent roof sheets.
Nailing 45x45mm bevelled edge supports on each side of the ridge beam.
Positioning clear panel and flat roof sheets, ensuring flush joins and riveting.
Securing the clear panel to supports and attaching capping sheet.
Marking and positioning the centre door stop and top door tracks.
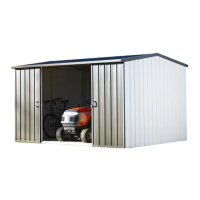
Hanging the right and left hand doors and adjusting for alignment.
Fitting door stops and bottom door guides for free sliding action.
Positioning barge flashing on gable ends and attaching spoutings.
Centrally positioning barge flashing and riveting it to the roof ribs.
Placing the shed in final position and checking for levelness.
Measuring and cutting floor boards to fit around studs.
Laying out remaining floor boards, checking fit around studs.
Nailing floor boards to joists and bottom plates, fitting floor flashing.
Attaching the T-locking handle to the right-hand door.
Positioning and screwing locking stays into door jamb brackets.
Positioning the latch on the left-hand door for secure closure.
Introduction to the shed warranty and its benefits.
Details of the guarantee for metal roofing and wall cladding.
Conditions and exclusions that apply to the shed warranty.
Minimum maintenance guidelines for shed cladding and gutters.
Instructions on how to register the shed warranty online or by phone.
| Brand | Duratuf KIWI |
|---|---|
| Model | MK3A |
| Category | Lawn and Garden Equipment |
| Language | English |