Sheet 2 of 2
LEDs contained within this luminaire shall only be replaced
by the manufacturer, their service agent or similar qualified
person.
DW Windsor
Pindar Road, Hoddesdon, Hertfordshire, EN11 ODX
T: +44 (0) 1992 474600 | E: info@dwwindsor.com
dwwindsor.com Issue 03 - February 2018
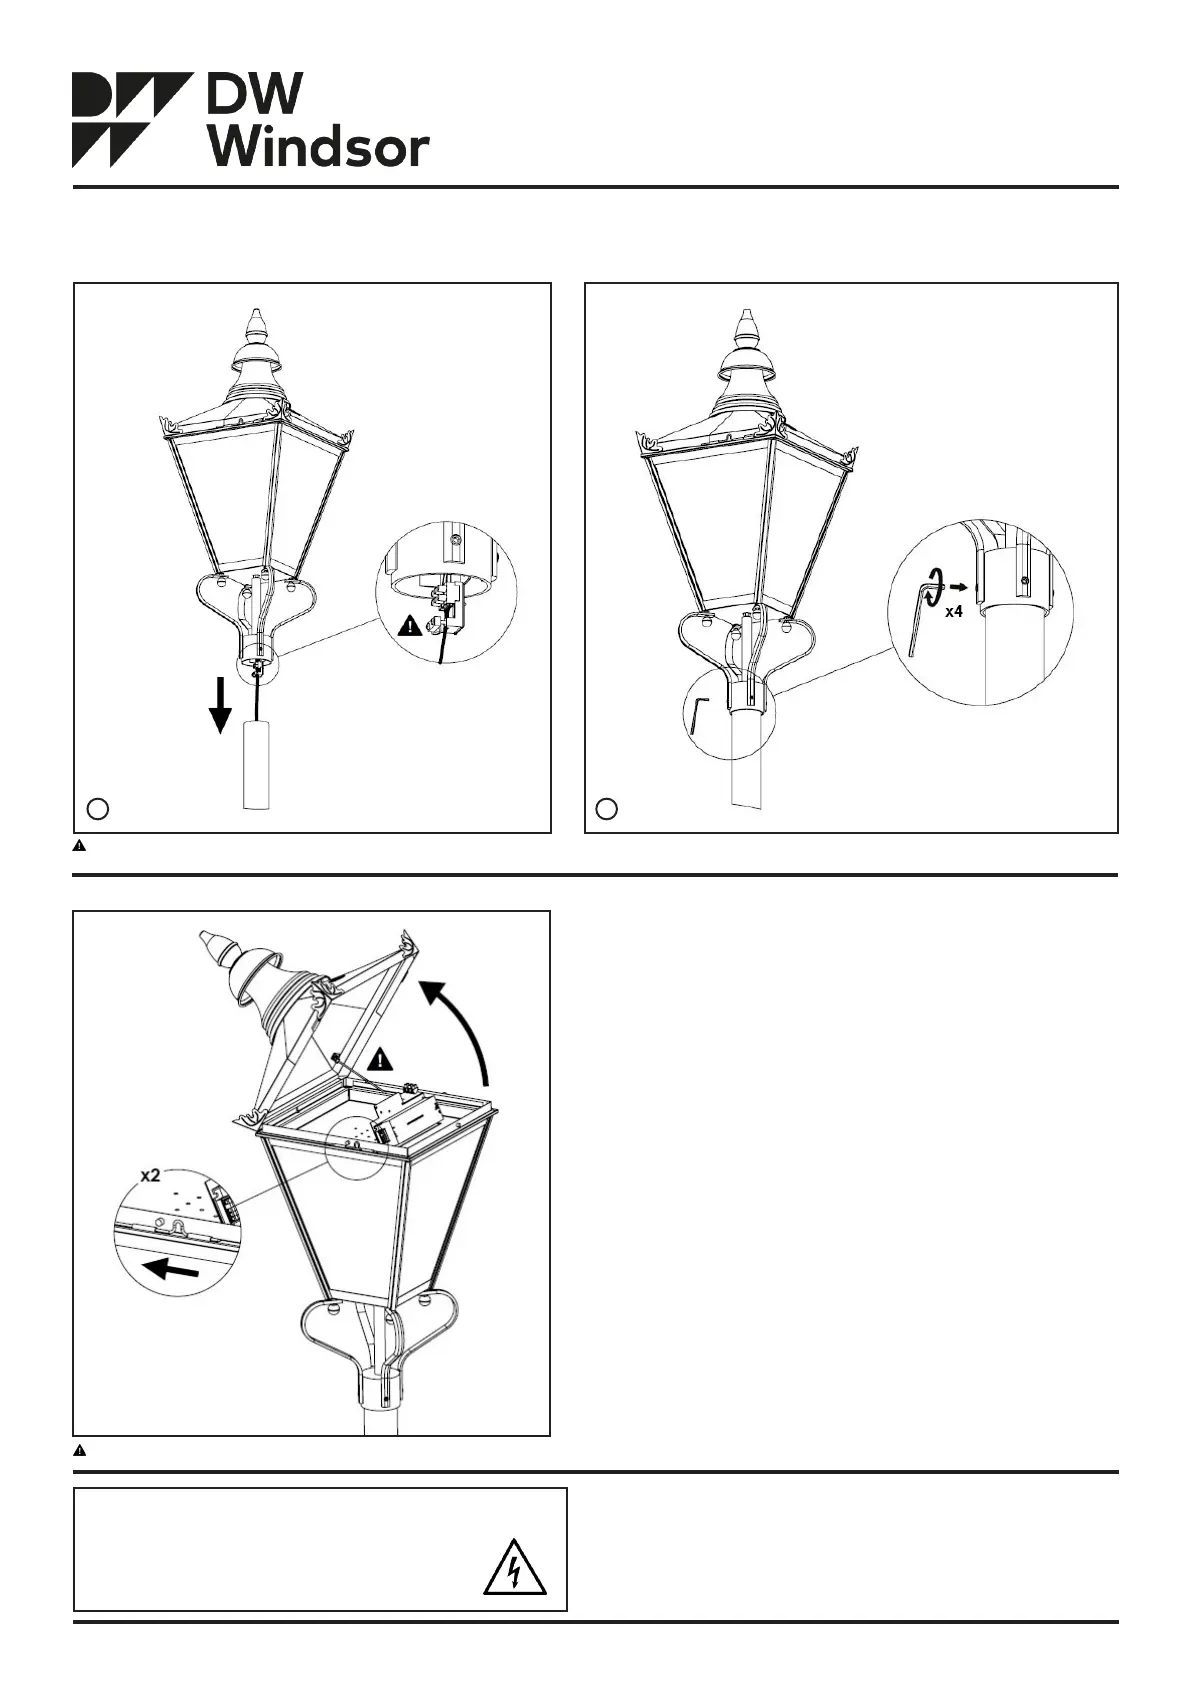
Step 3
Ensure lantern is vertical. Tighten set screws to the correct torque.
Lamping, Relamping, and Maintenance Access
Unfasten the two slide catches holding the lid in position, hinge up the lid and support
it with the lid stay.
For lamped lanterns, ensure correct lamp is used (refer to the information on the
control gear ballast if in doubt). Loosen the screws on the lampholder bracket and
lift clear. Fit the lamp into the lampholder. For ES and GES lamps, ensure they are
firmly screwed home. The lampholders are fitted with an anti-vibration device. Refit
lampholder and lid.
Pozi or Slotted
Screwdriver
3
Tools required:
Tools required:
5mm Allen Key1
See sheet 1 for wiring code.
Ensure lid stay is secure before relamping.
The Windsor Range
Traditional Lanterns
Street and Avenue sizes
NOTE!
Windsor installation steps
Step 2
Wire cable into terminal block and carefully fit lantern onto column.
 Loading...