37
I
NSTALLATION
5.5.
5.5.
5.
II
II
I
NSNS
NSNS
NS
TT
TT
T
ALLAALLA
ALLAALLA
ALLA
TIONTION
TIONTION
TION
5.1 General Mounting Information .............................................................................................. 37
5.2 Mounting Hole Torque ......................................................................................................... 39
5.3 Mounting Hole Information .................................................................................................. 39
5.4 Mounting the Pressure Transmitter ....................................................................................... 43
5.5 Installing the Flanged Pressure Transmitter .......................................................................... 43
5.6 Thermocouple or RTD Assembly, Removal and Installation ..................................................... 43
5.7 Electrical Connection ........................................................................................................... 44
5.8 Connection Assignments ..................................................................................................... 44
5.9 Flange Configurations ......................................................................................................... 46
5.15.1
5.15.1
5.1
GG
GG
G
ENERALENERAL
ENERALENERAL
ENERAL
M M
M M
M
OUNTINGOUNTING
OUNTINGOUNTING
OUNTING
I I
I I
I
NFORMANFORMA
NFORMANFORMA
NFORMA
TIONTION
TIONTION
TION
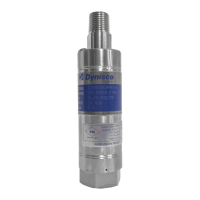
Do not remove the protective cap on the SPX until ready to install.
Before mounting the SPX, check mounting hole carefully. The SPX must only be mounted in holes that
satisfy the requirements below. A hole that does not satisfy these requirements can damage the
Transmitter.
Insure the mounting hole is clear of any frozen polymer or debris and is machined to the proper
dimensions.
For threaded SPX transmitters coat the threads with a high temperature anti-seize grease or a suitable
parting agent, this will help prevent the SPX snout from sticking permanently in the mounting hole. For
flanged configuration units, apply Anti-Seize to mounting bolt threads. Use proper Buttonseal gasket
and install on transducer tip.
Install unit into the process connection. (Do NOT torque transmitter into the hole at this time!) Allow time
for the transmitter snout temperature to equalize to the process temperature. This will help eliminate
thread galling and ease removal later. There should be NO pressure applied at this time.
Always use a torque wrench applied to the designated hexagon collar or mounting bolts while screwing
the transmitter in and out. Do not apply the tool to the housing or housing/sensor connection.
After temperatures have equalized, apply proper torque as described in Section 5.2 of the Manual and
tighten transmitter into mounting hole.
After the correct torque has been applied units with flexible capillary require the electronics to be
mounted away from the process heat using mounting hardware, P/N 200941.
 Loading...