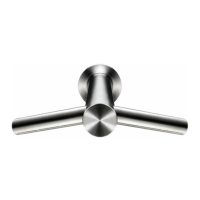
24
01 Insert a 1.5mm or 1/16 Allen key into the small hole in the underside of the tap.
Note: it will be necessary to force the Allen key through a rubber sleeve and into the grub screw.
Turn the Allen key between 12 and 15 times to fully undo the screw.
Please note: the grub screw will remain within the tap.
02 Remove the stem cap from the Tap.
Please note: the stem cap will be lightly bonded to the stem and will require force to remove.
03 Press the two central clips and remove the PCB housing outer.
04 Press the two same clips and carefully unclip the PCB from the PCB housing inner.
05 Carefully remove the PCB assembly being aware that a short wiring loom is attached to it.
Carefully disconnect the loom from the PCB.
06 Remove the T-8 screw from inside the PCB housing inner.
07 Push the Comms cable through the hole in the PCB housing inner.
08 Using a pair of long nosed pliers carefully but firmly pull the PCB housing inner from the Tap.
09 Carefully insert a thin, flat bladed screwdriver between the casing of the tap and the top centre of
the Lens housing assembly. A split-line in the Lens housing assembly allows you to push down and
crease the housing so that it folds in on itself. With the Lens housing assembly creased, firmly pull
it out of the tap.
10 Remove the Aerator from the underside of the tap.
Note: it is strongly advised to use the approved Aerator tool to perform this task.
Important: If the reason for the repair is to replace the Water pipe service assembly, or Comms loom
assembly, please follow the instructions in the ‘Air hose assembly removal’ section of this manual
(page 10), prior to coninuing with the following instructions.
11 Carefully but firmly using a pair of long nosed pliers pull the Water pipe service assembly out from
the Tap.
Note: using the hole where the Aerator was previously situated to push the rear of the Water pipe
housing may ease removal.
12 Remove the Thermal insulating sleeve.
13 Carefully detach the Comms loom assembly from the Water pipe housing.
14 Pull the Water pipe service assembly out of the Tap.
15 Pull the Comms loom assembly out of the Tap.
Section 4
Internals of Tap replacement removal
Warning: before continuing ensure the power and water supplies to the the machine are switched off.
 Loading...