02
Protective safety footware must be worn when installing/repairing AB09/10/11.
LOCATION
• The unit is designed for dry, internal location only.
• Consult local and national accessibility codes and regulations for relevant installation guidelines.
Conformity and compliance is the responsibility of the installer.
• Ensure the required electrical and mixed feed water supplies is available for later connection.
• Water pressure must be: maximum 8 bar (0.8Mpa) and minimum 1 bar (0.1Mpa).
• The sink should not be fitted with a plug.
• When drilling holes, follow the instructions of the manufacturer of the work surface.
Recommended tools to repair AB09/10/11:
1.5mm allen key
Torx T-15 screwdriver
Torx T-10 screwdriver
No. 2 sized Phillips screwdriver
Thin flat bladed screwdriver
Long/needle nosed pliers
Aerator tool
Tap spanner/wrench
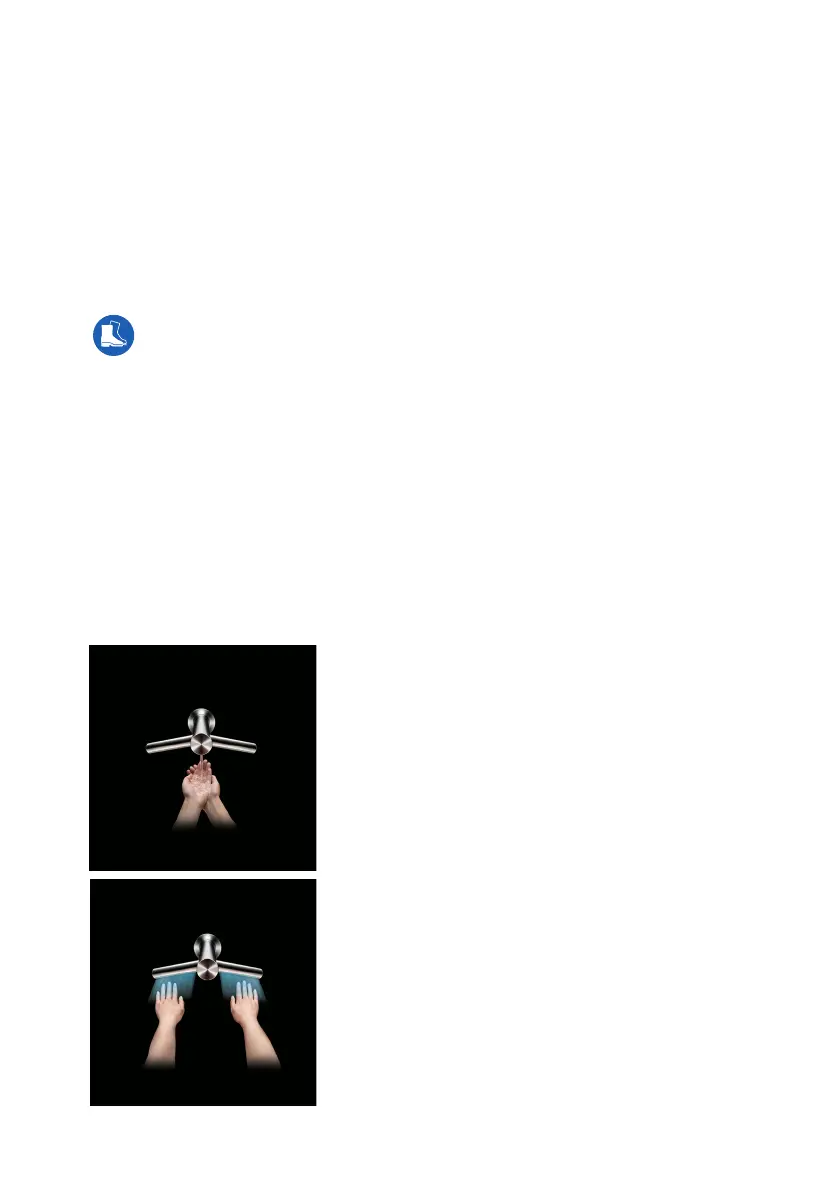
1. Insert hands beneath the centre of the tap to
automatically start the mixed water flow. If hands
remain in place the water will continue to flow for
a maximum of 30 seconds before automatically
switching off.
2. Place hands beneath the tap arms to start the
airflow. The water flow will automatically
stop.
3. Draw hands though the airflow. Hands should
be dry within approximately 12 seconds
(14 seconds US and Canada).
The airflow should stop within 4 seconds of hands
being withdrawn from the product.
If hands remain in place the air will
automatically cut off after 30 seconds before
automatically restarting again after 4 seconds.
Testing for correct operation
 Loading...