01 Using a small flat bladed screwdriver, unclip and remove the HEPA filter from the base of the
Motorbucket.
02 In some cases a T-15 screw may have been fitted into the Motorbucket release button. If this is the
case, remove.
03 Press the Motorbucket release button and remove the Motorbucket.
04 Disconnect the mains water supply from the Solenoid assembly.
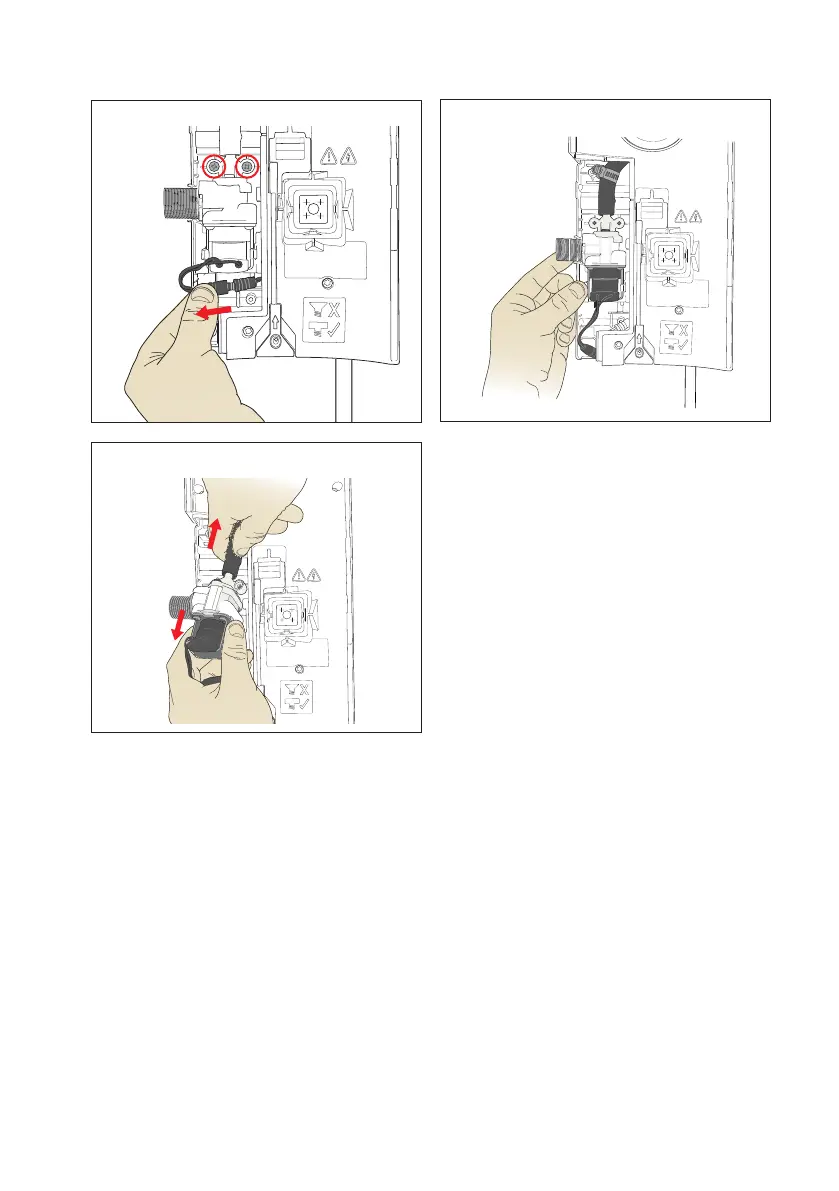
05 Remove the two T-15 screws in the water cover.
06 Loosen the water pipe clip on the water pipe.
07 Disconnect the Solenoid connector and remove from the Solenoid to PCB loom.
Remove the two Phillips screws.
08 Unclip the Solenoid from the Backplate.
09 Detach the Solenoid from the water pipe.
06
Section 1
Solenoid assembly removal
Warning: before continuing ensure the power and water supplies to the the machine are switched off.
07
08
09
 Loading...