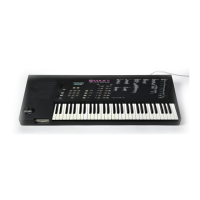
Emax II operation manual
187
below the sample’s pitch, and the high note at the sample’s pitch. This high note will give
the original sample sound with an extremely clean high end.
■
Creative use of multi-tracking:
Try multi-tracking sounds on a conventional
recorder, then sampling the combination sound into the Emax II. Recording a half-speed
piano note along with an electric bass and a little bit of analog synth in the background
gives a pretty outrageous bass sound...
Session No. 2:
SAMPLING ACOUSTIC INSTRUMENTS
Sampling acoustic instruments is not easy, which you’ve already discovered if you’ve
tried it. It’s not impossible, but you need persistence and patience. Here are some tips
that will help make matters easier.
Use Proper Miking Techniques
Prepare for a sampling session as if you were intending to record a Grammy-winning
album. This means matching the right mics to the right instrument. The general rule is
to use condenser mics for instruments that need delicacy, high end, and good transient
response. Dynamic mics seem to work best when capturing the sound of instruments
that exhibit raw power, such as bass drums, some singers, and stacks of Marshall
amplifiers. Some mics are acquiring a reputation as good sampling mics. What this
usually means is that the mic has a very flat and accurate frequency response, as opposed
to, say, vocal mics that boost the high end for more vocal presence.
Mic placement is crucial. Sounds that come from several directions, as is the case with
acoustic instruments, which tend to radiate sound, tend to be out of phase with respect
to each other. If the mic picks up these multiple signals, some will reinforce each other,
while others will tend to cancel. This reinforcement/cancellation effect produces
frequency response anomalies that can make a sound thin (with excessive cancellation)
or muddy and boomy (with excessive reinforcement).
One way to minimize phase problems is to use a PZM (Pressure Zone Microphone,
Crown’s trademarked name for this particular type of mic technology). A PZM mounts
the mic element over a small gap, facing a broad rectangular plate. This mounting
arrangement makes the mic relatively insensitive to receiving multiple out-of-phase
signals from an acoustic sound source.
I’ve often determined proper mic placement by sitting in the control room and taking
notes while the engineer, wearing headphones, tries a variety of miking positions. There
are some standard mic placements, but use these as points of departures only. Every
instrument, every microphone, and every player is different. Adapt to the circumstances
at hand.
THE ART OF SAMPLING
Acoustic Instruments

 Loading...