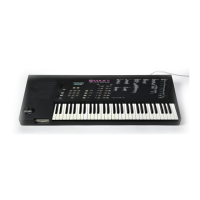
Emax II operation manual
22
2. Select the Arco Strings disk (4 M Emax IIs- Piano & Strings) , and insert it in the drive.
3. Press the button labeled LOAD BANK. The display will say:
Load All Presets
and Sequences
4. Press ENTER to load the floppy disk. Remember that loading in a new bank will erase
the currently loaded bank, so always think twice before pressing Enter to load the bank.
5. Play the sounds from the newly-loaded disk, then move on to the next section.
LOADING A BANK FROM THE HARD DISK
If you are using an external hard disk, make sure that it is correctly connected
(Connection Instructions) and formatted (MASTER 5) for the Emax II.
1. Press the button labeled DRIVE SELECT and use the data slider to locate the hard
disk. Hard disk drives may use SCSI ID numbers 1-7.
2. Press the LOAD BANK button; the display says: Load Bank, and shows the name and
number of the current bank. Use the data slider to scroll through the available hard disk
banks. Stop when you find the bank labeled Arco Strings (4 M Emax IIs- Piano & Strings),
then press ENTER.
■ An alternate method of loading a hard disk bank is to press LOAD BANK, then simply
type in the number of the bank using the numeric keypad.
The display will show the current preset number and name (the cursor will flash
underneath the first digit). Start playing the keyboard and adjust the Volume slider for
a comfortable listening level.
SELECTING DIFFERENT PRESETS
1. The bank you just loaded contains several presets. To call up a new current preset, use
the keypad underneath the display. Note that “leading zeroes” must be entered for
preset numbers (i.e. type 0 and 0, not just 0, to call up preset 00). Now type 0 then 0 on
the keypad; these will replace the numbers indicated by the flashing cursor.
2. The display says P00. Play the keyboard... hey, check out those sounds!
3. Now call up more presets (refer to GENERAL INSTRUCTIONS 1, “Selecting the
Current Preset,”). If you enter a number for which there is no preset, the display will list
the entered preset number and say “Empty Preset”; try again.
GUIDED TOURS
Guided Tour #1

 Loading...