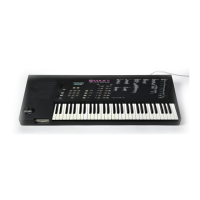
Emax II operation manual
24
■ Preset Management This module handles the preset “housekeeping”—load presets
from disk, save presets to disk, create, copy, rename, or erase presets, and check on how
much memory space a preset uses up.
■ Preset Definition This module lets you change parameters within a given preset. Set
up the arpeggiator or MIDI options, assign the pitch bend and modulation wheels to
control various parameters in real time, copy or erase voices, edit the voice assignment,
choose Stereo Voice mode (more on this later), and set some keyboard parameters
(dynamics and crossfade between overlapping voices).
■ Dynamic Processing This module sets parameters that should be familiar to those
who have worked with analog synthesizers. Set the dynamics by adjusting the VCA
envelope, control timbre using the VCF (filter) and its associated AHDSR envelope
generator, modulate the signal with the LFO, tie the keyboard velocity to various
parameters, set the tuning, attenuation, and delay for each voice, and more.
Remember—if you want to save modified voices or presets, save the altered bank to
disk. Otherwise, any changes will be lost as soon as power to the Emax II is interrupted.
ACTIVATING A MODULE, SELECTING FUNCTIONS,
DE-ACTIVATING A MODULE
Here’s important background information on how to access the various module
functions. As the tours progress, we’ll relate this information to practical examples.
■ Activating Each module has an associated switch. Most of these are found in the
right-most series of blue buttons, however, the Sequencer Setup and Sequencer Manage
module buttons are found in the green column of Sequencer-related buttons. Pushing
the associated switch “activates” the module, as indicated by an LED next to the switch
lighting up. Upon activation, the display’s top line will show the Module Identifier (such
as “Master,” “Preset Management,” etc.). In some cases, upon activation the display will
ask you to specify the current voice (as described in the next Guided Tour). Once the
module is active, it’s time to start...
■ Selecting functions Each module includes a printed list of functions on the front
panel; these functions are available when the module is active. Selecting a module
function requires keying in its associated number with the keypad. We will shortly give
an example of how this all works.
■ De-activating When you’re finished with the module, either press its button again
to de-activate, or simply activate a new module.
■
Any time you make a
mistake, get confused,
or get lost in the mod-
ule, simply de-activate
the module. Then, re-
activate and try again.
GUIDED TOURS
Guided Tour #1
 Loading...