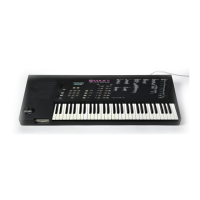
Emax II operation manual
45
DISK TYPE
Emax II requires double-sided, double-density (DSDD) 3.5-inch microfloppy disks. In
some cases the less expensive single-density or single-sided disks will work with the
Emax II, but we do not recommend using these except for non-critical applications.
FLOPPY DISK DRIVE
The floppy disk drive on your Emax II is used for transporting sounds in and out of the
Emax II and also for BACKING UP your valuable sound collection. Floppy disk drives
should be considered fragile and should not be subjected to mechanical shocks or
temperature extremes. The mechanism will occasionally make “clunking” sounds; these
are normal.
HARD DISK DRIVE
The hard disk drive built-in to your Emax II is the drive that you will want to use most
often. In fact, you will be spoiled and will never again want to use a floppy disk after
using the hard disk. If the hard disk ever develops an error, you will be very happy that
you have made a backup. Hard disk drives should be considered extremely fragile (ie.
do not drop your Emax II on a hard surface). If you treat your Emax II gently and with
due consideration you should get years of faithful service from the hard disk. Hard disks
are great!
LABELING DISKS
Write on an adhesive label which you then attach to the disk. Always label your disks
so that you don’t confuse blank and recorded disks.
WRITE-PROTECTING DISKS
Write-protecting a disk turns off the disk drive’s ability to record on to the disk, thus
preventing accidental erasure. To write-protect a disk, open the write-protect “switch”
in the corner of the disk. To write-enable the disk, close the “switch” so that there is no
visible hole in the disk case.
If you try to write on a disk that is write-protected,the Emax II display will say “Disk is
Write Protected”.
INSERTING A DISK INTO THE DRIVE
Referring to the diagram on the following page, insert the disk into the drive label-side
up, with the metal disk protector flap going in first. Gently push the disk in as far as it
will go, until you hear a solid click that indicates the disk is seated in the drive.
GENERAL INSTRUCTIONS
Disk Handling

 Loading...