EasyManua.ls Logo

Eagle TPO-9 - Page 6

Eagle TPO-9
16 pages
Print Icon
To Next Page IconTo Next Page
To Previous Page IconTo Previous Page
Loading...
lnstaitation
Manual
TP0-9/TP0-9A
.
.
·
......
...
Step 1: Measure
lift
area
and
check area
for
defects
T?Oa9/T?O-SA
..
5
The first step to
any
sw~essful installation is to
measure
the bay
f~-"rrect
positioning
of
the lift.
Msasure
the width
of
your
doori.vay
and
divide lt
by
two.
This will give you the center
of
your doorway.
Maka
a
mark
on the ficcr at
the
··
center
of
the
door-Nay
and measure.from the
side-wc:U
to center
mark.
Note
U1s
distance
and
measure the
S?me
distance
from
the
side
wall
at the fr=;;t
of
the
shop. Now snap a chalk
line
between the
two
marks--this
is the csr.tsr line fer
your
lift
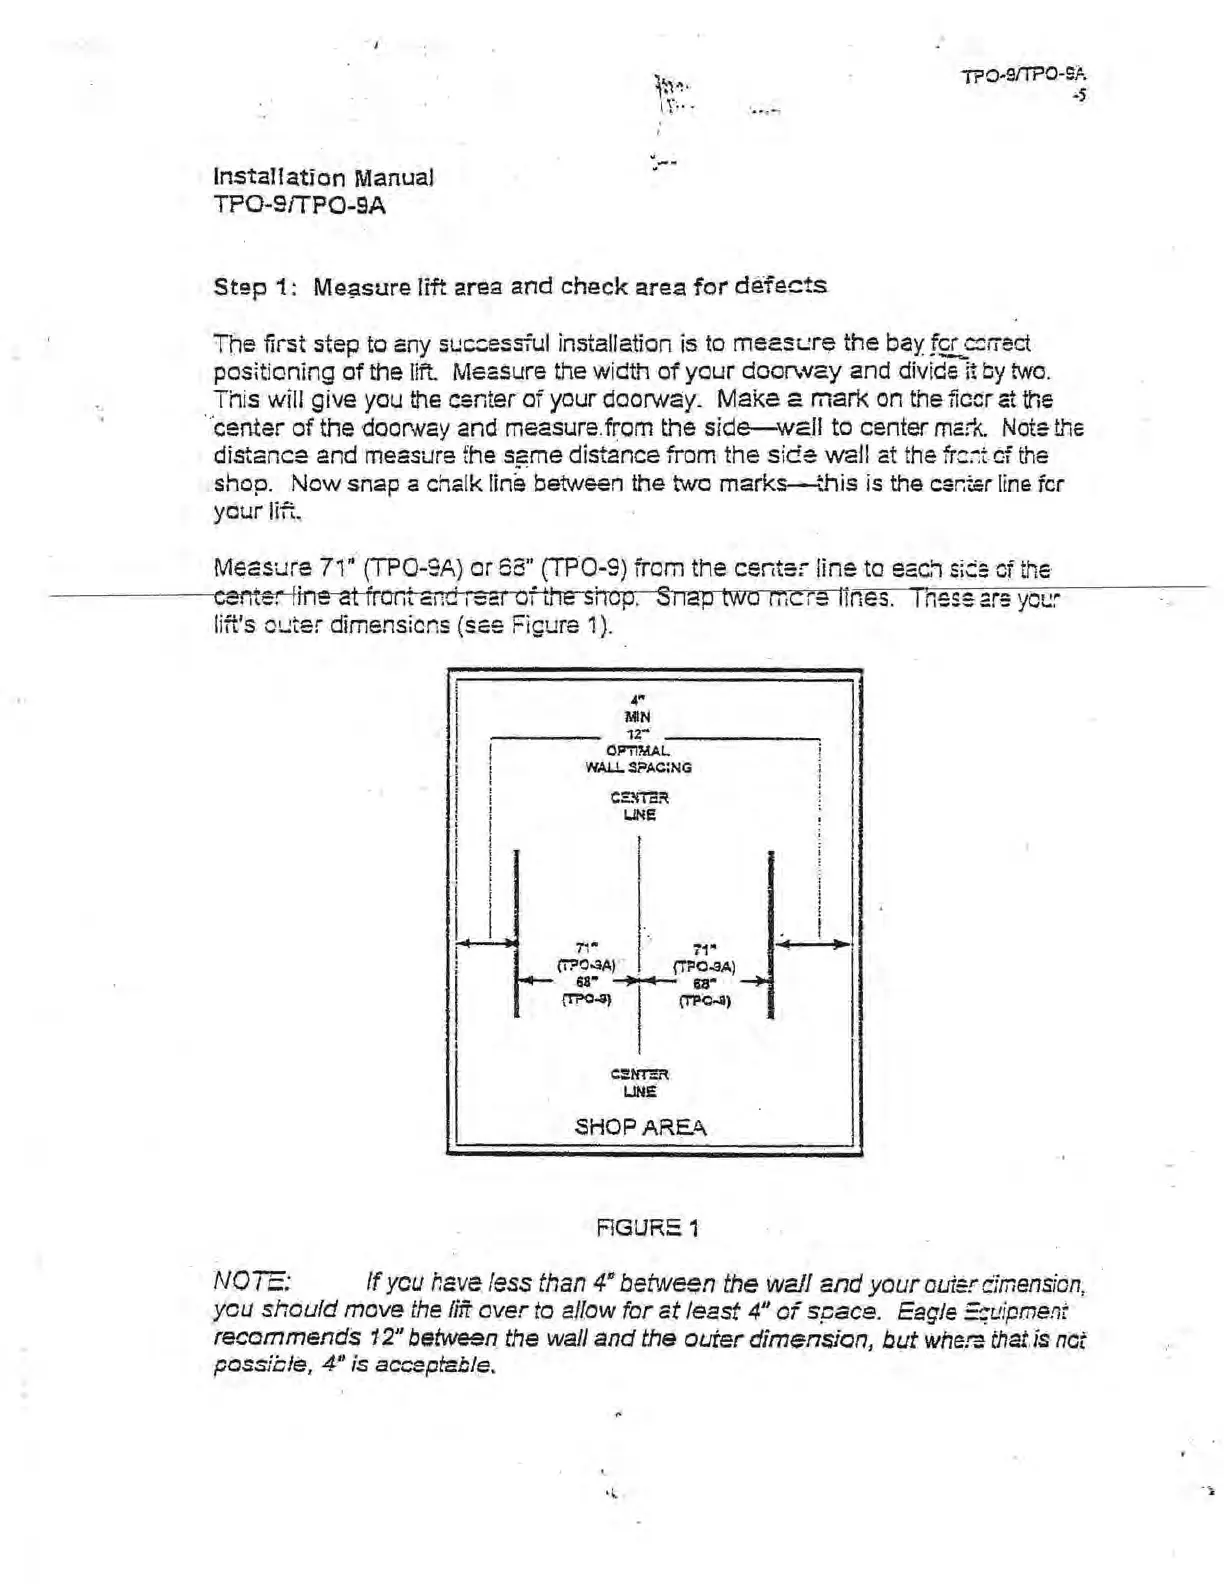
Measure
71
~
(TP0-9A)
or
68" (TP0-9)
from
the
center
line to each
s;ce
cf
the
csnte!"
Hne---atfront-21
,
t!
r
;.:::r
of
the
shoo.--Snao
two
mere
lines.
I
hes:
are
ycl!~
I '
lift's
01:.;ter
dimensions (
Sf;;e
Figure 1
).
'
I
-4"
MIN
,2
..
I
OFmAAL.
i
WAW..
.S?AC:NG
!
!
C!.fflR
l
UNE
J
i
!
'
l
r
I
I
!
i
!
I
I
i
!
l
I.
I -
~
•
!
1~"'
i'1"
;
(i?O.aA)
-
{il=O..SA)
~
58'"
)I
..
83'"
-+
{1'?0-8)
(T?c.a)
I
I
C!NT'::R
UN~
SHOP
ARE.A.
FlGURE:
1
NO
i E:
If
ycu have less than
4~
between the
wa/1
and
your
out::rcfmensicn,
you
should
move
the lift
over
to allow
for
at
least
4"
of
space. Eagle =~uipment
recommends 12" between the wall
and
the outer dim~nsion,
but
wher.:
that
.
is
not
possible,
4"
is acc.eptable.