LL
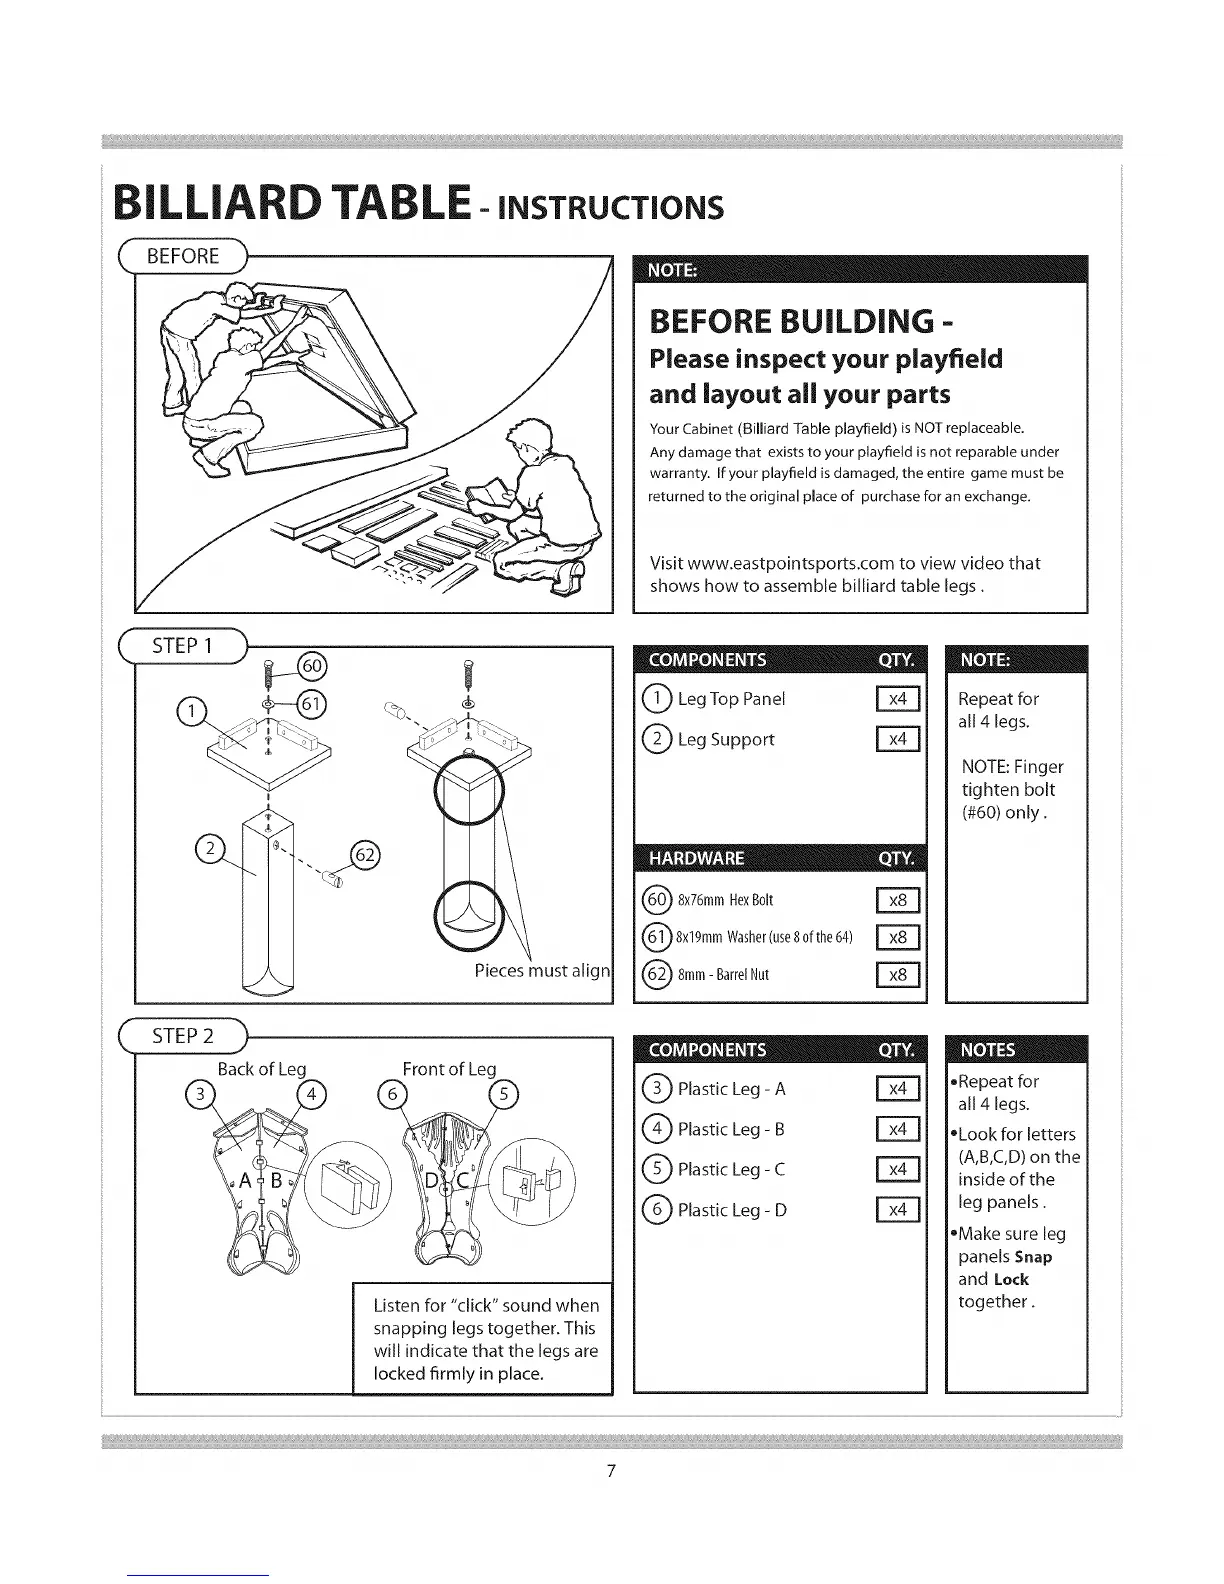
BEFORE
L
-iNSTRUCTiONS
BEFORE BUILDING-
Please inspect your playfield
and layout all your parts
YourCabinet (Billiard Table playfield) is NOTreplaceable.
Any damage that existsto your play_etd isnot reparable under
warranty. If your playfield is damaged, the entire game must be
returned to the original place of purchase for an exchange.
Visit www.eastpointsports.com to view video that
shows how to assemble billiard table legs.
(_STEP 1
Pieces must aligr
Q_IQ O
i Q LegTop Panel
Q Leg Support
O 8x76mmHexB01t [_
8x19mmWasher(use80f the64)
O 8ram- BarrelNut E_]
Repeat for
all 4 legs.
NOTE:Finger
tighten bolt
(#60) only.
(_ STEP2
Back of Lec
i
Front of Leg
Listen for "click" sound when
snapping legs together. This
will indicate that the legs are
locked firmly in place.
e "e O
IQ PhsticLeg-A [_
Q Plastic Leg- B
Q Plastic Leg- C [_
G) ,a ic eo-O 123
• Repeat for
all 4 legs.
• Look for letters
(A,B,C,D) on the
inside of the
leg panels.
•Make sure leg
panels Snap
and Lock
together.
i
 Loading...