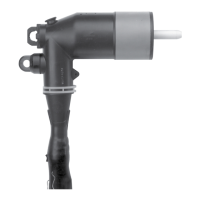
600 A 35 kV Class T-OP II connector assembly installation instructions
4INSTALLATION INSTRUCTIONS MN650051EN May 2017
Step 9
Install compression connector
ote:N Refer to chart supplied with the crimp connector for
tool and die to be used.
Wire brush conductor, only if it is aluminum.
Remove protective cap from compression connector.
Insert conductor completely into compression connector
and rotate connector to distribute inhibitor.
ote:N Connector must be fully seated on cable conductor.
Align flats of compression connector and apparatus
bushing for minimum conductor strain.
Make first crimp 1/2” (13 mm) below shoulder of
compression connector. (Refer to Figure 10.)
CRIMPING
AREA
BUSHING
CABLE
ADAPTER
TOOL
Figure 10. Line il lus tra tion of crimping area
Rotate each successive crimp 90º on com pres sion
connector and allow 1/8” (3 mm) between crimps.
Wipe excess inhibitor from connector and
adapter surfac es.
Step 10
Check dimensions
Check length from end of compression connector to top
of cable adapter.
Length should be between 6 3/4” and 7 3/4”
(171-197 mm). (Refer to Figure 11.)
COMPRESSION
CONNECTOR
6 3/4 – 7 3/4"
(171 – 197 mm)
TAPE MARKER
CABLE ADAPTER
CONCENTRIC
Figure 11. Line illustration for dimensional check
Install T-body and reducing tap plug
Step 11
Install T-body
Clean and lubricate outside of cable adapter with
lubricantsupplied.
Clean and lubricate inside of T-Body with
lubricantsupplied.
ote:N If test point T-Body is used, insure test point is
opposite front plate side of T-Body.
Without moving the cable adapter, slide T-Body onto cable
adapter until compression connector eye is centered in
600 A interfaces. (Refer to Figure 12.)
ote:N The end of the cable adapter must line up with the
top edge of the tape marker after T-body assembly.
Refer to Figure 9.
Remove tape marker from cable.
T-BODY
CABLE
ADAPTER
TAPE MARKER
CONCENTRIC
LUBRICATE
APPARATUS
BUSHING
Test point on
accessible side
Figure 12. Line illustration of BOL-T T-body installation
Step 12.
Install loadbreak reducing tap plug (LRTP) into t-Body
Clean and then lubricate mating 600 A interface of
the LRTP and T-Body with lubricant supplied or CPS
approvedequivalent.
Check that compression connector flats are parallel to
apparatus bushing.
Remove shipping cap from 200 A LRTP interface and
thread protector from 15/16” threads.
Insert T-Wrench into throat of LRTP and through rotating
nut and engage alignment segment. (T-Wrench will not
rotate without entire LRTP rotating.)
Insert threaded ferrule end of LRTP into side of T-Body
opposite apparatus bushing. (Refer to Figure 13.)

 Loading...

